Build an SMS-to-Email Gateway Using Plivo and Mailgun API
You can set up a free email-to-SMS gateway that lets you receive SMS notifications in your email inbox and reply to those messages directly from email.
Forward SMS messages to your email address.

Reply back to SMS messages from your email.

We’ve partnered with our friends at Mailgun to let you build this gateway entirely free of charge using a free Mailgun account and a free Plivo account. Follow the instructions in this guide to build an SMS-to-email gateway app.
Prerequisites
-
Get a Free Plivo Trial Account: upon signup and verification, you will receive a SMS enabled
Plivo Number, yourPlivo Auth ID, and yourPlivo Auth Token. -
Get a Free Mailgun Account: here is where you will receive your
Mailgun Access Key. -
Get a Free Heroku Account: Once you get your account, create a new app and install the free redistogo add-on. If you’re new to Heroku, you can visit the Heroku Getting Started page for all the info on setting up your account. In our example, we will call our app
your-heroku-app. -
An email address where you will forward your SMS messages. In our example we will use
youremail@yourdomain.com
Push the app to heroku
Get the sample code
Download the sample code (https://github.com/plivo/apps/tree/master/plivomessenger) for the app. Here, we will use Git.
$ git clone https://github.com/plivo/apps.git
$ cp -r apps/plivomessenger mailgunapp
$ cd mailgunapp
Deploy the app to Heroku
If you’re not familiar with Git, Pro Git is a free online resource covering all of Git.
$ git init
$ git add .
$ git commit -m "init"
$ heroku create
$ git push heroku master
$ heroku scale web = 1
Configure Your Plivo Credentials
Add your Plivo Credentials
Your Email-to-SMS gateway will first require you to configure your Plivo Credentials. You can set these config variables in Heroku using your console. Check out Heroku’s variable configuration tutorial if you need help.
$ heroku config:set PLIVO_AUTH_ID=your-plivo-auth-id
$ heroku config:set PLIVO_AUTH_TOKEN=your-plivo-auth-token
$ heroku config:set PLIVO_NUMBER=your-SMS-enabled-plivo-number
You can get your PLIVO_AUTH_IDand PLIVO_AUTH_TOKENfrom your Plivo Dashboard.

Use any of your Plivo phone numbers found on your Numbers tab in the Plivo Dashboard to PLIVO_NUMBER. If you don’t yet have a number, you can claim your free local US phone number in the Numbers tab if you click on the “Claim your free local US number” link.
Let Plivo know where your Email-to-SMS gateway app is and what to do with it
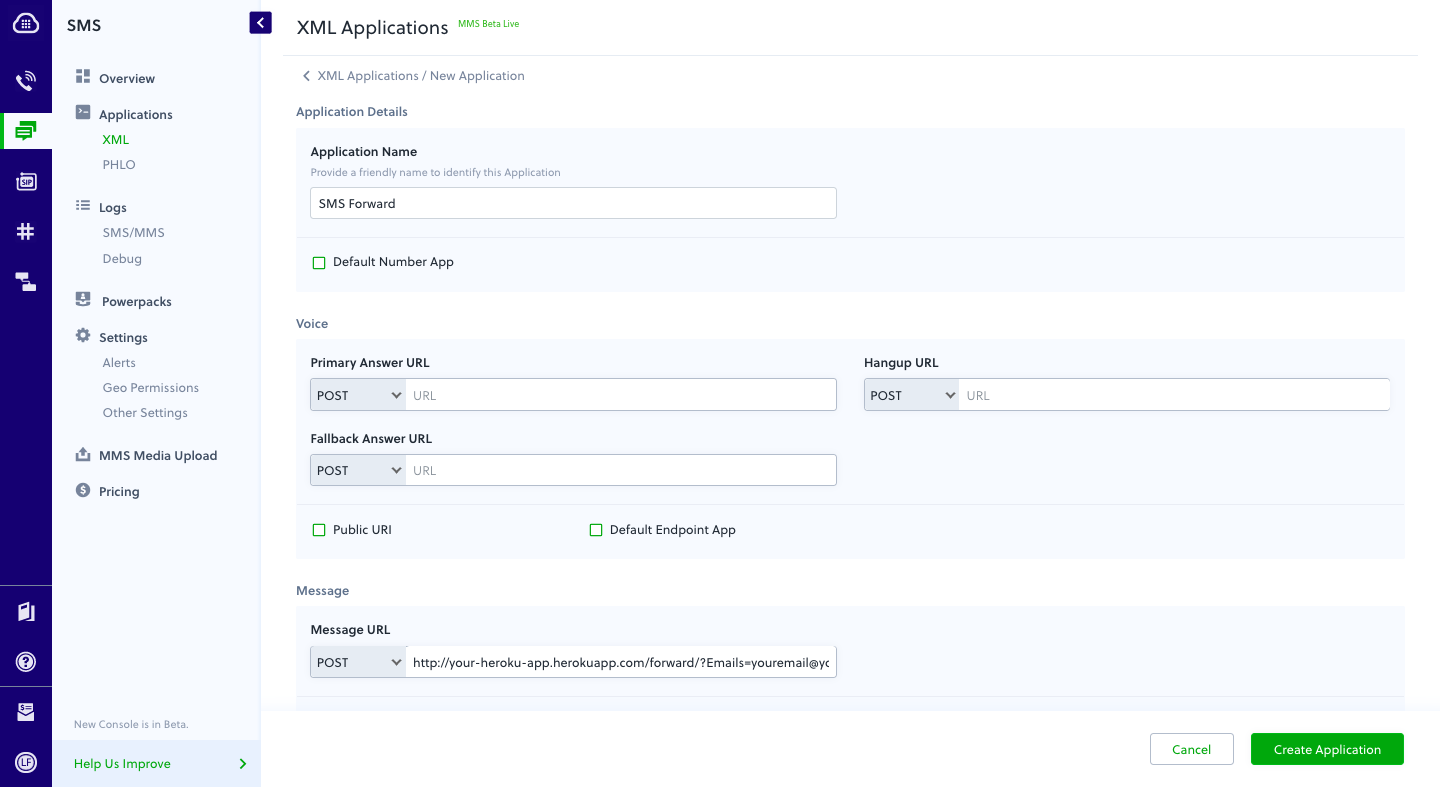
Create a Plivo application and point it to the Plivo number you purchased. Open the Applications Tab in your browser. Click on the New Applicationbutton to create an application. Give a name to your application (next to Application Name), let’s call it ‘SMS Forward’. Fill out the following Application credentials and click “Create”. Be sure to set your Message url to:
http://your-heroku-app.herokuapp.com/forward/?Emails=youremail@yourdomain.com
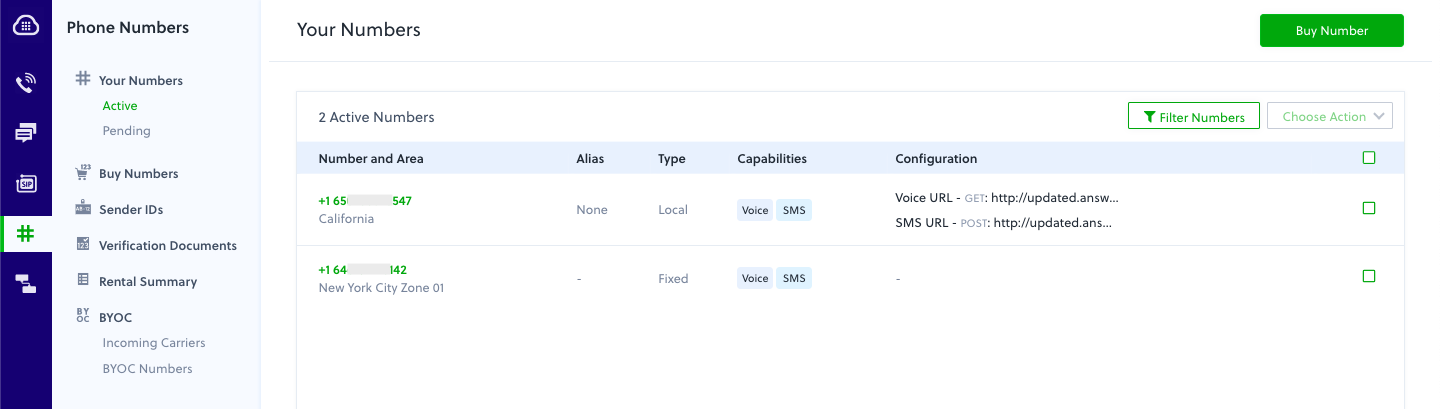
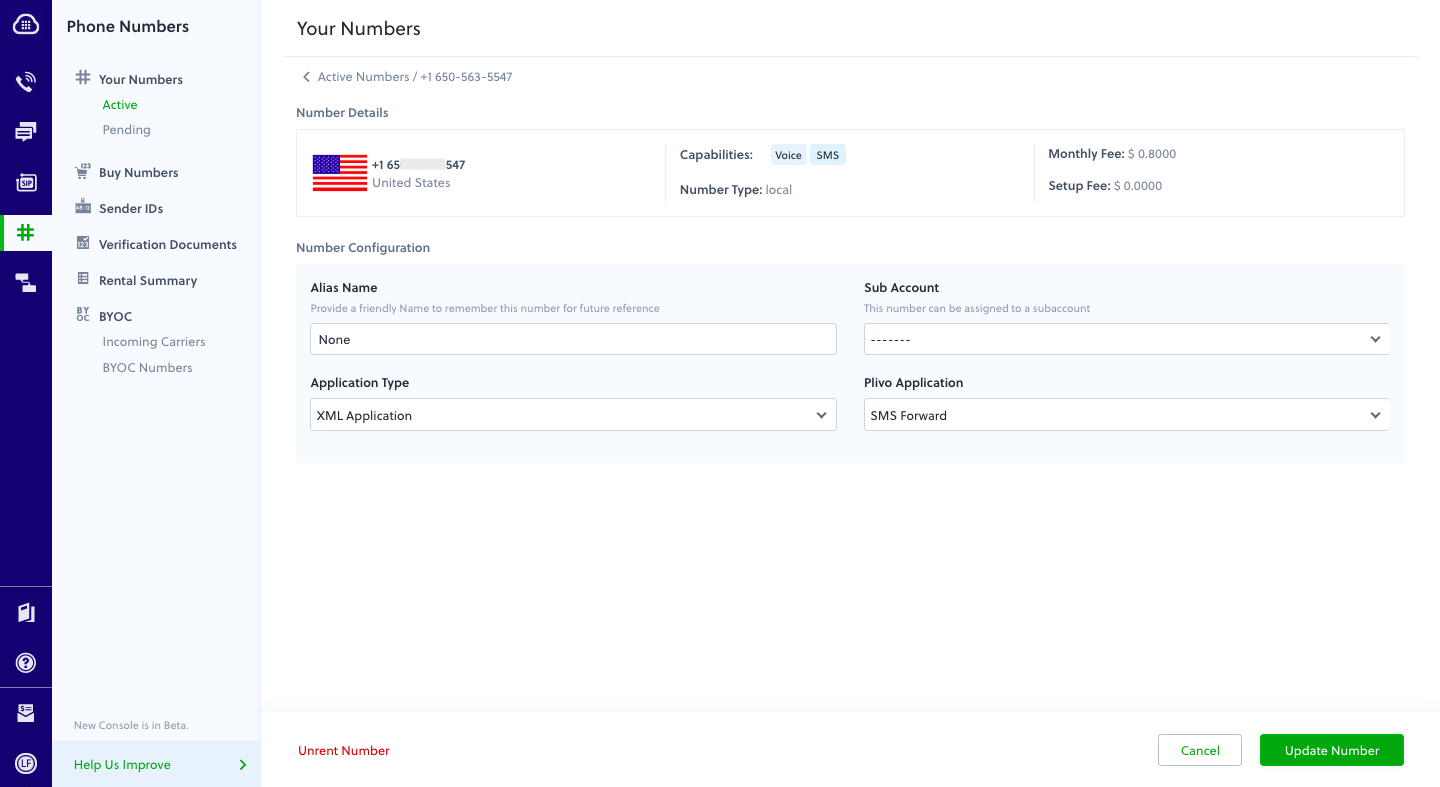
Assign a Plivo phone number to your app: attach your SMS Enabled Plivo phone number to your newly created “ SMS Forward” application. Go to the Numbers tab and select the phone number you want to use for this app. Then select the name of your app next to Plivo App Click ‘Update’ when done.
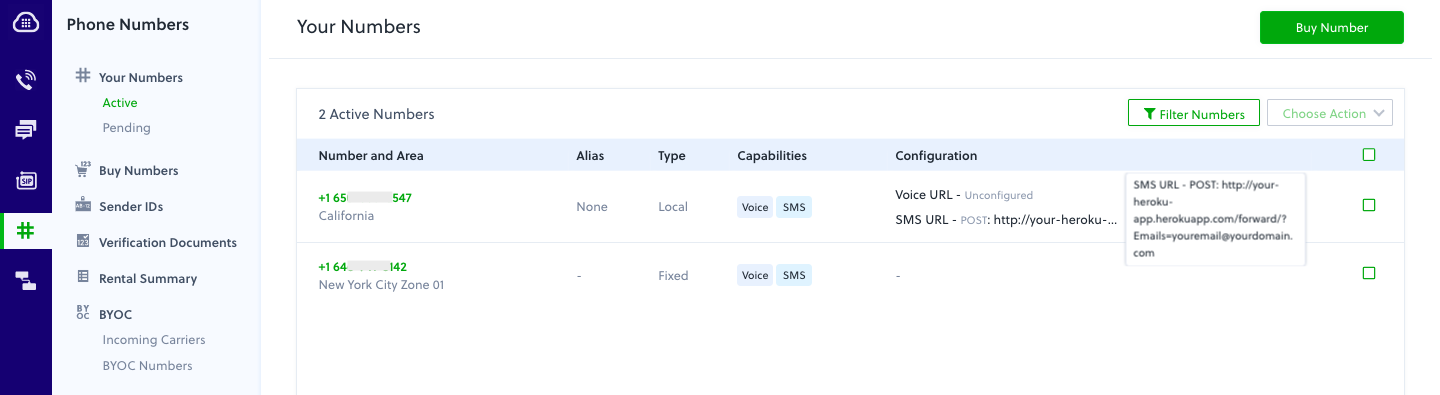
Your phone number set up should now look like this:
Testing your App Locally (optional)
This is an optional step, but it’s always good practice to ensure that all your code is correct. So before we go any further, let’s run the app locally and make sure everything is working properly.
Test if your app is running by pasting the link below in your browser (be sure to insert your own heroku app URL and your email address):
http://your-heroku-app.herokuapp.com/forward/?Emails=youremail@yourdomain.com&From=1000&To=1000&Text=Test
It should display an empty <Response>XML.
Configure Your Mailgun Credentials
Add your Mailgun Credentials
$ heroku config:set MAILGUN_ACCESS_KEY=your-mailgun-access-key
$ heroku config:set MAILGUN_SERVER_NAME=yourdomain.com
You can get all of your Mailgun info from your Mailgun Control Panel.

Let Mailgun Know Where to Send Your Emails
First, set up your DNS (Domain Provider or 3rd Party) to allow Incoming emails of your domain (i.e., my.yourdomain.com) to Mailgun. For us, we are showing how to set up our record values on Amazon Web Services EC2 Route53. In this example, the domain is plivo.com and we have set up my.plivo.com as the email domain for this service. A zone editor is similarly available for most domain providers, where the values are set as per the example.

Add your Mail Domain to Mailgun
Next, in your Mailgun account, set up a mail domain for my.yourdomain.com. In our example we used my.plivo.com for our domain plivo.com:

Add your Route to Mailgun
After the domain is added, click on Route tab in Mailgun. Now add a new route with the following parameters:
Filter Expression:
match_recipient(“^(.*)@ my.yourdomain.com$”)
Actions:
forward("http://your-heroku-app.herokuapp.com/reverse/?")

That’s it! You’re now free to use your Email-to-SMS gateway!
Testing SMS to Email
Try sending a SMS to your SMS enabled Plivo number, it should arrive to youremail@yourdomain.com, as configured in the app. The email will have originated from yourphonenumber@my.yourdomain.com.
Testing Email to SMS
Now try replying to that email, the reply should go back to your phone. In our app, we only let emails forward to numbers we receive an actual request from.