Creating a new Powerpack
To create a new Powerpack:
- Log in to the Plivo console and navigate to Messaging > Powerpacks, then click Add New Powerpack.

- In the Details section, enter a name for the Powerpack.
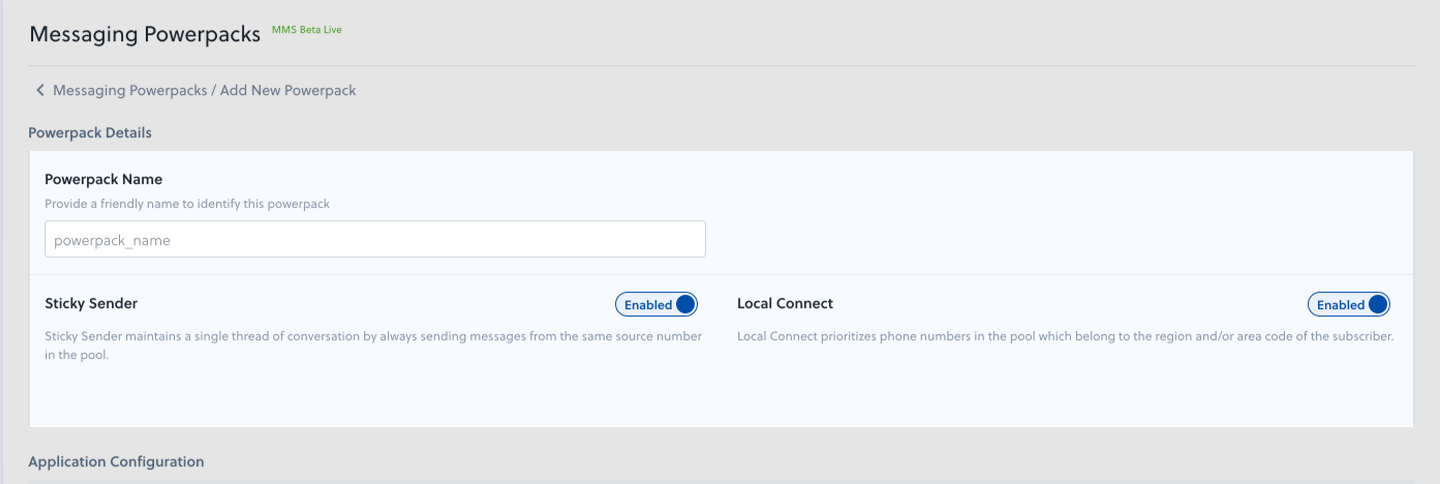
- Enable Sticky Sender if you want to maintain a single thread of conversation by ensuring that messages sent to a particular number are always sent from the same Powerpack source number. Enabling or disabling Sticky Sender is reflected in the source number resolution logic instantaneously.
- Enable Local Connect if you want to ensure that Powerpack prioritizes using a source number belonging to the same region or area code as the destination number for outbound SMS and MMS messages. Enabling or disabling Local Connect is reflected in the source number resolution logic instantaneously.
- Under the Application Configuration settings, select the application type and name from the respective drop-downs.
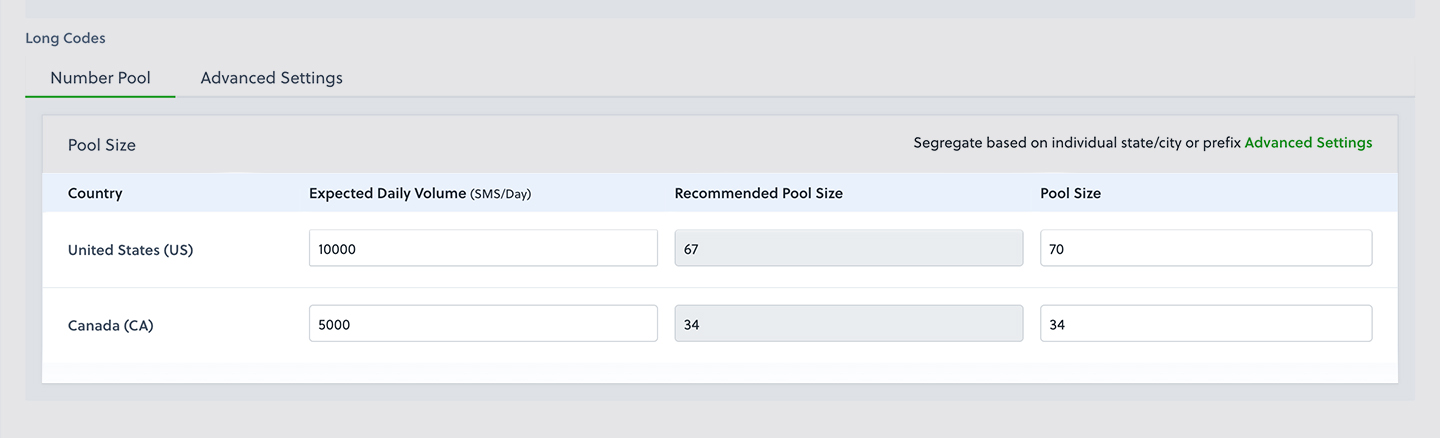
- Under Long Codes, in the Number Pool section, enter the count of phone numbers at a country and/or regional level.
- To configure your number pool at a country level, enter your daily message volume for the US and Canada. Plivo will recommend the optimal phone number pool size based on your input.
- To configure your number pool at an area code or region level, use the Advanced Settings tab to add phone numbers to the number pool at a more granular level.
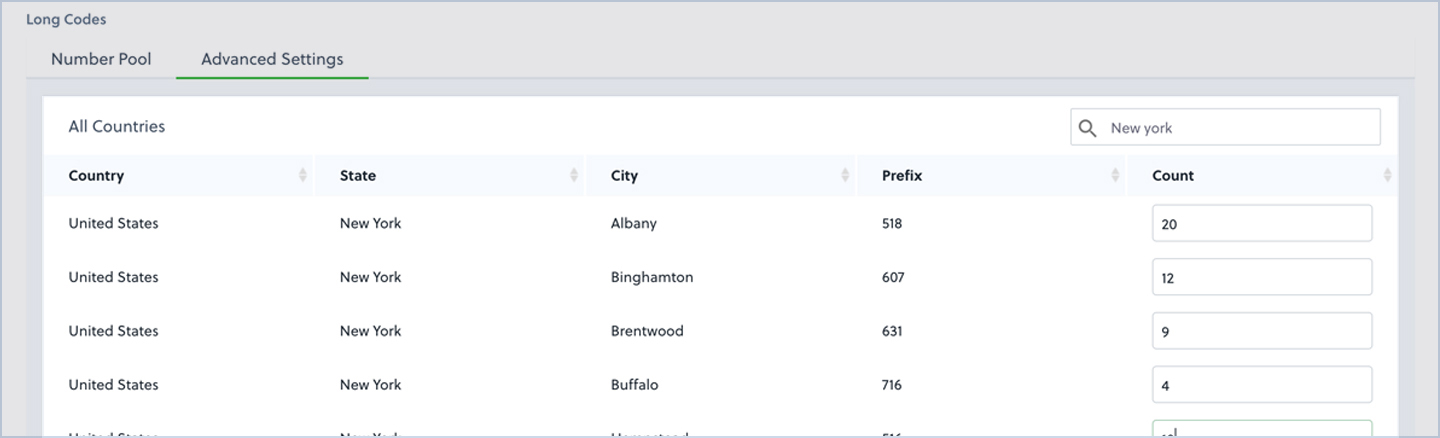
- If you don’t need to get more granular than state-level region matching, simply specify the total count of numbers against any prefix from that state.
- To configure your number pool at a country level, enter your daily message volume for the US and Canada. Plivo will recommend the optimal phone number pool size based on your input.
- Specify the pool size, and click Add Powerpack to initiate the purchasing and provisioning of phone numbers.
Rate this page
🥳 Thank you! It means a lot to us!
×
Help Us Improve
Thank you so much for rating the page, we would like to get your input
for further improvements!
Subscribe to Updates
Thank you for your feedback!