Overview
This guide shows how to write an autoresponder for SMS text messages. Autoresponders can streamline marketing campaigns and subscription signups and reduce the amount of work humans have to do. You can create an autoresponder either by using our PHLO visual workflow builder or our APIs. Follow the instructions in one of the tabs below.- Using API
Here’s how to use Plivo APIs to set up an SMS autoresponder.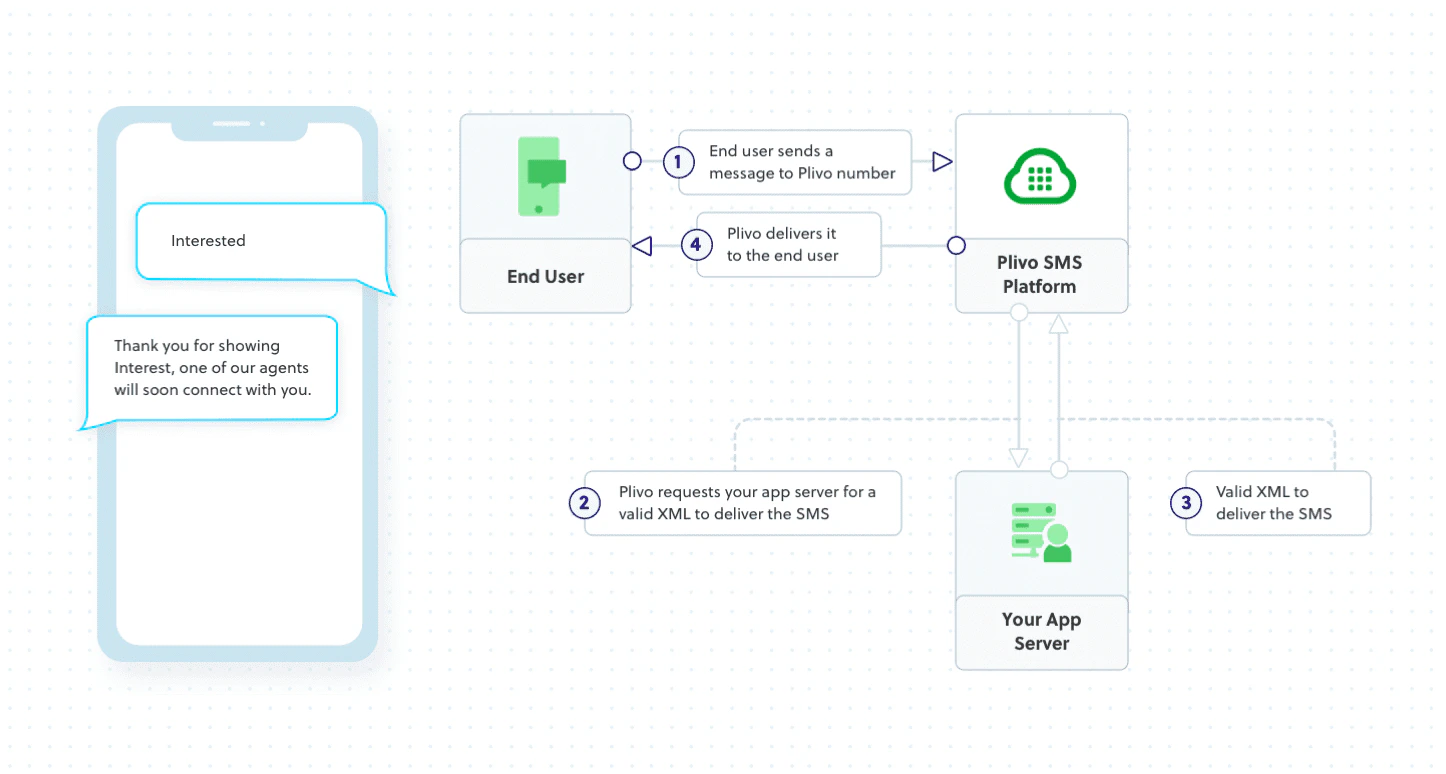


How it works
Prerequisites
To get started, you need a Plivo account — sign up with your work email address if you don’t have one already. To receive incoming messages, you must have a Plivo phone number that supports SMS; you can rent numbers from the Numbers page of the Plivo console or by using the Numbers API. If this is your first time using Plivo APIs, follow our instructions to set up a Ruby development environment.Create a Rails controller to receive and respond to SMS messages
Change to the project directory and run this command to create a Rails controller for inbound messages.Create the autoresponder application using Rails server
Edit app/controllers/plivo_controller.rb and paste into it this code.Add a route
Edit config/routes.rb and change the lineNote:
For ngrok testing, add this line to config/environments/development.rb.
config.hosts << /[a-z0-9-]+\.ngrok\.io/Create a Plivo application for the autoresponder
Associate the Rails controller you created with Plivo by creating a Plivo application. Visit SMS > Applications in the Plivo console and click on Add New Application, or use Plivo’s Application API.Assign a Plivo number to the application
Navigate to the Numbers page and select the phone number you want to use for this application.From the Application Type drop-down, selectXML Application.From the Plivo Application drop-down, select Autoresponder (the name we gave the application).Click Update Number to save.