Overview
Delivery reports serve as your callback service, informing you of the status of messages sent to a specific destination (outbound message) or received on your Plivo number (inbound message). When a call to the Message API to send a message completes successfully, your message is put into a queue to be sent to its destination. By default, you do not receive an automatic notification regarding the delivery of your message. To get notified about the status of your message, include theurl parameter in your API request. This generates a notification when your message reaches its destination, or if it fails to deliver. Your delivery report will show the status — “queued”, “sent”, “delivered”, “undelivered” or “failed” — for each recipient, along with other parameters.
You can find SMS delivery reports by visiting Messaging > Logs on the Plivo console.
Similarly, if you want a delivery report when you receive an SMS message on your Plivo number, update the Message URL of the application associated with your Plivo number. Your delivery report will show the status — “delivered” or “undelivered” — along with incoming message details.
Note: Long SMS messages are automatically split for sending and concatenated upon receipt for a seamless user experience. When checking message logs and delivery reports for long SMS messages that are split, look for the MessageUUID, which is the same in all related split messages and identical to the UUID of the first message in the split sequence of messages.
- Inbound
- Outbound
Prerequisites
To get started, you need a Plivo account — sign up with your work email address if you don’t have one already. To receive incoming messages, you must have a Plivo phone number that supports SMS; you can rent numbers from the Numbers page of the Plivo console or by using the Numbers API. If this is your first time using Plivo APIs, follow our instructions to set up a Ruby development environment and a web server and safely expose that server to the internet.Here’s how the process works for inbound messages.Inbound
Create the autoresponder application using Rails server
Edit app/controllers/plivo_controller.rb and paste into it this code.Add a route
Edit config/routes.rb and change the lineTest
Start the Rails serverNote:
For ngrok testing, add this line to config/environments/development.rb.
config.hosts << /[a-z0-9-]+\.ngrok\.io/Create an application
Associate the code you created with Plivo by creating a Plivo application. Visiting Messaging > Applications and click Add New Application. You can also use Plivo’s Application API.Give your application a name — we called ours Delivery Reports. Enter the server URL you want to use (for example https://<yourdomain>.com/delivery_report/) in the Message URL field and set the method to POST. Click Create Application to save your application.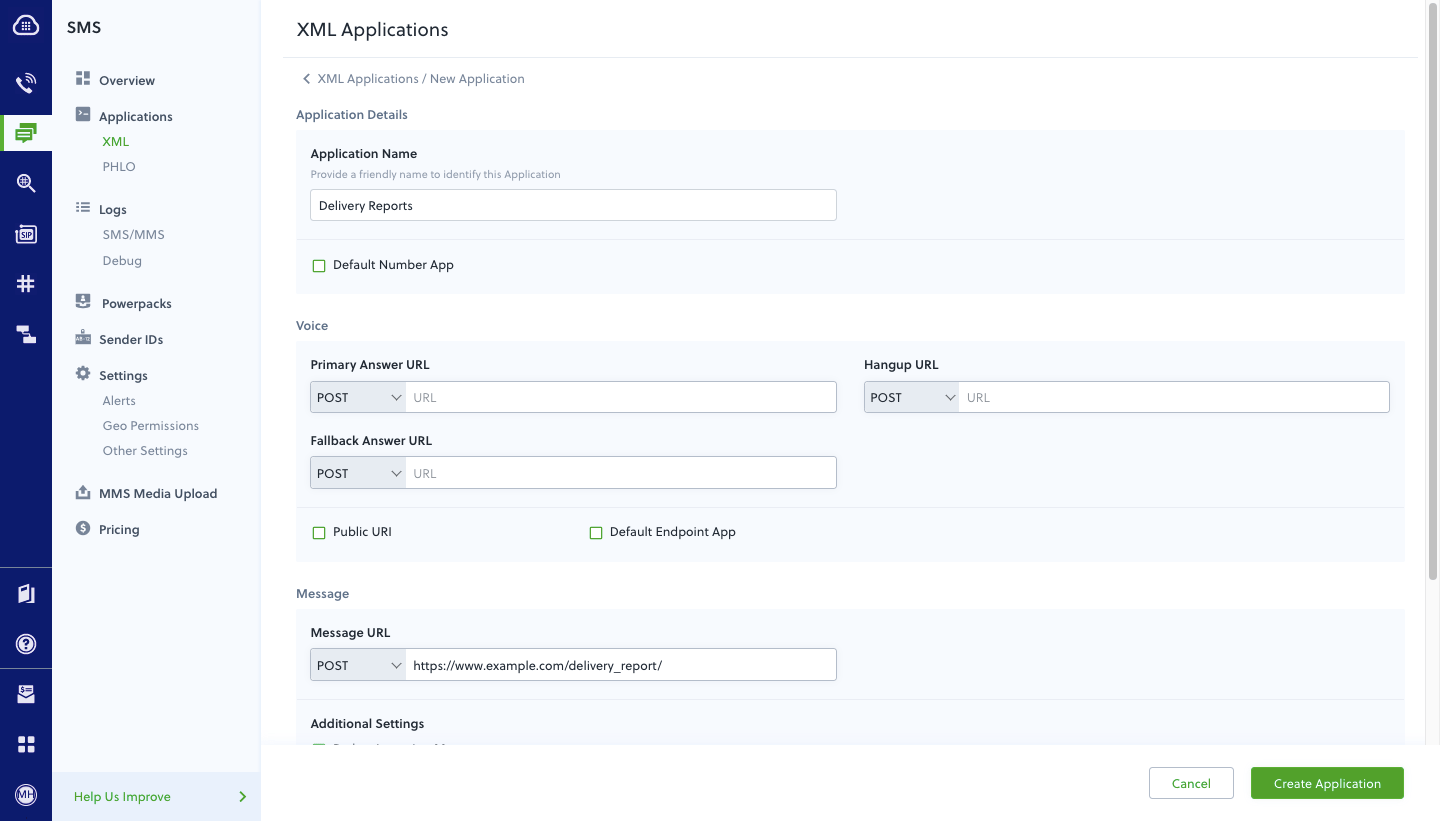
Assign a Plivo number to your application
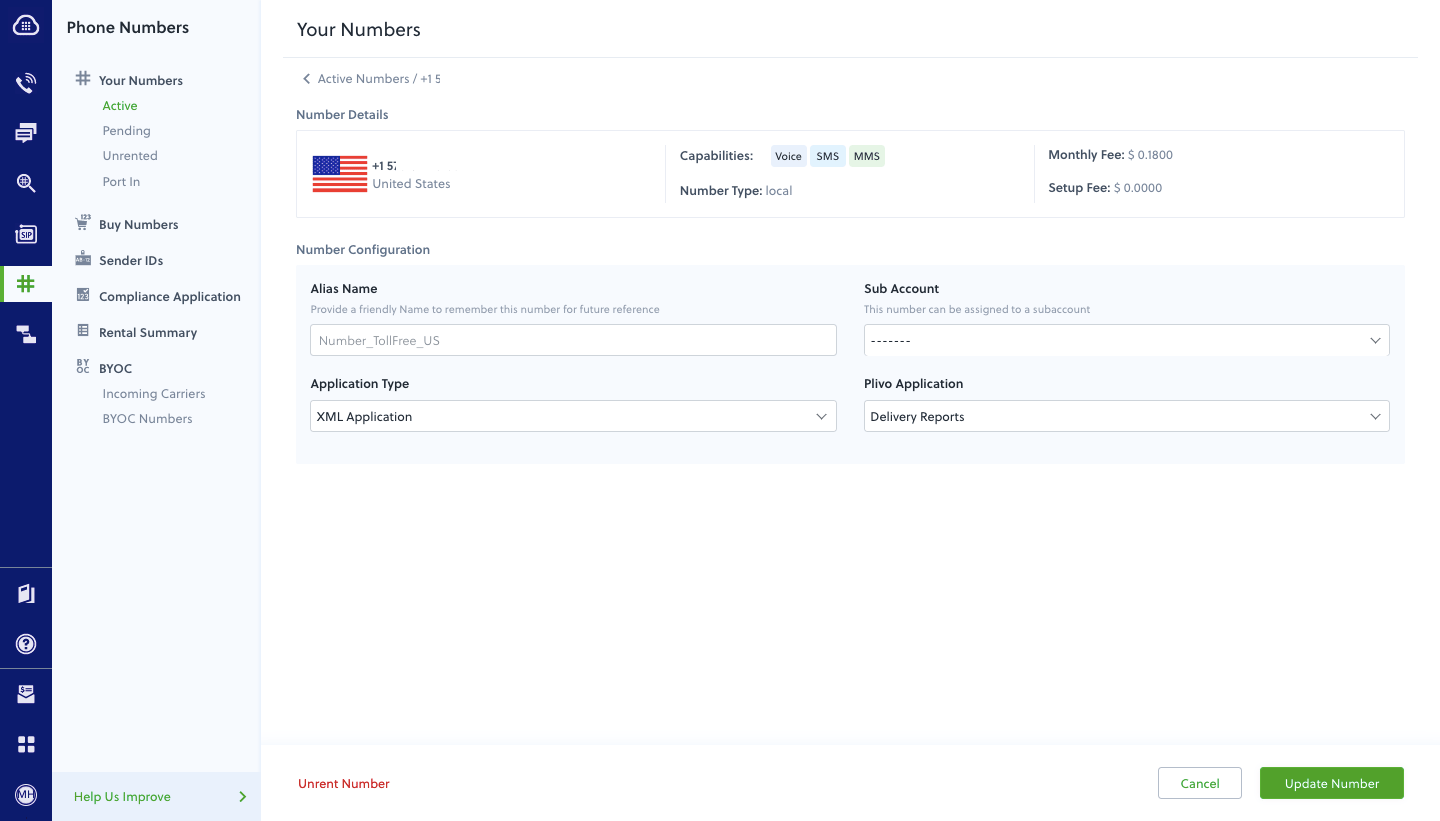
Navigate to the Numbers page and select the phone number you want to use for this application. From the Application Type drop-down, select XML Application. From the Plivo Application drop-down, select Receive SMS (the name we gave the application). Click Update Number to save.