Set Up a Node.js Dev Environment for Messaging
This guide shows how to set up a development environment in five minutes to trigger API requests related to our Messaging API. It also shows how to send and receive messages using tunneling software to expose the local dev server to the public internet.
Install Node.js, the Plivo Node.js SDK, and Express
To get started, install Node and Plivo’s Node SDK. You can check whether Node is installed by running the command node --version in a terminal window. If you need to install or update it, download and install it.
To install the Plivo Node.js SDK, first create a project directory using the command mkdir mynodeapp, then change to the directory and install the SDK using npm:
npm install plivo
You should also install the Express framework.
Trigger an API request
Now you can create a file in the project directory and execute code to trigger any Plivo API. Here’s some example code that sends an SMS message. Create a file called SendSMS.js and paste into it this code.
1
2
3
4
5
6
7
8
9
10
11
12
13
14
15
16
17
18
19
20
21
22
23
24
25
26
27
const express = require('express');
const bodyParser = require('body-parser');
const app = express();

app.use(bodyParser.urlencoded({
    extended: true
}));
app.use(function(req, response, next) {
    response.contentType('application/xml');
    next();
});
app.set('port', (process.env.PORT || 3000));
app.all('/outbound_sms/', function(request, response) {
    let client = new plivo.Client('<auth_id>', '<auth_token>');
    client.messages.create({
            src: '<sender_id>',
            dst: '<destination_number>',
            text: 'Hello, from Node Express!'
        }

    ).then(function(message_created) {
        console.log(message_created)
    });
});
app.listen(app.get('port'), function() {
    console.log('Node app is running on port', app.get('port'));
});
1
2
3
4
5
6
7
8
9
10
11
12
13
14
15
16
17
18
19
20
21
22
23
24
25
26
27
28
const express = require('express');
const bodyParser = require('body-parser');
const app = express();

app.use(bodyParser.urlencoded({
    extended: true
}));
app.use(function(req, response, next) {
    response.contentType('application/xml');
    next();
});
app.set('port', (process.env.PORT || 3000));
app.all('/outbound_mms/', function(request, response) {
    let client = new plivo.Client('<auth_id>', '<auth_token>');
    response = client.messages.create({
        src: '<sender_id>',
        dst: '<destination_number>',
        text: 'Hello, MMS from Express!',
        type: 'mms',
        media_urls: ['https://media.giphy.com/media/26gscSULUcfKU7dHq/source.gif'],
        media_ids: ['801c2056-33ab-499c-80ef-58b574a462a2']
    }).then(function(response) {
        console.log(response)
    });
});
app.listen(app.get('port'), function() {
    console.log('Node app is running on port', app.get('port'));
});
- Replace the placeholders <auth_id> and <auth_token> with your authentication credentials, which you can find on the overview page of the Plivo console.
- We recommend that you store your credentials in the auth_id and auth_token environment variables to avoid the possibility of accidentally committing them to source control. If you do this, you can initialize the client with no arguments and it will automatically fetch the values from the environment variables
- Replace the placeholder <Caller_ID> with a phone number you’ve purchased, and <Destination_Number> with the phone number you’ll be calling. Both phone numbers should be in E.164 format.
Save the file and run it.
node SendSMS.js
Your local development server will be started and you can test the application for outbound messages via the URL http://localhost:3000/plivo/outbound_sms/.
You can follow the same approach to trigger other API requests. Refer to our detailed API reference to see all the API requests available on the Messaging API platform.
Set up an Express server to serve XML and manage callbacks
Now that we’ve sent a message, let’s set up an Express server to handle incoming messages.
Plivo supports receiving SMS text messages in several countries (see complete SMS API coverage). When someone sends a text message to a Plivo phone number, you can receive it on your server by setting a Message URL in your Plivo application. Plivo sends the message, along with other parameters, to your Message URL.
Set up an Express server
Use this code snippet to start a local server.
1
2
3
4
5
6
7
8
9
10
11
12
13
14
15
16
17
18
19
20
21
const express = require('express');
const bodyParser = require('body-parser');
const app = express();

app.use(bodyParser.urlencoded({
    extended: true
}));
app.use(function (req, response, next) {
    response.contentType('application/xml');
    next();
});
app.set('port', (process.env.PORT || 3000));
app.all('/receive_sms/', function (request, response) {
    let from_number = request.body.From || request.query.From;
    let to_number = request.body.To || request.query.To;
    let text = request.body.Text || request.query.Text;
    console.log('Message received - From: ' + from_number + ', To: ' + to_number + ', Text: ' + text);
});
app.listen(app.get('port'), function () {
    console.log('Node app is running on port', app.get('port'));
});
1
2
3
4
5
6
7
8
9
10
11
12
13
14
15
16
17
18
19
20
21
22
const express = require('express');
const bodyParser = require('body-parser');
const app = express();

app.use(bodyParser.urlencoded({
    extended: true
}));
app.use(function (req, response, next) {
    response.contentType('application/xml');
    next();
});
app.set('port', (process.env.PORT || 3000));
app.all('/receive_sms/', function (request, response) {
    let from_number = request.body.From || request.query.From;
    let to_number = request.body.To || request.query.To;
    let text = request.body.Text || request.query.Text;
    let media_url = request.body.Media0 || request.query.Media0;
    console.log('Message received - From: ' + from_number + ', To: ' + to_number + ', Text: ' + text+ ', Media: ' + media_url);
});
app.listen(app.get('port'), function () {
    console.log('Node app is running on port', app.get('port'));
});
Save this code in any file — we called ours receive_sms.js. To run this file on the server, go to the folder where the file resides and enter:
node receive_sms.js
You should see your basic server app in action on http://localhost:3000/receive_sms/.
Ngrok Setup
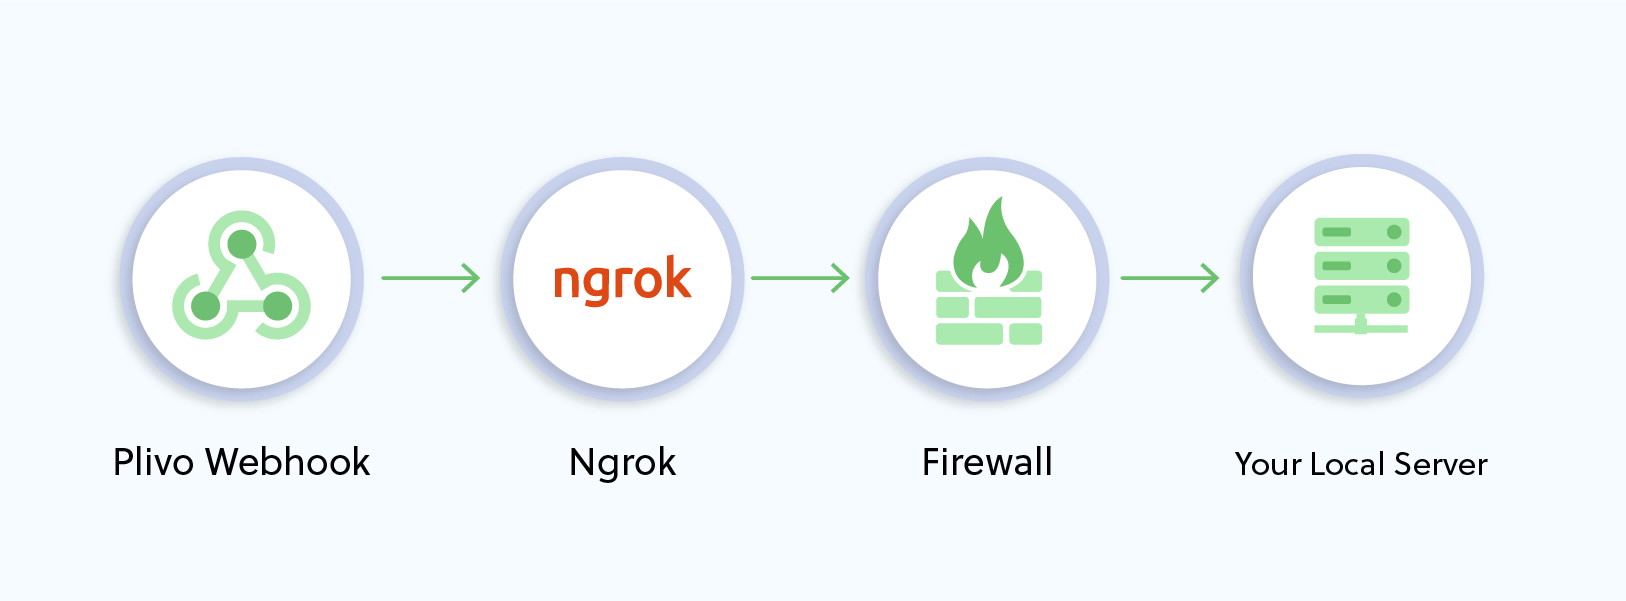
To serve XML documents, your local server must connect with Plivo API services. For that, we recommend using ngrok, which exposes local servers running behind NATs and firewalls to the public internet over secure tunnels. Using ngrok, you can set webhooks that can talk to the Plivo server.
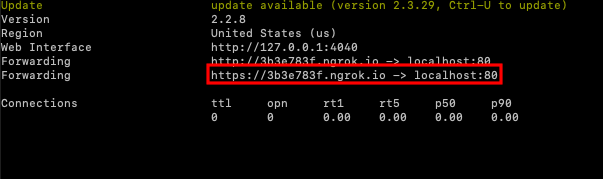
Install ngrok and run it on the command line, specifying the port that hosts the application on which you want to receive messages (3000 in this case):
./ngrok http 3000
This starts the ngrok server on your local server. Ngrok will display a forwarding link that you can use as a webhook to access your local server over the public network. You should be able to see your basic server application in action at https://<nrgok_URL>/inbound/.
Now people can send messages to your Plivo number.
You can follow the same approach to serve other XML documents to manage call flows. Refer to our detailed XML reference to see all the XML elements available on the Messaging API platform.