Set up Your Java Dev Environment for Voice Calls
In this guide, you will learn how to set up a development environment in under 5 minutes to trigger API requests and to start serving valid Plivo XML to control your call flow. Also, Using a tunnelling software like ngrok, we will see how you can expose your local dev server with a public address to test out your integration with Plivo.
Prerequisites
Install Java, Spring and the Plivo Java package
You must set up and install Java(Java 1.8 or higher) and Plivo’s Java SDK to make your first call. Here’s how.
Install Java
| Operating System | Instructions |
|---|---|
| macOS & Linux | To see if you already have Java installed, run the command java -version in the terminal. If you do not have it installed, you can install it from here. |
| Windows | To install Java on Windows follow the instructions listed here. |
Install Spring and Plivo Java Package using IntelliJ Idea
-
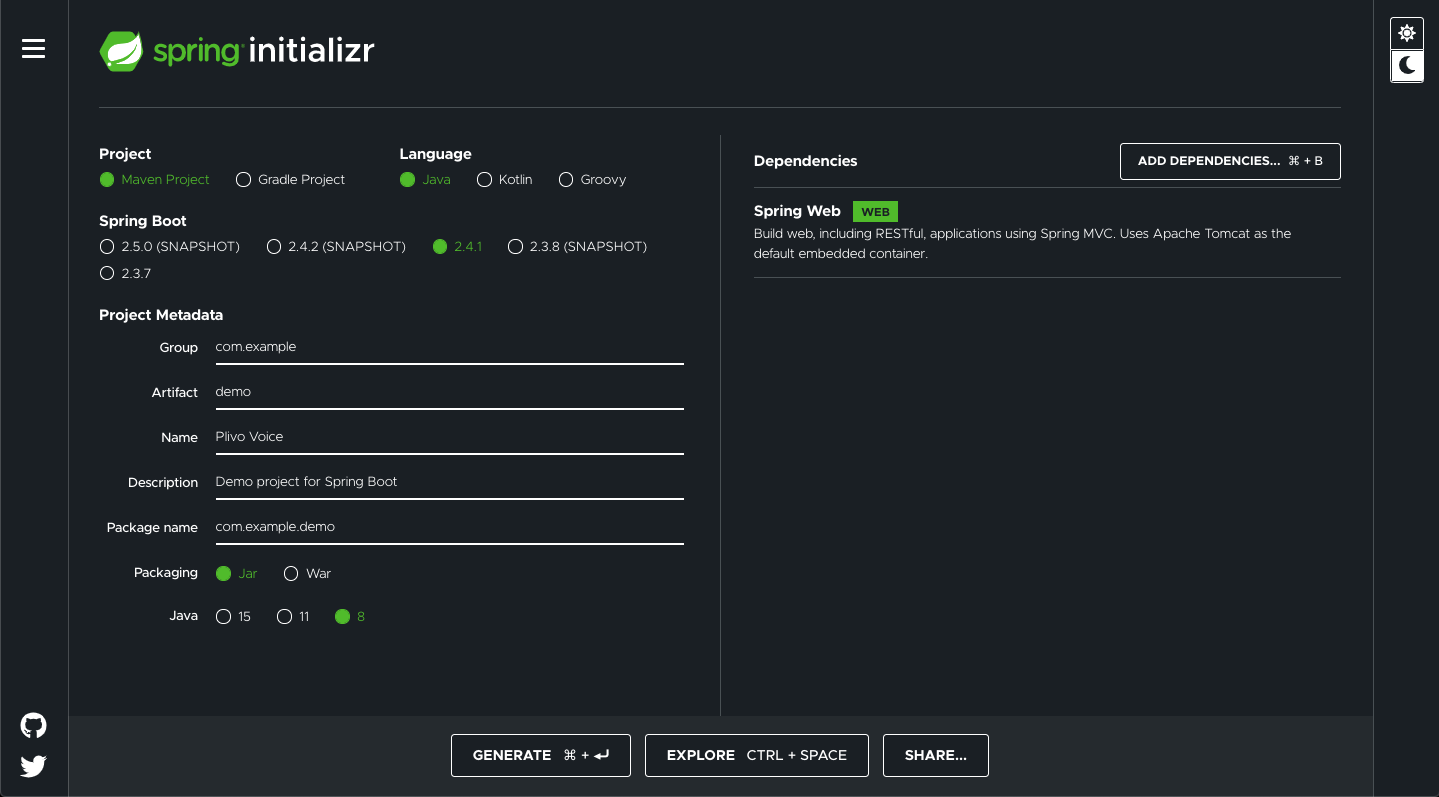
Use Spring Initializr to create a boilerplate project with Spring Boot framework.
-
Choose the “Spring Web” dependency, Give the project a friendly name and click “Generate” to download the boilerplate code and open it in IntelliJ Idea.
 Note: Please set the Java target as 8.
 -
Install the Plivo Java package by adding the dependency in
pom.xml<dependency> <groupId>com.plivo</groupId> <artifactId>plivo-java</artifactId> <version>5.9.3</version> </dependency>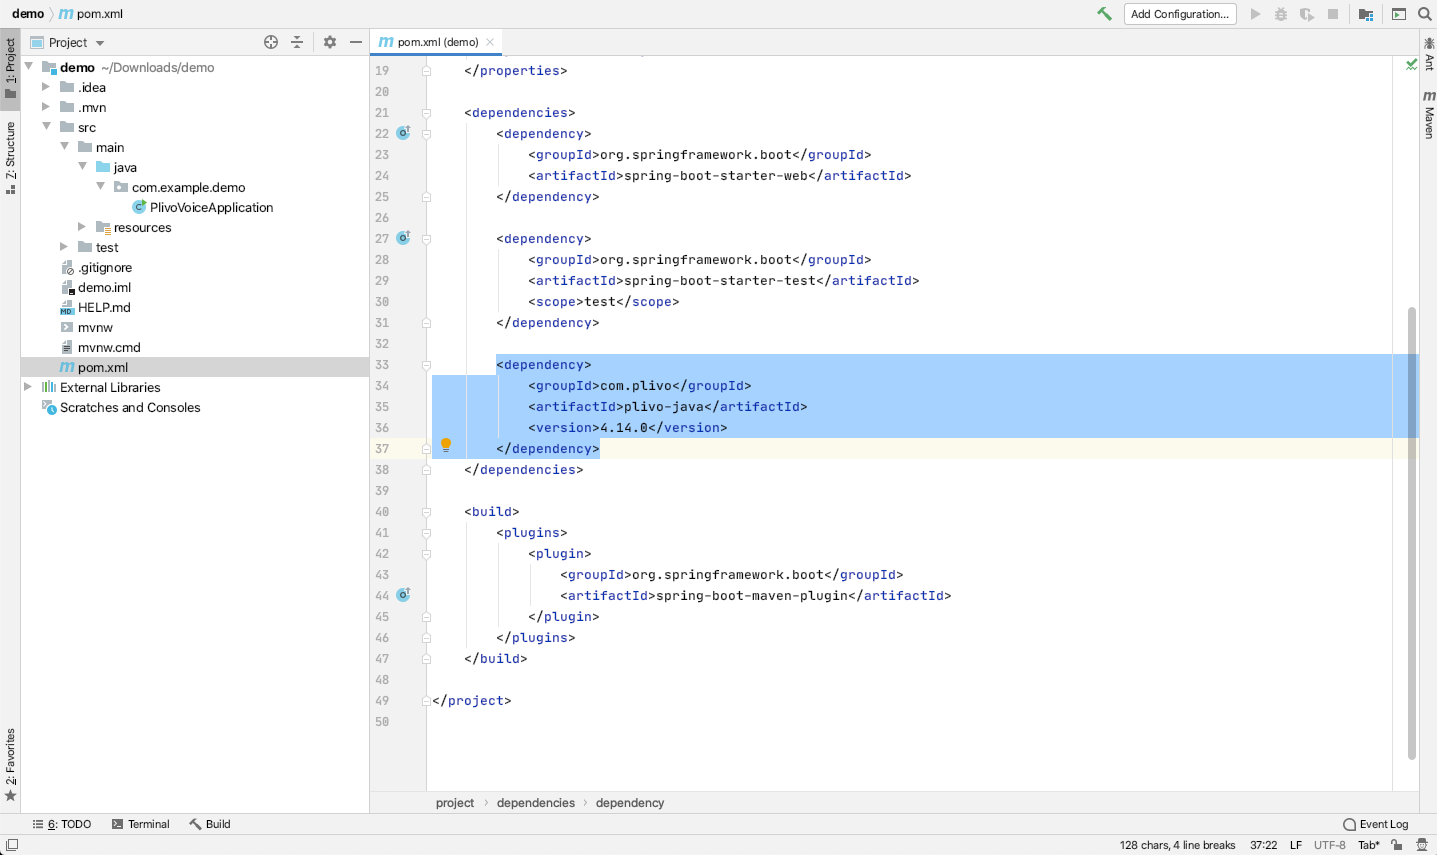
Make your first Outbound Call
Prerequisites
This section will guide you through how to use Plivo APIs to make voice calls from your application. First, let’s make sure you meet these prerequisites before we dive into the code.
-
Plivo Auth Id and Auth Token: You will find your Plivo Auth Id and Auth Token on the home screen of your Plivo Console. Click here to sign-up for a Plivo account if you haven’t already!

-
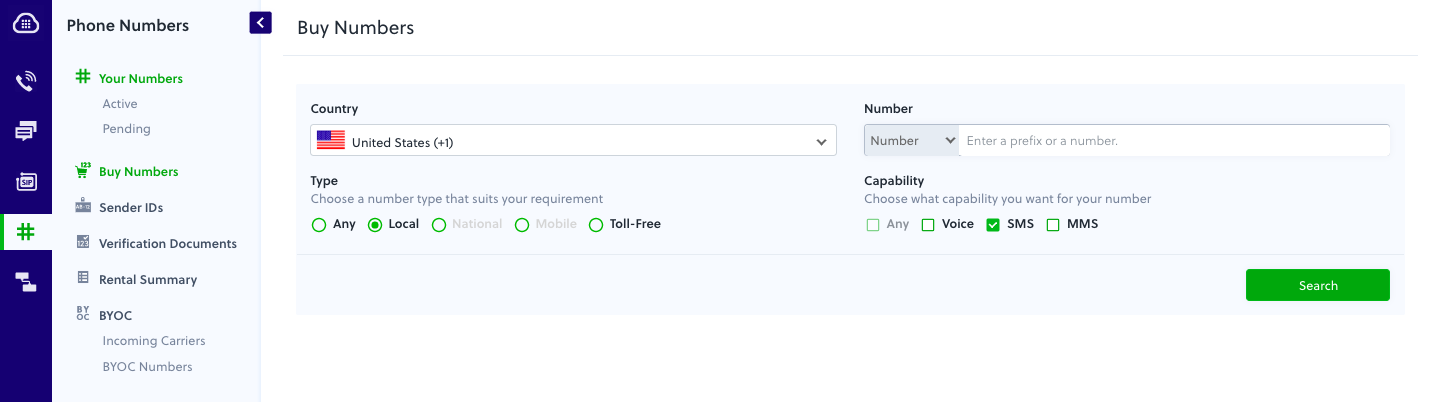
Plivo Phone Number(Optional): Purchase numbers from the Numbers section of your Plivo Console and use the same as the caller ID for the outbound call. This number will also help you receive incoming calls as you must have a voice-enabled Plivo phone number to do the same. Please note that you can also purchase numbers using the Numbers API.
-
Answer Url: When a call is answered by the destination_number, you can control the call flow with the help of the answer_url set in the API request. Plivo will invoke the answer_url specified as soon as the call is answered and expect a valid XML response with instructions to handle the call. For example, you can use https://s3.amazonaws.com/static.plivo.com/answer.xml as answer_url to test your first outgoing call. The XML response of this is:
<Response>
<Speak>Congratulations! You've made your first outbound call!</Speak>
</Response>
As you can tell, the XML above holds instructions to say ‘Congratulations! You’ve made your first outbound call!’ to the callee. You can find the entire list of Plivo XML verbs and their details in the XML Reference section of the website here.
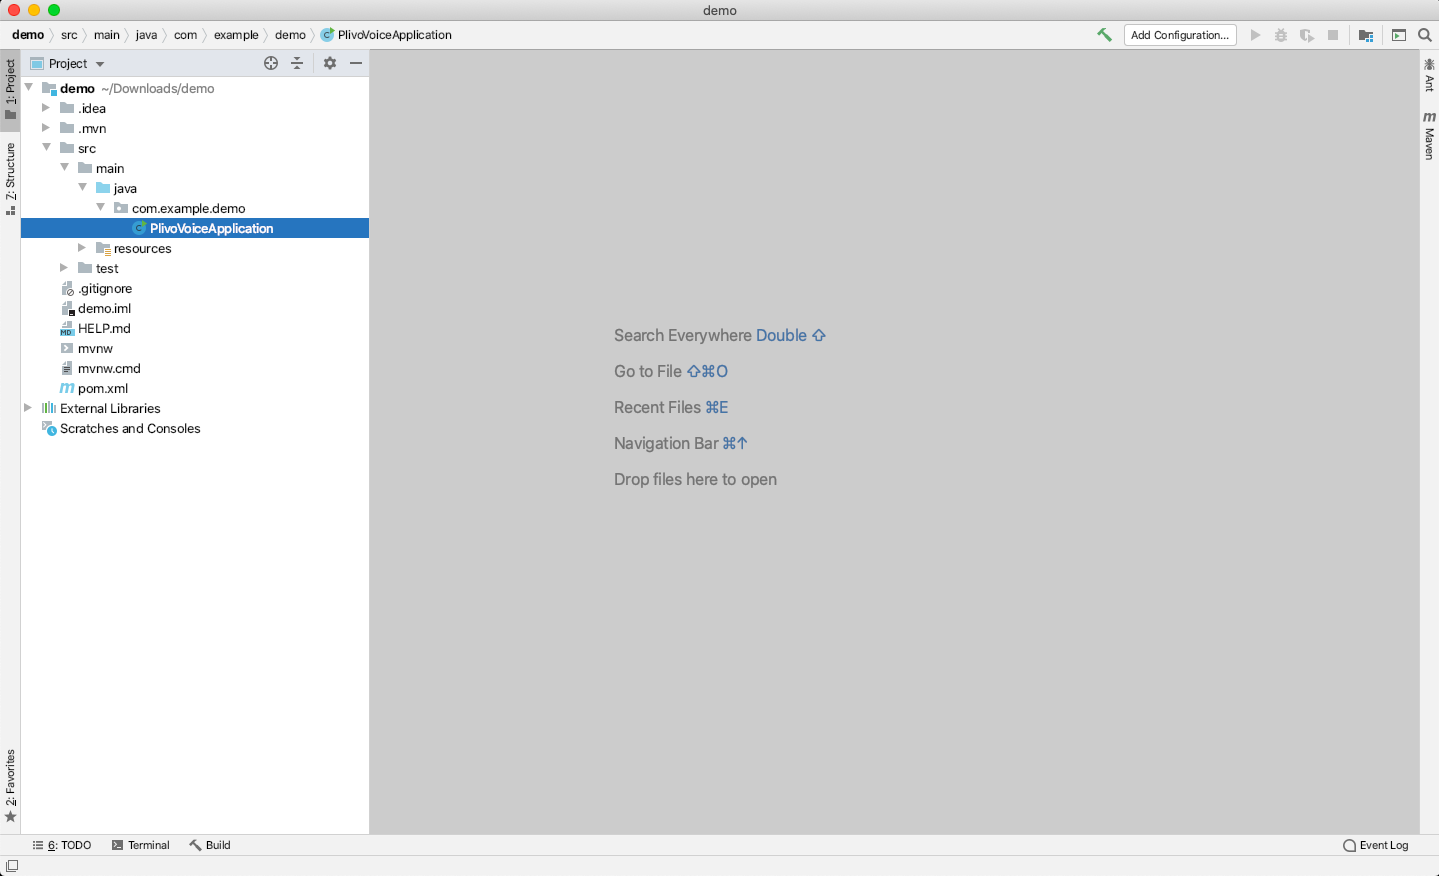
Now, locate the PlivoVoiceApplication.java file in the src/main/java/com.example.demo/ folder and paste the following code.
Code
1
2
3
4
5
6
7
8
9
10
11
12
13
14
15
16
17
18
19
20
21
22
23
24
25
26
27
28
29
30
31
32
33
34
35
package com.example.demo;
import com.plivo.api.Plivo;
import com.plivo.api.exceptions.PlivoRestException;
import com.plivo.api.models.call.Call;
import com.plivo.api.models.call.CallCreateResponse;
import org.springframework.boot.SpringApplication;
import org.springframework.boot.autoconfigure.SpringBootApplication;
import org.springframework.web.bind.annotation.GetMapping;
import org.springframework.web.bind.annotation.RestController;
import com.plivo.api.exceptions.PlivoXmlException;
import java.io.IOException;
import java.util.Collections;

@SpringBootApplication
@RestController
public class PlivoVoiceApplication {


	public static void main(String[] args) {
		SpringApplication.run(PlivoVoiceApplication.class, args);
	}

	@GetMapping(value="/outbound", produces={"application/json"})
	public CallCreateResponse makeCall() throws PlivoXmlException, IOException, PlivoRestException {
		Plivo.init("<auth_id>","<auth_token>");
		CallCreateResponse response = Call.creator("+14151234567",
				Collections.singletonList("+14157654321"),
				"http://s3.amazonaws.com/static.plivo.com/answer.xml")
				.answerMethod("GET")
				.create();
		System.out.println(response);
		return response;
	}

}
- Replace the placeholders auth_id & auth_token with your credentials from Plivo Console.
- We recommend that you store your credentials in the auth_id & auth_token environment variables, so as to avoid the possibility of accidentally committing them to source control. If you do this, you can initialize the client with no arguments and it will automatically fetch them from the environment variables
- You can use System.getenv() to store and retrieve environment variables while initializing the client.
- Replace the placeholder +14151234567 with the Phone number which you have purchased and +14157654321 with the phone number you will be making calls to.
- Both +14151234567 and +14157654321 should be in E.164 format
Save the file and run it.
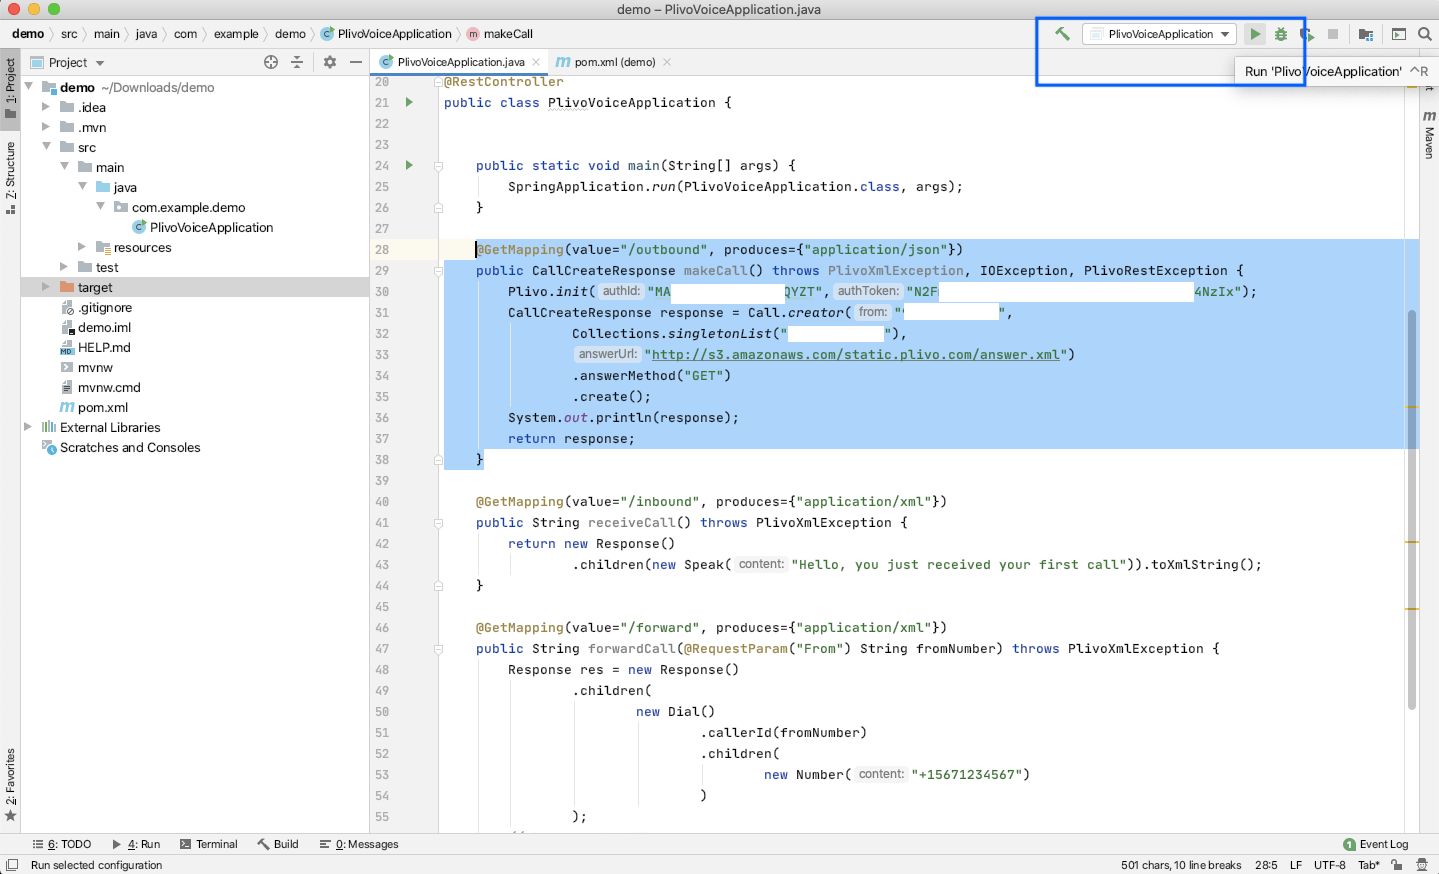
You will see your server app in action on http://127.0.0.1:8080/outbound/.
Receive Your First Inbound Call
Prerequisites
In addition to having at least one voice-enabled Plivo phone number that is needed to receive incoming calls (as was mentioned earlier), you need the following:
Answer URL & Callback URLs
When a call is received on a Plivo voice-enabled number, you can control the call flow by declaring an answer URL for your Plivo application associated with that Plivo phone number. Plivo will invoke the answer URL specified and expect a valid XML response to handle the call.
Notice how the concept of Answer URLs applies to both outbound API calls as well as incoming calls to your Plivo numbers. In the outbound API call example above, we specified the answer URL along with the make call API request, whereas in the case of incoming calls to Plivo numbers, the answer URL is specified in the Plivo application associated with the phone number.
In addition to requests to the answer URL, Plivo initiates HTTP requests to your application server through the course of a call based on the specific XML elements in your answer XML. Such requests can be broadly classified into two categories:
Action URL requests: XML instructions to carry forward the call are expected in response to these requests. These requests are typically invoked at the end of an XML element’s execution. For example: when an IVR input is received from the caller during a GetInput XML execution.
Callback URL requests: No XML instructions are expected in response to these requests. Such requests serve as webhooks to notify your application server of important events through the course of an XML element’s execution. For example: when a conference participant is muted or unmuted.
Web Server
To be able to host Answer and Callback URLs and to be able to provide valid XMLs and accept notifications on these URLs respectively, you need to host a webserver at your end.
Set up a Spring Webapp for Incoming Calls & Callbacks
In this section, we’ll walk you through how to set up a Spring webapp in under five minutes and start handling incoming calls & callbacks.
Update the PlivoVoiceApplication.java file in the src/main/java/com.example.demo/ folder and paste the following code after the makeCall function block.
1
2
3
4
5
6
7
8
9
10
11
12
13
14
15
16
17
18
19
20
21
22
23
24
25
26
27
28
29
30
31
32
33
34
35
36
37
38
package com.example.demo;
import com.plivo.api.Plivo;
import com.plivo.api.exceptions.PlivoRestException;
import com.plivo.api.models.call.Call;
import com.plivo.api.models.call.CallCreateResponse;
import org.springframework.boot.SpringApplication;
import org.springframework.boot.autoconfigure.SpringBootApplication;
import org.springframework.web.bind.annotation.GetMapping;
import org.springframework.web.bind.annotation.RequestParam;
import org.springframework.web.bind.annotation.RestController;
import com.plivo.api.exceptions.PlivoXmlException;
import com.plivo.api.xml.Response;
import com.plivo.api.xml.Speak;
import java.io.IOException;
import java.util.Collections;

@SpringBootApplication
@RestController
public class PlivoVoiceApplication {


	public static void main(String[] args) {
		SpringApplication.run(PlivoVoiceApplication.class, args);
	}

	@GetMapping(value="/outbound", produces={"application/json"})
	public CallCreateResponse makeCall() throws PlivoXmlException, IOException, PlivoRestException {
		........;
        ........;
	}

	@GetMapping(value="/inbound", produces={"application/xml"})
	public String receiveCall() throws PlivoXmlException {
		return new Response()
				.children(new Speak("Hello, you just received your first call")).toXmlString();
	}

}
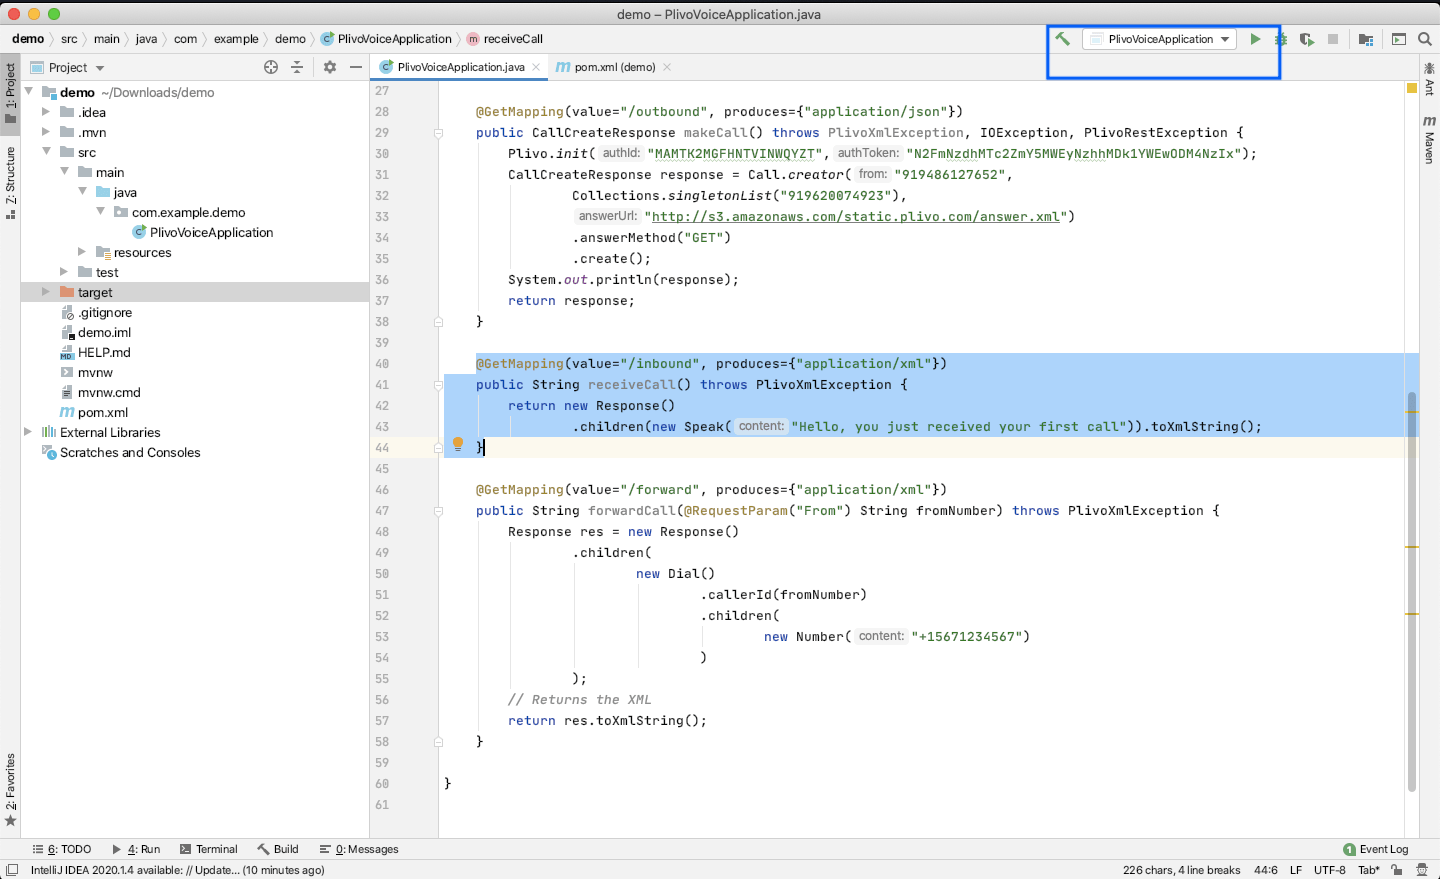
Run the project and you should see your basic server app in action on http://localhost:8080/inbound/
Exposing your local server to the internet
To receive Incoming Calls and to handle callbacks, your local server should be able to connect with Plivo API service, Ngrok is a tunneling software used to expose a web server running on your local machine to the internet. Using Ngrok you can set webhooks which can talk to Plivo server.
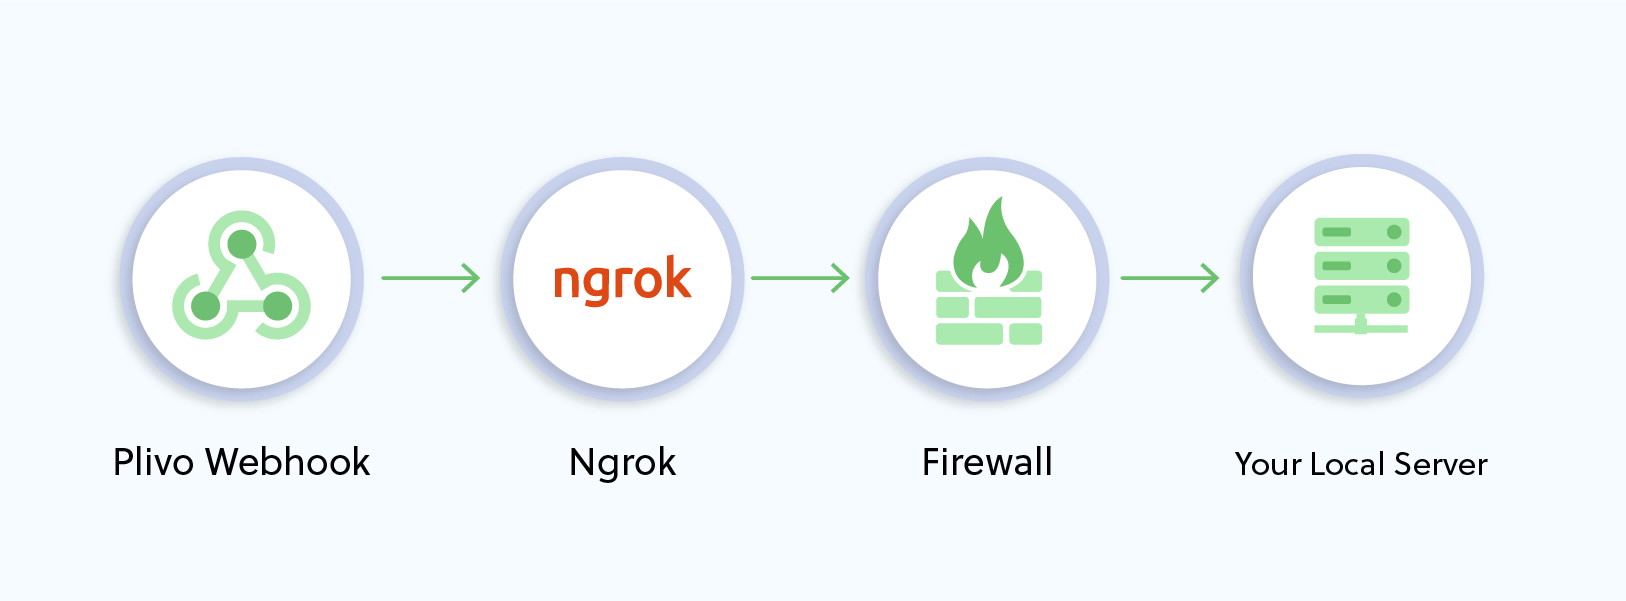
You can download and install ngrok from here. Follow the detailed configuration instructions to get started.
Run ngrok on the port which currently hosts your application. For example, if your port number is 80, run the following command:
./ngrok http <port_on_which_your_local_server_is_running>
This will give you a UI with links that look like ngrok.io/* which you can use to access your local server using the public network.
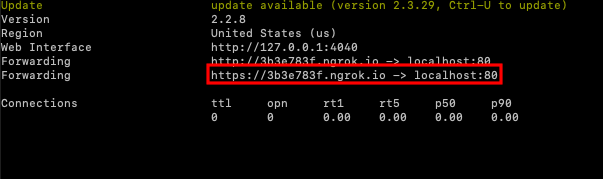
In this case, the ngrok url will be something like https://37347786acf6.ngrok.io/inbound/ and you can check the XML document using any browser.
You can use the above ngrok URL as answer_url in your Plivo application.