Two-Factor Authentication Using Python

Two-factor authentication (2FA) can play a key role in securing your applications against password data breaches. Authentication with a one-time password (OTP) delivered to your users over SMS is an effective approach to implementing two-factor authentication. Plivo’s premium direct routes guarantee the highest possible delivery rates and the shortest possible delivery times for your 2FA SMS messages.

This guide shows how to set up SMS-based two-factor authentication using either PHLO or traditional API development. PHLO lets you create and deploy workflows from an intuitive graphical canvas in few clicks.

You can create and deploy a PHLO to handle 2FA with a few clicks on the PHLO canvas and trigger it with a few lines of code.

Prerequisites

To get started, you need a Plivo account — sign up with your work email address if you don’t have one already. If this is your first time triggering a PHLO with Python, follow our instructions to set up a Python development environment.

Create the PHLO

Plivo provides a prototype for 2FA; all you have to do is select the PHLO and give it a friendly name.

Set up the demo application locally

Once you‘ve created the PHLO, download and modify the code to trigger it.

  • Clone the repository from GitHub
 $ git clone  https://github.com/plivo/2fa-python-demo.git
  • Change your working directory to 2fa-python-demo.
 $ cd 2fa-python-demo
  • Install the necessary dependencies using the requirements.txt file.
 $ pip install -r requirements.txt
  • Edit settings.py. Replace the auth placeholders with your authentication credentials from the Plivo console. Enter your PHLO ID, which you can find on the Plivo console. Replace the phone number placeholder with an actual phone number in E.164 format (for example, +12025551234).

A review of the code

Let‘s walk through what the code does.

Step 1: Generate the OTP

We use the Time-Based OTP algorithm to generate a random six-digit one-time password (OTP).

1
2
3
def generate_code(self):
        code = random.choice(range(100000, 999999))  # generating 6 digit random code
        return code

Step 2: Send SMS and make a call

With a single function, we can send an SMS message or make a call via PHLO (in the event the initial SMS message never arrives). The argument that tells PHLO whether to send an SMS message or make a call is mode, and the allowed values passed to it are sms and call.

1
2
3
4
5
6
7
8
9
10
11
12
13
14
def send_verification_code_phlo(self,dst_number,code,mode):
        payload = {
            "from": self.app_number,
            "to": dst_number,
            "otp": code,
            "mode": mode,
        }
        try:
            phlo = self.client_phlo.phlo.get(self.phlo_id)
            response = phlo.run(**payload)
            return response
        except exceptions as e:
            print(e)
            return ("Error encountered", 400)

Step 3: Verify the OTP

We verify the OTP the user enters on their handset.

1
2
3
4
5
6
7
8
9
10
11
12
13
14
15
16
17
18
19
20
21
22
23
@app.route("/checkcode/<number>/<code>")
def check_code(number, code):
    """
    check_code(number, code) accepts a number and the code entered by the user and
    tells if the code entered for that number is correct or not
    """

    original_code = current_app.redis.get("number:%s:code" % number)
    if original_code == code:  # verification successful, delete the code
        current_app.redis.delete("number:%s:code" % number)
        return (jsonify({"status": "success", "message": "codes match, number verified"}),200,)
    elif original_code != code:
        return (
            jsonify(
                {
                    "status": "rejected",
                    "message": "codes do not match, number not verified",
                }
            ),
            404,
        )
    else:
        return (jsonify({"status": "failed", "message": "number not found"}), 500)

Test

To test the application, start the Redis server.

 $ redis-server

Run the application.

$ flask run

Set up ngrok to expose your local server to the internet.

You should be able to see the application in action at https://<ngrok_identifier>.ngrok.io/.

The finished application should look like this.

Note: If you’re using a Plivo Trial account, you can send messages and make calls only to phone numbers that have been verified with Plivo. You can verify (sandbox) a number by going to the console’s Phone Numbers > Sandbox Numbers page.

Here’s how to implement 2FA using Plivo APIs.
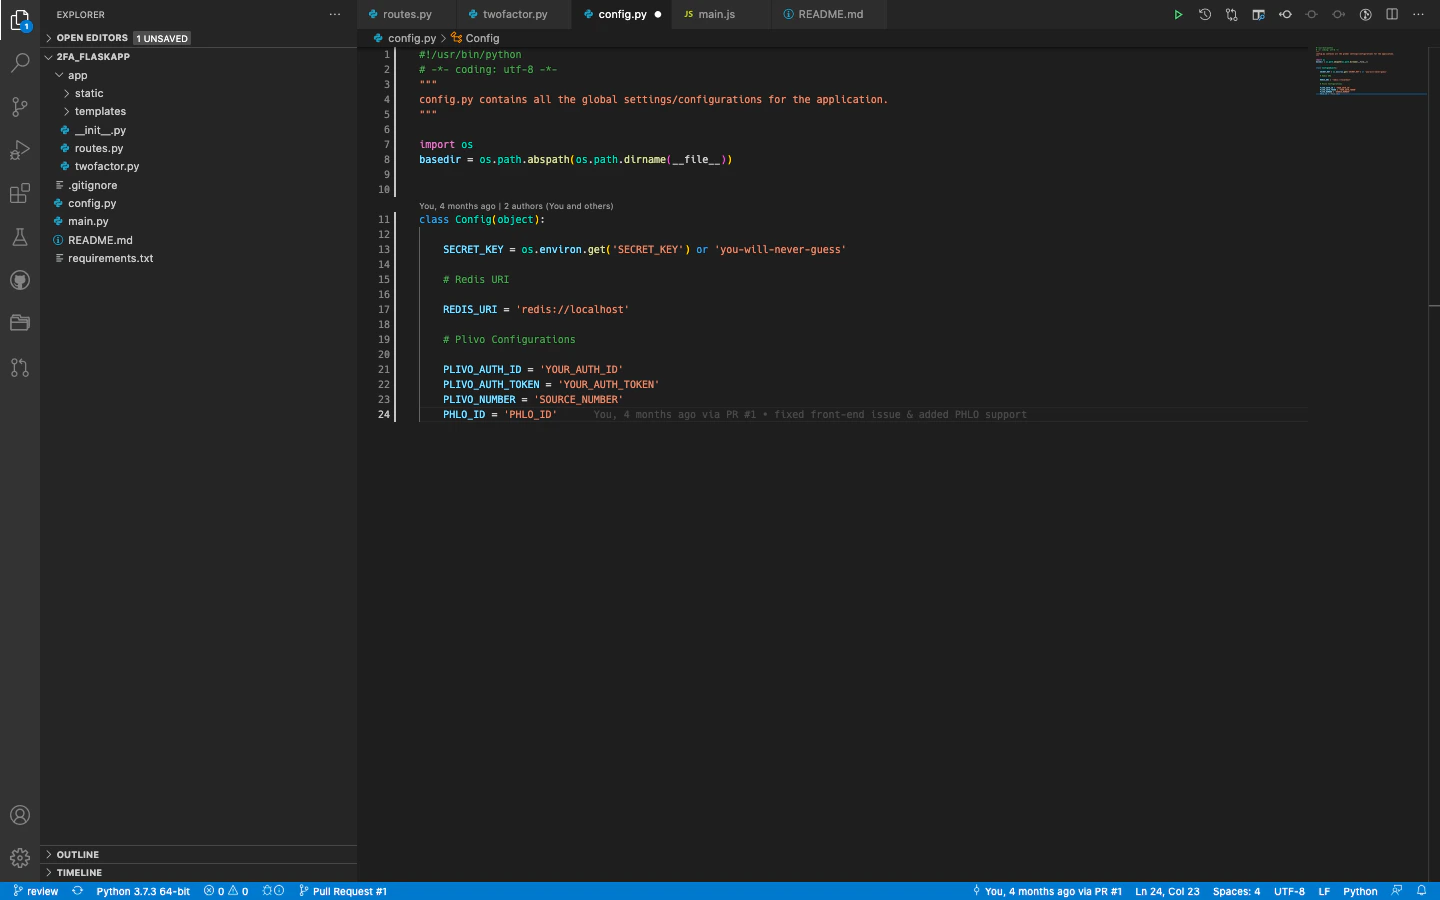
Prerequisites

To get started, you need a Plivo account — sign up with your work email address if you don’t have one already. If this is your first time using Plivo APIs, follow our instructions to set up a Python development environment.

Set up the demo application locally

  • Clone the repository from GitHub.
 $ git clone https://github.com/plivo-dev/2fa-python-demo
  • Change your working directory to 2fa-python-demo.
 $ cd 2fa-python-demo
  • Install the dependencies using the requirements.txt file.
 $ pip install -r requirements.txt
  • Edit config.py. Replace the auth placeholders with your authentication credentials from the Plivo console. Replace the phone number placeholder with an actual phone number in E.164 format (for example, +12025551234). Replace the PHLO ID with null. Configuration file

A review of the code

Let‘s walk through what the code does.

Step 1: Generate the OTP

Use the Time-Based OTP algorithm to generate a random six-digit one-time password (OTP).

1
2
3
def generate_code(self):
        code = random.choice(range(100000, 999999))  # generating 6-digit random code
        return code

Step 2: Send an SMS message with the OTP

Send an SMS message with the OTP to the user’s registered mobile number using Plivo’s Send Message API.

1
2
3
4
5
6
7
8
9
10
11
12
13
14
15
16
17
18
19
20
21
22
def send_verification_code_sms(self, dst_number: str, message):
        """
        `send_verification_code` accepts destination number
        to which the message that has to be sent.

        The message text should contain a `__code__` construct
        in the message text which will be
        replaced by the code generated before sending the SMS.
    
        :param: dst_number
        :param: message
        :return: verification code
        """
        try:
            response = self.client.messages.create(
                src=self.app_number, dst=dst_number, text=message
            )
            print(response)
            return response
        except exceptions as e:
            print(e)
            return "Error encountered", 400

Failover: Make a phone call with the OTP

If the SMS message doesn’t reach the mobile device, the user can request a voice OTP.

1
2
3
4
5
6
7
8
9
10
11
12
def send_verification_code_voice(self, dst_number, code):
try:
        response = self.client.calls.create(
                from_=self.app_number,
                to_=dst_number,
                answer_url=f"https://twofa-answerurl.herokuapp.com/answer_url/{code}",
                answer_method="GET",
            )
            return response
        except exceptions as e:
            print(e)
            return "Error encountered", 400

Step 3: Verify the OTP

Verify the OTP the user entered on their handset.

1
2
3
4
5
6
7
8
9
10
11
12
13
14
15
16
17
18
19
20
21
22
23
@app.route("/checkcode/<number>/<code>")
def check_code(number, code):
    """
    check_code(number, code) accepts a number and the code entered by the user and
    tells if the code entered for that number is correct or not.
    """

    original_code = current_app.redis.get("number:%s:code" % number)
    if original_code == code:  # verification successful, delete the code
        current_app.redis.delete("number:%s:code" % number)
        return (jsonify({"status": "success", "message": "codes match, number verified"}),200,)
    elif original_code != code:
        return (
            jsonify(
                {
                    "status": "rejected",
                    "message": "codes do not match, number not verified",
                }
            ),
            404,
        )
    else:
        return (jsonify({"status": "failed", "message": "number not found"}), 500)

Test

To test the application, start the Redis server.

 $ redis-server

Save your code and run it.

$ flask run

Set up ngrok to expose your local server to the internet.

You should be able to see the application in action at https://<ngrok_identifier>.ngrok.io/.

The finished application should look like this.

Note: If you’re using a Plivo Trial account, you can send messages and make calls only to phone numbers that have been verified with Plivo. You can verify (sandbox) a number by going to the console’s Phone Numbers > Sandbox Numbers page.