- Node
- Ruby
- Python
- PHP
- .NET
Overview
This guide shows how to use a voice one-time password (OTP) to verify a mobile number. We first make a call to the phone number to be verified and use text-to-speech to read a random sequence of digits to the call recipients. The user then confirms the digits by entering them using dialpad keypresses. Voice OTP is commonly used to verify new user registrations for an app or website.You can send a voice OTP either by using our PHLO visual workflow builder or our APIs and XML documents. Follow the instructions in one of the tabs below.- Using PHLO
- Using XML
You can create a PHLO to implement a voice OTP with a few clicks on the PHLO canvas and trigger it with a few lines of code.Replace the auth placeholders with your authentication credentials from the Plivo console. Replace the phlo_id placeholder with your PHLO ID from the Plivo console. Replace the parameters with values from the PHLO. Phone number placeholders should be actual phone numbers in E.164 format (for example, +12025551234).You should see your basic server application in action as below:Set up ngrok to expose your local server to the internet.
Prerequisites
To get started, you need a Plivo account — sign up with your work email address if you don’t have one already. If this is your first time triggering a PHLO with Node.js, follow our instructions to set up a Node.js development environment.Create the PHLO
- On the PHLO page of the Plivo console, click Create New PHLO.
-
In the Choose your use case pop-up, click Build my own. The PHLO canvas will appear with the Start node.
Note: The Start node is the starting point of any PHLO. It lets you trigger a PHLO to start upon one of three actions: incoming SMS message, incoming call, or API request.
- Click the Start node to open the Configuration tab to the right of the canvas, then enter the keys that you want to retrieve from the HTTP Request payload — in this case, from and to numbers and an OTP.
- Validate the configuration by clicking Validate. Every time you finish configuring a node, click Validate to check the syntax and save your changes.
- From the list of components on the left side, drag and drop the Initiate Call component onto the canvas. This adds an Initiate Call node onto the canvas. When a component is placed on the canvas it becomes a node.
- Draw a line to connect the Start node‘s API Request trigger state to the Initiate Call node.
- In the Configuration tab of the Initiate Call node, give the node a name. To enter dynamic values for fields, enter two curly brackets to view all available variables, and choose the appropriate ones: {{Start.http.params.from}} for the From field and {{Start.http.params.to}} for the To field, for example. The values for the variables will be retrieved from the HTTP Request payload you defined in the Start node.
- Next, drag and drop the Play Audio component onto the canvas. Connect the Initiate Call node to the Play Audio node using the Answered trigger state.
- Configure the Play Audio node to play a message to the user by entering text in the Speak Text box in the Prompt section of its Configuration tab. Under Speak Text, tick Amazon Polly as the text-to-speech processor and paste this XML code into the box:
Copy
Ask AI
<Speak voice="Polly.Amy">
    <prosody rate="medium">
        Your verification code is
    <break/>
    <break/>
    <say-as interpret-as="spell-out">{{"{{Start.http.params.otp"}}}}</say-as>
    </prosody>
</Speak>
- After you complete and validate the node configurations, give the PHLO a name by clicking in the upper left, then click Save.
Trigger the PHLO
You integrate a PHLO into your application workflow by making an API request to trigger the PHLO with the required payload — the set of parameters you pass to the PHLO. You can define a static payload by specifying values when you create the PHLO, or define a dynamic payload by passing values through parameters when you trigger the PHLO from your application. An OTP application always uses a dynamic payload.Create a file calledTriggerPhlo.js and paste into it this code.Copy
Ask AI
const express = require('express');
const app = express();
const redis = require('redis');
const redisClient = redis.createClient();
var plivo = require('plivo');
var PhloClient = plivo.PhloClient;

var authId = "<auth_id>";
var authToken = "<auth_token>";
var phloId = "<phlo_id>";
var phloClient = phlo = null;

// Make call to the destination number with OTP
app.get('/dispatch_otp/:number', function(req, res) {
    const number = (req.params.number);
    const code = Math.floor(100000 + Math.random() * 900000);

    var client = new plivo.Client(auth_id, auth_token);
    var payload = {
        from: '<caller_id>',
        to: number,
        otp: code
    }
    phloClient = new PhloClient(authId, authToken);
    phloClient.phlo(phloId).run(payload).then(function(result) {
        console.log('Phlo run result', result);
    }).catch(function(err) {
        console.error('Phlo run failed', err);
    });
    redisClient.set(`number:${number}:code`, code, 'EX', 60);
    res.send(JSON.stringify({
        'status': 'success',
        'message': 'verification initiated'
    }));
});

// Validate the OTP entered by the user
app.get('/verify_otp/:number/:code', function(req, res) {
    const number = (req.params.number);
    const code = (req.params.code);
    redisClient.get(`number:${number}:code`, function(err, OriginalCode) {
        if (OriginalCode == code) {
            redisClient.del(`number:${number}:code`);
            res.send(JSON.stringify({
                'status': 'success',
                'message': 'codes match, number verified'
            }));
        } else if (OriginalCode != code) {
            res.send(JSON.stringify({
                'status': 'failure',
                'message': 'codes do not match, number not verified'
            }));
        } else {
            res.send(JSON.stringify({
                'status': 'failure',
                'message': 'number not found'
            }));
        }
    });
});
app.listen(5000);
Test
Save the file and run it, and start Redis.Copy
Ask AI
node TriggerPhlo.js
redis-server
Copy
Ask AI
http://localhost:5000/dispatch_otp/?destination_number=<destination_number>
http://localhost:5000/verify_otp/?destination_number=<destination_number>&otp=<otp>
Here’s how to use Plivo APIs and XML to implement voice OTPs.Replace the auth placeholders with your authentication credentials from the Plivo console. Replace the phone number placeholder with an actual phone number in E.164 format (for example, +12025551234).You should see your basic server application in action as below:
Prerequisites
To get started, you need a Plivo account — sign up with your work email address if you don’t have one already. If this is your first time using Plivo APIs, follow our instructions to set up a Node.js development environment.Create a voice OTP application
Create a file calledvoiceotp.js and paste into it this code.Copy
Ask AI
const express = require('express');
const app = express();
const redis = require('redis');
const redisClient = redis.createClient();
var plivo = require('plivo');

// Make call to the destination number with OTP
app.get('/dispatch_otp/:number', function(req, res) {
    const number = (req.params.number);
    const code = Math.floor(100000 + Math.random() * 900000);

    var client = new plivo.Client("<auth_id>", "<auth_token>");
    var response = client.calls.create(
        "<caller_id>", // from
        number, // to
        "https://<yourdomain>.com/answer_url/" + code, // answer url
        {
            answerMethod: "GET",
        },
    )
    console.log(response)
    redisClient.set(`number:${number}:code`, code, 'EX', 60);
    res.send(JSON.stringify({
        'status': 'success',
        'message': 'verification initiated'
    }));
});

// Validate the OTP entered by the user
app.get('/verify_otp/:number/:code', function(req, res) {
    const number = (req.params.number);
    const code = (req.params.code);
    redisClient.get(`number:${number}:code`, function(err, OriginalCode) {
        if (OriginalCode == code) {
            redisClient.del(`number:${number}:code`);
            res.send(JSON.stringify({
                'status': 'success',
                'message': 'Codes match — number verified'
            }));
        } else if (OriginalCode != code) {
            res.send(JSON.stringify({
                'status': 'failure',
                'message': 'Codes do not match — number not verified'
            }));
        } else {
            res.send(JSON.stringify({
                'status': 'failure',
                'message': 'Number not found'
            }));
        }
    });
});

app.listen(5000);
Note: We recommend that you store your credentials in the
auth_id and auth_token environment variables, to avoid the possibility of accidentally committing them to source control. If you do this, you can initialize the client with no arguments and Plivo will automatically fetch the values from the environment variables. You can use process.env to store environment variables and fetch them when initializing the client.Test
Save the file and run it, and start Redis.Copy
Ask AI
$ node voiceotp.js
$ redis-server
Copy
Ask AI
http://localhost:5000/dispatch_otp/?destination_number=<destination_number>
http://localhost:5000/verify_otp/?destination_number=<destination_number>&otp=<otp>
Overview
This guide shows how to use a voice one-time password (OTP) to verify a mobile number. We first make a call to the phone number to be verified and use text-to-speech to read a random sequence of digits to the call recipients. The user then confirms the digits by entering them using dialpad keypresses. Voice OTP is commonly used to verify new user registrations for an app or website.You can send a voice OTP either by using our PHLO visual workflow builder or our APIs and XML documents. Follow the instructions in one of the tabs below.- Using PHLO
- Using XML
You can create a PHLO to implement a voice OTP with a few clicks on the PHLO canvas and trigger it with a few lines of code.This generates a controller named plivo_controller in the app/controllers/ directory and a respective view in the app/views/plivo directory. We can delete the view as we don‘t need it.Edit app/controllers/plivo_controller.rb and paste into it this code.Replace the auth placeholders with your authentication credentials from the Plivo console. Replace the phlo_id placeholder with your PHLO ID from the Plivo console. Replace the parameters with values from the PHLO. Phone number placeholders should be actual phone numbers in E.164 format (for example, +12025551234).toYou should see your basic server application in action as below:Set up ngrok to expose your local server to the internet.
Prerequisites
To get started, you need a Plivo account — sign up with your work email address if you don’t have one already. If this is your first time triggering a PHLO with Ruby, follow our instructions to set up a Ruby development environment.Create the PHLO
- On the PHLO page of the Plivo console, click Create New PHLO.
-
In the Choose your use case pop-up, click Build my own. The PHLO canvas will appear with the Start node.
Note: The Start node is the starting point of any PHLO. It lets you trigger a PHLO to start upon one of three actions: incoming SMS message, incoming call, or API request.
- Click the Start node to open the Configuration tab to the right of the canvas, then enter the keys that you want to retrieve from the HTTP Request payload — in this case, from and to numbers and an OTP.
- Validate the configuration by clicking Validate. Every time you finish configuring a node, click Validate to check the syntax and save your changes.
- From the list of components on the left side, drag and drop the Initiate Call component onto the canvas. This adds an Initiate Call node onto the canvas. When a component is placed on the canvas it becomes a node.
- Draw a line to connect the Start node‘s API Request trigger state to the Initiate Call node.
- In the Configuration tab of the Initiate Call node, give the node a name. To enter dynamic values for fields, enter two curly brackets to view all available variables, and choose the appropriate ones: {{Start.http.params.from}} for the From field and {{Start.http.params.to}} for the To field, for example. The values for the variables will be retrieved from the HTTP Request payload you defined in the Start node.
- Next, drag and drop the Play Audio component onto the canvas. Connect the Initiate Call node to the Play Audio node using the Answered trigger state.
- Configure the Play Audio node to play a message to the user by entering text in the Speak Text box in the Prompt section of its Configuration tab. Under Speak Text, tick Amazon Polly as the text-to-speech processor and paste this XML code into the box:
Copy
Ask AI
<Speak voice="Polly.Amy">
    <prosody rate="medium">
        Your verification code is
    <break/>
    <break/>
    <say-as interpret-as="spell-out">{{"{{Start.http.params.otp"}}}}</say-as>
    </prosody>
</Speak>
- After you complete and validate the node configurations, give the PHLO a name by clicking in the upper left, then click Save.
Trigger the PHLO
You integrate a PHLO into your application workflow by making an API request to trigger the PHLO with the required payload — the set of parameters you pass to the PHLO. You can define a static payload by specifying values when you create the PHLO, or define a dynamic payload by passing values through parameters when you trigger the PHLO from your application. An OTP application always uses a dynamic payload.Create a Rails controller for OTP
Change to the project directory and run this command to create a Rails controller for voice OTP.Copy
Ask AI
rails generate controller Plivo voice
Copy
Ask AI
rm app/views/plivo/voice.html.erb
Copy
Ask AI
include Plivo
require 'redis'
require 'json'
include Plivo::Exceptions

class PlivoController < ApplicationController
	def dispatch_otp
		redis = Redis.new(host: "localhost")
		code = rand(999_999)
		dst_number = params[:dst_number]
		auth_id = '<auth_id>'
    auth_token = '<auth_token>'

    client = Phlo.new(auth_id, auth_token)
    	begin
    phlo = client.phlo.get('<phlo_id>')
    #parameters set in PHLO - params
    params = {
       from: <caller_id>,
       to: <destination_number>,
       otp: code
  }
  response = phlo.run(params)
  puts response
rescue PlivoRESTError => e
  puts 'Exception: ' + e.message
end
		redis.setex(dst_number, 60, code) # Verification code is valid for 1 minute
		puts JSON.pretty_generate({ :status=> 'success', :message=> 'verification initiated' })
	rescue PlivoRESTError => e
		puts 'Exception: ' + e.message
	end

	def verify_otp
		redis = Redis.new(host: "localhost")
		code = params[:otp]
		number = params[:number]
		original_code = redis.get(number)
		if original_code == code
			redis.del(number)  # verification successful, delete the code
			puts JSON.pretty_generate( { :status=> 'success', :message=> 'codes match, number verified'})
		elsif original_code != code
			puts JSON.pretty_generate({ :status => "failure", :message=> 'codes do not match, number not verified' })
		else
			puts JSON.pretty_generate( { :status=> 'rejected', :message=> 'number not found' })
		end
	end
end
Add a route
Add a route for the outbound function in the PlivoController class. Edit the config/routes.rb file and change the line:Copy
Ask AI
get 'plivo/voice'
Copy
Ask AI
get 'plivo/verify_otp'
get 'plivo/dispatch_otp'
Test
Start the Rails server and start Redis.Copy
Ask AI
rails server
redis-server
Copy
Ask AI
http://localhost:3000/plivo/dispatch_otp?destination_number=<destination_number>
http://localhost:3000/plivo/verify_otp?destination_number=<destination_number>&otp=<otp>
Here’s how to use Plivo APIs and XML to implement voice OTPs.It generates a controller named plivo_controller in the app/controllers/ directory and a respective view in app/views/plivo. We can delete the view as we don‘t need it.Replace the auth placeholders with your authentication credentials from the Plivo console. Replace the phone number placeholder with an actual phone number in E.164 format (for example, +12025551234).toYou should see your basic server application in action as below:
Prerequisites
To get started, you need a Plivo account — sign up with your work email address if you don’t have one already. If this is your first time using Plivo APIs, follow our instructions to set up a Ruby development environment.Create a Rails controller
Change to the project directory and run this command to create a Rails controller for the voice OTP application.Copy
Ask AI
$ rails generate controller Plivo voice
Copy
Ask AI
$ rm app/views/plivo/voice.html.erb
Create a voice OTP application
Edit app/controllers/plivo_controller.rb file and add this code.Copy
Ask AI
include Plivo
require 'redis'
require 'json'
include Plivo::Exceptions

class PlivoController < ApplicationController
	def dispatch_otp
		redis = Redis.new(host: "localhost")
		code = rand(999_999)
		dst_number = params[:dst_number]

		api = RestClient.new("<auth_id>","<auth_token>")
		begin
			response = api.calls.create(
				'<caller_id>',
				[dst_number],
				"https://<yourdomain>.com/answer_url/#{code}"
			)
			puts response
		end
		redis.setex(dst_number, 60, code) # Verification code is valid for 1 min
		puts JSON.pretty_generate({ :status=> 'success', :message=> 'verification initiated' })
	rescue PlivoRESTError => e
		puts 'Exception: ' + e.message
	end

	def verify_otp
		redis = Redis.new(host: "localhost")
		code = params[:otp]
		number = params[:number]
		original_code = redis.get(number)
		if original_code == code
			redis.del(number)  # verification successful, delete the code
			puts JSON.pretty_generate( { :status=> 'success', :message=> 'Codes match — number verified'})
		elsif original_code != code
			puts JSON.pretty_generate({ :status => "failure", :message=> 'Codes do not match — number not verified' })
		else
			puts JSON.pretty_generate( { :status=> 'rejected', :message=> 'Number not found' })
		end
	end
end
Note:
We recommend that you store your credentials in the
auth_id and auth_token environment variables, to avoid the possibility of accidentally committing them to source control. If you do this, you can initialize the client with no arguments and Plivo will automatically fetch the values from the environment variables. You can use ENV to store environment variables and fetch them when initializing the client.Add a route
Edit the file config/routes.rb and change the line:Copy
Ask AI
get 'plivo/voice'
Copy
Ask AI
get 'plivo/verify_otp'
get 'plivo/dispatch_otp'
Test
Start Rails and Redis.Copy
Ask AI
$ rails server
$ redis-server
Copy
Ask AI
http://localhost:3000/plivo/dispatch_otp?destination_number=<destination_number>
http://localhost:3000/plivo/verify_otp?destination_number=<destination_number>&otp=<otp>
Overview
This guide shows how to use a voice one-time password (OTP) to verify a mobile number. We first make a call to the phone number to be verified and use text-to-speech to read a random sequence of digits to the call recipients. The user then confirms the digits by entering them using dialpad keypresses. Voice OTP is commonly used to verify new user registrations for an app or website.You can send a voice OTP either by using our PHLO visual workflow builder or our APIs and XML documents. Follow the instructions in one of the tabs below.- Using PHLO
- Using XML
You can create a PHLO to implement a voice OTP with a few clicks on the PHLO canvas and trigger it with a few lines of code.Replace the auth placeholders with your authentication credentials from the Plivo console. Replace the phlo_id placeholder with your PHLO ID from the Plivo console. Replace the parameters with values from the PHLO. Phone number placeholders should be actual phone numbers in E.164 format (for example, +12025551234).You should see your basic server application in action as below:Set up ngrok to expose your local server to the internet.
Prerequisites
To get started, you need a Plivo account — sign up with your work email address if you don’t have one already. If this is your first time triggering a PHLO with Python, follow our instructions to set up a Python development environment.Create the PHLO
- On the PHLO page of the Plivo console, click Create New PHLO.
-
In the Choose your use case pop-up, click Build my own. The PHLO canvas will appear with the Start node.
Note: The Start node is the starting point of any PHLO. It lets you trigger a PHLO to start upon one of three actions: incoming SMS message, incoming call, or API request.
- Click the Start node to open the Configuration tab to the right of the canvas, then enter the keys that you want to retrieve from the HTTP Request payload — in this case, from and to numbers and an OTP.
- Validate the configuration by clicking Validate. Every time you finish configuring a node, click Validate to check the syntax and save your changes.
- From the list of components on the left side, drag and drop the Initiate Call component onto the canvas. This adds an Initiate Call node onto the canvas. When a component is placed on the canvas it becomes a node.
- Draw a line to connect the Start node‘s API Request trigger state to the Initiate Call node.
- In the Configuration tab of the Initiate Call node, give the node a name. To enter dynamic values for fields, enter two curly brackets to view all available variables, and choose the appropriate ones: {{Start.http.params.from}} for the From field and {{Start.http.params.to}} for the To field, for example. The values for the variables will be retrieved from the HTTP Request payload you defined in the Start node.
- Next, drag and drop the Play Audio component onto the canvas. Connect the Initiate Call node to the Play Audio node using the Answered trigger state.
- Configure the Play Audio node to play a message to the user by entering text in the Speak Text box in the Prompt section of its Configuration tab. Under Speak Text, tick Amazon Polly as the text-to-speech processor and paste this XML code into the box:
Copy
Ask AI
<Speak voice="Polly.Amy">
    <prosody rate="medium">
        Your verification code is
    <break/>
    <break/>
    <say-as interpret-as="spell-out">{{"{{Start.http.params.otp"}}}}</say-as>
    </prosody>
</Speak>
- After you complete and validate the node configurations, give the PHLO a name by clicking in the upper left, then click Save.
Trigger the PHLO
You integrate a PHLO into your application workflow by making an API request to trigger the PHLO with the required payload — the set of parameters you pass to the PHLO. You can define a static payload by specifying values when you create the PHLO, or define a dynamic payload by passing values through parameters when you trigger the PHLO from your application. An OTP application always uses a dynamic payload.Create a Flask application for OTP
Create a file calledtrigger_phlo.py and paste into it this code.Copy
Ask AI
import plivo
import random
import redis

from flask import Flask, jsonify

app = Flask(__name__)

r = redis.StrictRedis()

def generate_code():
    code = random.choice(range(100000, 999999))  # generating six-digit random code
    return code


# Make call to the destination number with OTP
@app.route("/dispatch_otp/<destination_number>")
def dispatch_otp(destination_number):
    try:
        # generate OTP
        code = generate_code()

        # Make a call
        auth_id = <auth_id>
        auth_token = <auth_token>
        phlo_id = '<phlo_id>'
        payload = {"from" : "<caller_id>","to" : <destination_number>, "otp": code}
        phlo_client = plivo.phlo.RestClient(auth_id=auth_id, auth_token=auth_token)
        phlo = phlo_client.phlo.get(phlo_id)
        response = phlo.run(**payload)
        print str(response)
        print(r.setex("number:%s:code" % destination_number, 60, code))
        return (
            jsonify({"status": "success", "message": "verification initiated"}),
            200,
        )
    except:
        return ("Error encountered", 400)

# verify the OTP enetered by the user
@app.route("/verify_otp/<destination_number>/<code>")
def check_code(destination_number, code):
    """
    check_code(number, code) accepts a number and the code entered by the user and
    tells if the code entered for that number is correct or not
    """
    # fetch the OTP set for the destination number
    original_code = r.get("number:%s:code" % destination_number)

    if int(original_code) == int(code):  # verification successful, delete the code
        r.delete("number:%s:code" % destination_number)
        return (
            jsonify({"status": "success", "message": "codes match, number verified"}),
            200,
        )
    elif original_code != code:
        return (
            jsonify(
                {
                    "status": "rejected",
                    "message": "codes do not match, number not verified",
                }
            ),
            404,
        )
    else:
        return (jsonify({"status": "failed", "message": "number not found"}), 500)


if __name__ == "__main__":
    app.run(host="0.0.0.0", debug=True)
Test
Save the file and run it, and start Redis.Copy
Ask AI
python trigger_phlo.py
redis-server
Copy
Ask AI
http://localhost:5000/dispatch_otp?destination_number=<destination_number>
http://localhost:5000/verify_otp?destination_number=<destination_number>&otp=<otp>
Here’s how to use Plivo APIs and XML to implement voice OTPs.Replace the auth placeholders with your authentication credentials from the Plivo console. Replace the phone number placeholder with an actual phone number in E.164 format (for example, +12025551234).You should see your basic server application in action as below:
Prerequisites
To get started, you need a Plivo account — sign up with your work email address if you don’t have one already. If this is your first time using Plivo APIs, follow our instructions to set up a Python development environment.Create a voice OTP application
Create a file calledvoiceotp.py and paste into it this code.Copy
Ask AI
import plivo
import random
import redis

from flask import Flask, jsonify

app = Flask(__name__)

r = redis.StrictRedis()

def generate_code():
    code = random.choice(range(100000, 999999))  # generating 6-digit random code
    return code


# Make call to the destination number with OTP
@app.route("/dispatch_otp/<destination_number>")
def dispatch_otp(destination_number):
    try:
        # generate OTP.
        code = generate_code()

        # Make a call
        client = plivo.RestClient("<auth_id>", "<auth_token>")
        response = client.calls.create(
            from_="<caller_id>",
            to_=destination_number,
            answer_url=f"https://<yourdomain>.com/answer_url/{code}",
            answer_method="GET",
        )
        print(response)
        print(r.setex("number:%s:code" % destination_number, 60, code))
        return (
            jsonify({"status": "success", "message": "verification initiated"}),
            200,
        )
    except:
        return ("Error encountered", 400)

# verify the OTP enetered by the user
@app.route("/verify_otp/<destination_number>/<code>")
def check_code(destination_number, code):
    """
    check_code(number, code) accepts a number and the code entered by the user and
    tells whether the code entered is correct
    """
    # fetch the OTP set for the destination number
    original_code = r.get("number:%s:code" % destination_number)

    if int(original_code) == int(code):  # verification successful, delete the code
        r.delete("number:%s:code" % destination_number)
        return (
            jsonify({"status": "success", "message": "Codes match — number verified"}),
            200,
        )
    elif original_code != code:
        return (
            jsonify(
                {
                    "status": "rejected",
                    "message": "Codes do not match — number not verified",
                }
            ),
            404,
        )
    else:
        return (jsonify({"status": "failed", "message": "Number not found"}), 500)


if __name__ == "__main__":
    app.run(host="0.0.0.0", debug=True)
Note:
We recommend that you store your credentials in the
auth_id and auth_token environment variables, to avoid the possibility of accidentally committing them to source control. If you do this, you can initialize the client with no arguments and Plivo will automatically fetch the values from the environment variables. You can use os module(os.environ) to store environment variables and fetch them when initializing the client.Test
Save the file and run it, and start Redis.Copy
Ask AI
$ python voiceotp.py
$ redis-server
Copy
Ask AI
http://localhost:5000/dispatch_otp/destination_number
http://localhost:5000/verify_otp/destination_number/otp
Overview
This guide shows how to use a voice one-time password (OTP) to verify a mobile number. We first make a call to the phone number to be verified and use text-to-speech to read a random sequence of digits to the call recipients. The user then confirms the digits by entering them using dialpad keypresses. Voice OTP is commonly used to verify new user registrations for an app or website.You can send a voice OTP either by using our PHLO visual workflow builder or our APIs and XML documents. Follow the instructions in one of the tabs below.- Using PHLO
- Using XML
You can create a PHLO to implement a voice OTP with a few clicks on the PHLO canvas and trigger it with a few lines of code.This generates a controller named VoiceController in the app/http/controllers/ directory. Edit app/http/controllers/VoiceController.php and paste into it this code.Replace the auth placeholders with your authentication credentials from the Plivo console. Replace the phlo_id placeholder with your PHLO ID from the Plivo console. Replace the parameters with values from the PHLO. Phone number placeholders should be actual phone numbers in E.164 format (for example, +12025551234).Navigate to your You should see your basic server application in action as below:Set up ngrok to expose your local server to the internet.
Prerequisites
To get started, you need a Plivo account — sign up with your work email address if you don’t have one already. If this is your first time triggering a PHLO with PHP, follow our instructions to set up a PHP development environment.Create the PHLO
- On the PHLO page of the Plivo console, click Create New PHLO.
-
In the Choose your use case pop-up, click Build my own. The PHLO canvas will appear with the Start node.
Note: The Start node is the starting point of any PHLO. It lets you trigger a PHLO to start upon one of three actions: incoming SMS message, incoming call, or API request.
- Click the Start node to open the Configuration tab to the right of the canvas, then enter the keys that you want to retrieve from the HTTP Request payload — in this case, from and to numbers and an OTP.
- Validate the configuration by clicking Validate. Every time you finish configuring a node, click Validate to check the syntax and save your changes.
- From the list of components on the left side, drag and drop the Initiate Call component onto the canvas. This adds an Initiate Call node onto the canvas. When a component is placed on the canvas it becomes a node.
- Draw a line to connect the Start node‘s API Request trigger state to the Initiate Call node.
- In the Configuration tab of the Initiate Call node, give the node a name. To enter dynamic values for fields, enter two curly brackets to view all available variables, and choose the appropriate ones: {{Start.http.params.from}} for the From field and {{Start.http.params.to}} for the To field, for example. The values for the variables will be retrieved from the HTTP Request payload you defined in the Start node.
- Next, drag and drop the Play Audio component onto the canvas. Connect the Initiate Call node to the Play Audio node using the Answered trigger state.
- Configure the Play Audio node to play a message to the user by entering text in the Speak Text box in the Prompt section of its Configuration tab. Under Speak Text, tick Amazon Polly as the text-to-speech processor and paste this XML code into the box:
Copy
Ask AI
<Speak voice="Polly.Amy">
    <prosody rate="medium">
        Your verification code is
    <break/>
    <break/>
    <say-as interpret-as="spell-out">{{"{{Start.http.params.otp"}}}}</say-as>
    </prosody>
</Speak>
- After you complete and validate the node configurations, give the PHLO a name by clicking in the upper left, then click Save.
Trigger the PHLO
You integrate a PHLO into your application workflow by making an API request to trigger the PHLO with the required payload — the set of parameters you pass to the PHLO. You can define a static payload by specifying values when you create the PHLO, or define a dynamic payload by passing values through parameters when you trigger the PHLO from your application. An OTP application always uses a dynamic payload.Create a Laravel controller for OTP
Change to the project directory and run this command to create a Laravel controller for voice OTP.Copy
Ask AI
$ php artisan make:controller VoiceController
Copy
Ask AI
<?php
namespace App\Http\Controllers;
require '../../vendor/autoload.php';
use Plivo\RestClient;
use Illuminate\Support\Facades\Redis;

class VoiceController extends Controller
{
    public function dispatch_otp()
    {
        $dst_number = $_REQUEST["dst_number"];
        $code = random_int(100000, 999999);

        $auth_id    = "<auth_id>";
        $auth_token = "<auth_token>";
        $client = new PhloRestClient($auth_id, $auth_token);
        $phlo = $client->phlo->get(<phlo_id>);
         try {
         $response = $phlo->run(["from" => "<caller_id>", "to" => $dst_number,"otp"=>$code]); // These are the fields entered in the PHLO console
         print_r($response);
      } catch (PlivoRestException $ex) {
    print_r($ex);
   }
        Redis::setex($dst_number, 60, $code);
        header('Content-Type: application/json');
        echo json_encode($response);
        echo '{"status": "success", "message": "verification initiated"}';
    }

    public function verify_otp()
    {
        $dst_number = $_REQUEST["dst_number"];
        $code = $_REQUEST["otp"];

        $value = Redis::get($dst_number);

        if ($code==$value)
        {
            Redis::get($dst_number);
            echo '{"status": "success", "message": "codes match, number verified"}';
        }
        elseif($code!=$value)
        {
            Redis::del($dst_number,$code);
            echo '{"status": "failure", "message": "codes do not match, number not verified"}';
        }
        else
        {
            echo '{"status": "failure", "message": "number not found"}';
        }
    }
}
Add a route
Add a route for the outbound function in the VoiceController class. Edit routes/web.php and add these lines at the end of the file.Copy
Ask AI
Route::match(['get', 'post'], '/dispatch_otp', 'App\Http\Controllers\VoiceController@dispatch_otp');
Route::match(['get', 'post'], '/verify_otp', 'App\Http\Controllers\VoiceController@verify_otp');
.env file and add this line.Copy
Ask AI
REDIS_CLIENT=predis
Test
Start the Laravel server and Redis.Copy
Ask AI
php artisan serve
redis-server
Copy
Ask AI
http://localhost:8000/dispatch_otp/?destination_number=<destination_number>
http://localhost:8000/verify_otp/?destination_number=<destination_number>&otp=<otp>
asd
Overview
This guide shows how to use a voice one-time password (OTP) to verify a mobile number. We first make a call to the phone number to be verified and use text-to-speech to read a random sequence of digits to the call recipients. The user then confirms the digits by entering them using dialpad keypresses. Voice OTP is commonly used to verify new user registrations for an app or website.You can send a voice OTP either by using our PHLO visual workflow builder or our APIs and XML documents. Follow the instructions in one of the tabs below.- Using PHLO
- Using XML
You can create a PHLO to implement a voice OTP with a few clicks on the PHLO canvas and trigger it with a few lines of code.Replace the auth placeholders with your authentication credentials from the Plivo console. Replace the phlo_id placeholder with your PHLO ID from the Plivo console. Replace the parameters with values from the PHLO. Phone number placeholders should be actual phone numbers in E.164 format (for example, +12025551234).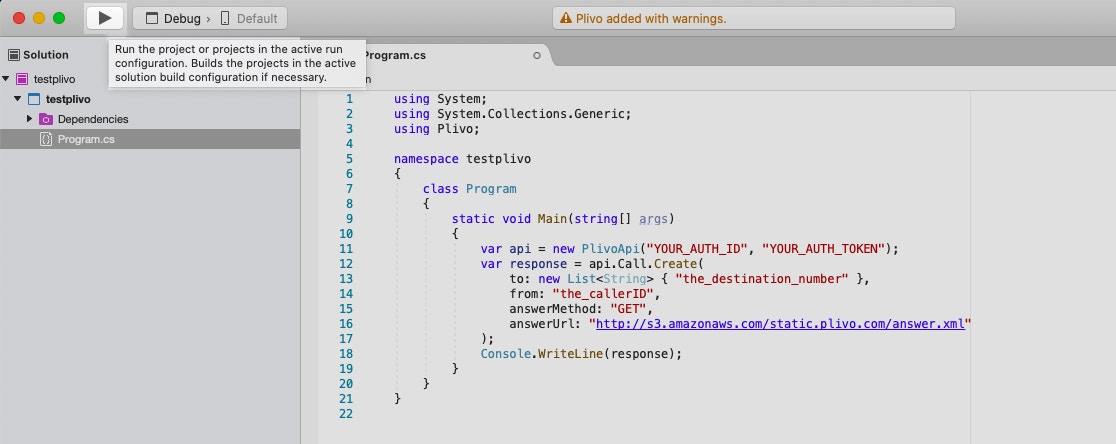
Prerequisites
To get started, you need a Plivo account — sign up with your work email address if you don’t have one already. If this is your first time triggering a PHLO with .NET, follow our instructions to set up a .NET development environment.Create the PHLO
- On the PHLO page of the Plivo console, click Create New PHLO.
-
In the Choose your use case pop-up, click Build my own. The PHLO canvas will appear with the Start node.
Note: The Start node is the starting point of any PHLO. It lets you trigger a PHLO to start upon one of three actions: incoming SMS message, incoming call, or API request.
- Click the Start node to open the Configuration tab to the right of the canvas, then enter the keys that you want to retrieve from the HTTP Request payload — in this case, from and to numbers and an OTP.
- Validate the configuration by clicking Validate. Every time you finish configuring a node, click Validate to check the syntax and save your changes.
- From the list of components on the left side, drag and drop the Initiate Call component onto the canvas. This adds an Initiate Call node onto the canvas. When a component is placed on the canvas it becomes a node.
- Draw a line to connect the Start node‘s API Request trigger state to the Initiate Call node.
- In the Configuration tab of the Initiate Call node, give the node a name. To enter dynamic values for fields, enter two curly brackets to view all available variables, and choose the appropriate ones: {{Start.http.params.from}} for the From field and {{Start.http.params.to}} for the To field, for example. The values for the variables will be retrieved from the HTTP Request payload you defined in the Start node.
- Next, drag and drop the Play Audio component onto the canvas. Connect the Initiate Call node to the Play Audio node using the Answered trigger state.
- Configure the Play Audio node to play a message to the user by entering text in the Speak Text box in the Prompt section of its Configuration tab. Under Speak Text, tick Amazon Polly as the text-to-speech processor and paste this XML code into the box:
Copy
Ask AI
<Speak voice="Polly.Amy">
    <prosody rate="medium">
        Your verification code is
    <break/>
    <break/>
    <say-as interpret-as="spell-out">{{"{{Start.http.params.otp"}}}}</say-as>
    </prosody>
</Speak>
- After you complete and validate the node configurations, give the PHLO a name by clicking in the upper left, then click Save.
Trigger the PHLO
You integrate a PHLO into your application workflow by making an API request to trigger the PHLO with the required payload — the set of parameters you pass to the PHLO. You can define a static payload by specifying values when you create the PHLO, or define a dynamic payload by passing values through parameters when you trigger the PHLO from your application. An OTP application always uses a dynamic payload.In Visual Studio, navigate to the Controllers directory, create a controller namedotp.cs, and paste into it this code.Copy
Ask AI
using System;
using System.Collections.Generic;
using Plivo;
using StackExchange.Redis;
using Microsoft.AspNetCore.Mvc;
using Newtonsoft.Json;

namespace otp.Controllers {
  public class otp: Controller {
    public object dispatch_otp(String destination_number) {
      ConnectionMultiplexer redis = ConnectionMultiplexer.Connect("localhost: 6379");
      IDatabase conn = redis.GetDatabase();

      Random r = new Random();
      var code = r.Next(999999);
      var phloClient = new PhloApi("<auth_id>", "<auth_token>");
            var phloID = "<phlo_id>";
            var phlo = phloClient.Phlo.Get(phloID);
            var data = new Dictionary<string, object>
            {
                { "from", "<caller_id>" },
                { "to", destination_number },
                { "otp", code },
            };
            Console.WriteLine(phlo.Run(data));
      var key = string.Format("number:{0}:code", destination_number);
      conn.StringSet(key, code, TimeSpan.FromSeconds(60));

      Verification verification = new Verification();
      verification.status = "success";
      verification.message = "verification initiated";
      string output = JsonConvert.SerializeObject(verification);
      return output;
    }

    public string verify_otp(String destination_number, String otp) {
      ConnectionMultiplexer redis = ConnectionMultiplexer.Connect("localhost: 6379");
      IDatabase conn = redis.GetDatabase();

      string key = $ "number:{destination_number}:code";
      var compare_code = (string) conn.StringGet(key);

      if (compare_code == otp) {
        conn.KeyDelete(key);
        Verification verification = new Verification();
        verification.status = "success";
        verification.message = "Number verified";
        string output = JsonConvert.SerializeObject(verification);
        return output;
      } else if (compare_code != otp) {
        Verification verification = new Verification();
        verification.status = "failure";
        verification.message = "Number not verified";
        string output = JsonConvert.SerializeObject(verification);
        return output;
      } else {
        Verification verification = new Verification();
        verification.status = "failure";
        verification.message = "number not found";
        string output = JsonConvert.SerializeObject(verification);
        return output;
      }

    }

    private class Verification {
      public string status {
        get;
        internal set;
      }
      public string message {
        get;
        internal set;
      }
    }
  }
}
Test
Save the file and run it.Copy
Ask AI
redis-server
Copy
Ask AI
https://localhost:5001/dispatch_otp/?destination_number=<destination_number>
https://localhost:5001/verify_otp/?destination_number=<destination_number>&otp=<otp>
Here’s how to use Plivo APIs and XML to implement voice OTPs.Replace the auth placeholders with your authentication credentials from the Plivo console. Replace the phone number placeholder with an actual phone number in E.164 format (for example, +12025551234).You should see your basic server application in action as below:
Prerequisites
To get started, you need a Plivo account — sign up with your work email address if you don’t have one already. If this is your first time using Plivo APIs, follow our instructions to set up a .NET development environment.Create a voice OTP application
In Visual Studio, create a controller namedotp.cs and paste into it this code.Copy
Ask AI
using System;
using System.Collections.Generic;
using Plivo;
using StackExchange.Redis;
using Microsoft.AspNetCore.Mvc;
using Newtonsoft.Json;

namespace otp.Controllers {
  public class otp: Controller {
    public object dispatch_otp(String destination_number) {
      ConnectionMultiplexer redis = ConnectionMultiplexer.Connect("localhost: 6379");
      IDatabase conn = redis.GetDatabase();

      Random r = new Random();
      var code = r.Next(999999);
      var api = new PlivoApi("<auth_id>", "<auth_token>");
      var response = api.Call.Create(
        to: new List < String > {
          destination_number
        },
        from: "<caller_id>",
        answerMethod: "POST",
        answerUrl: "https://<yourdomain>.com/answer_url/" + code);
      var key = string.Format("number:{0}:code", destination_number);
      conn.StringSet(key, code, TimeSpan.FromSeconds(60));

      Verification verification = new Verification();
      verification.status = "success";
      verification.message = "verification initiated";
      string output = JsonConvert.SerializeObject(verification);
      return output;
    }

    public string verify_otp(String destination_number, String otp) {
      ConnectionMultiplexer redis = ConnectionMultiplexer.Connect("localhost: 6379");
      IDatabase conn = redis.GetDatabase();

      string key = $ "number:{destination_number}:code";
      var compare_code = (string) conn.StringGet(key);

      if (compare_code == otp) {
        conn.KeyDelete(key);
        Verification verification = new Verification();
        verification.status = "success";
        verification.message = "Number verified";
        string output = JsonConvert.SerializeObject(verification);
        return output;
      } else if (compare_code != otp) {
        Verification verification = new Verification();
        verification.status = "failure";
        verification.message = "Number not verified";
        string output = JsonConvert.SerializeObject(verification);
        return output;
      } else {
        Verification verification = new Verification();
        verification.status = "failure";
        verification.message = "Number not found";
        string output = JsonConvert.SerializeObject(verification);
        return output;
      }

    }

    private class Verification {
      public string status {
        get;
        internal set;
      }
      public string message {
        get;
        internal set;
      }
    }
  }
}
Note:
We recommend that you store your credentials in the
auth_id and auth_token environment variables, to avoid the possibility of accidentally committing them to source control. If you do this, you can initialize the client with no arguments and Plivo will automatically fetch the values from the environment variables. You can use process.env to store environment variables and fetch them while initializing the client. You can store environment variables using <a href="https://docs.microsoft.com/en-us/dotnet/api/system.environment.setenvironmentvariable?view=netcore-3.1" rel="nofollow">Environment.SetEnvironmentVariable Method</a> and fetch them using <a href="https://docs.microsoft.com/en-us/dotnet/api/system.environment.getenvironmentvariable?view=netcore-3.1" rel="nofollow">Environment.GetEnvironmentVariable Method</a> when initializing the client.Test
Save the file and run it, and start Redis.Copy
Ask AI
$ redis-server
Copy
Ask AI
https://localhost:5001/dispatch_otp/?destination_number=<destination_number>
https://localhost:5001/verify_otp/?destination_number=<destination_number>&otp=<otp>