

Prerequisites
Before you begin:- Sign up for a Plivo account (free trial includes credits)
- Note your Auth ID and Auth Token from the console dashboard
- Rent a phone number for receiving calls
Install the SDK
- Python
- Node.js
- Ruby
- PHP
- Java
- .NET
- Go
Make an Outbound Call
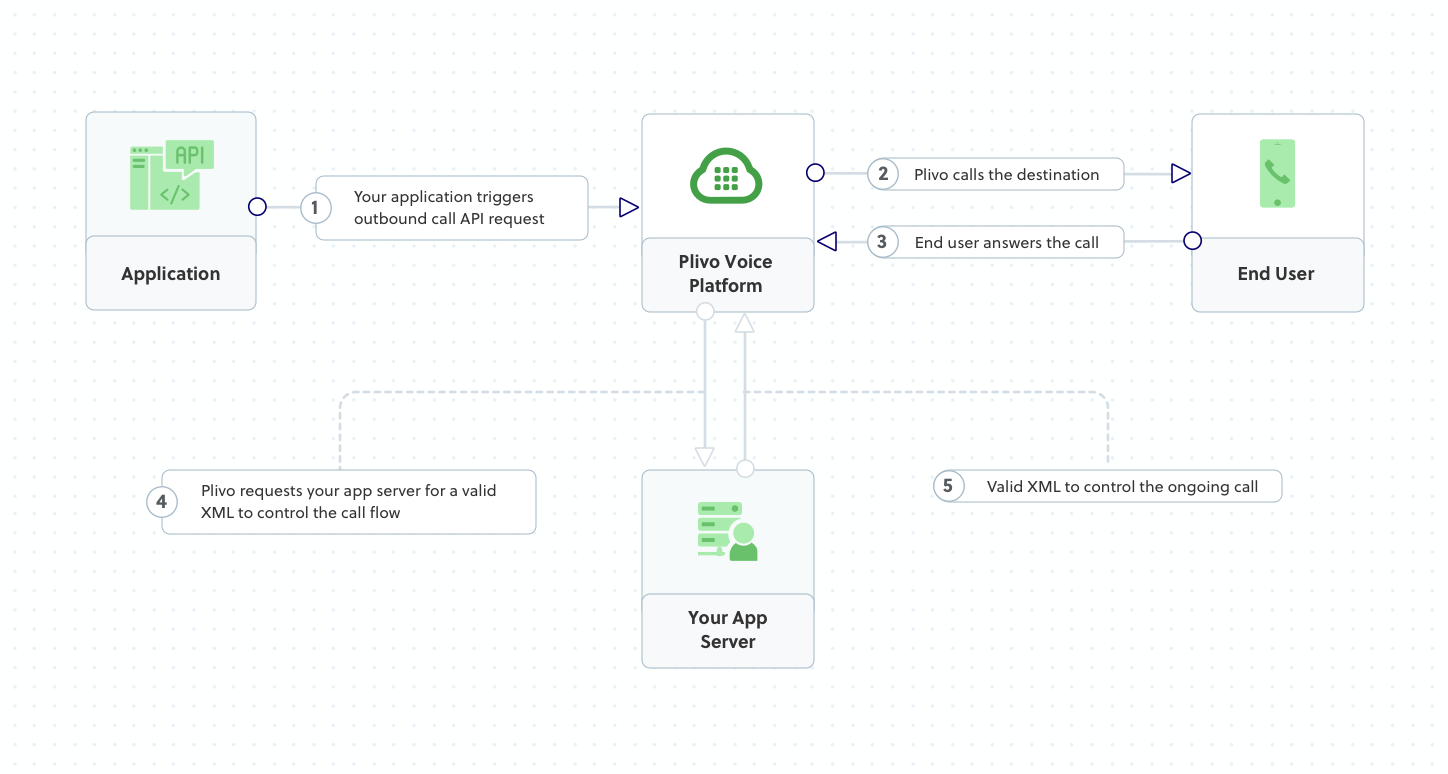
Create a call from your Plivo number to any phone number. When the call is answered, Plivo fetches XML instructions from youranswer_url.
- Python
- Node.js
- Ruby
- PHP
- Java
- .NET
- Go
- cURL
answer.xml file plays a message:
Receive an Incoming Call
Set up a web server to handle incoming calls. When someone calls your Plivo number, Plivo sends a request to your Answer URL and executes the XML instructions you return.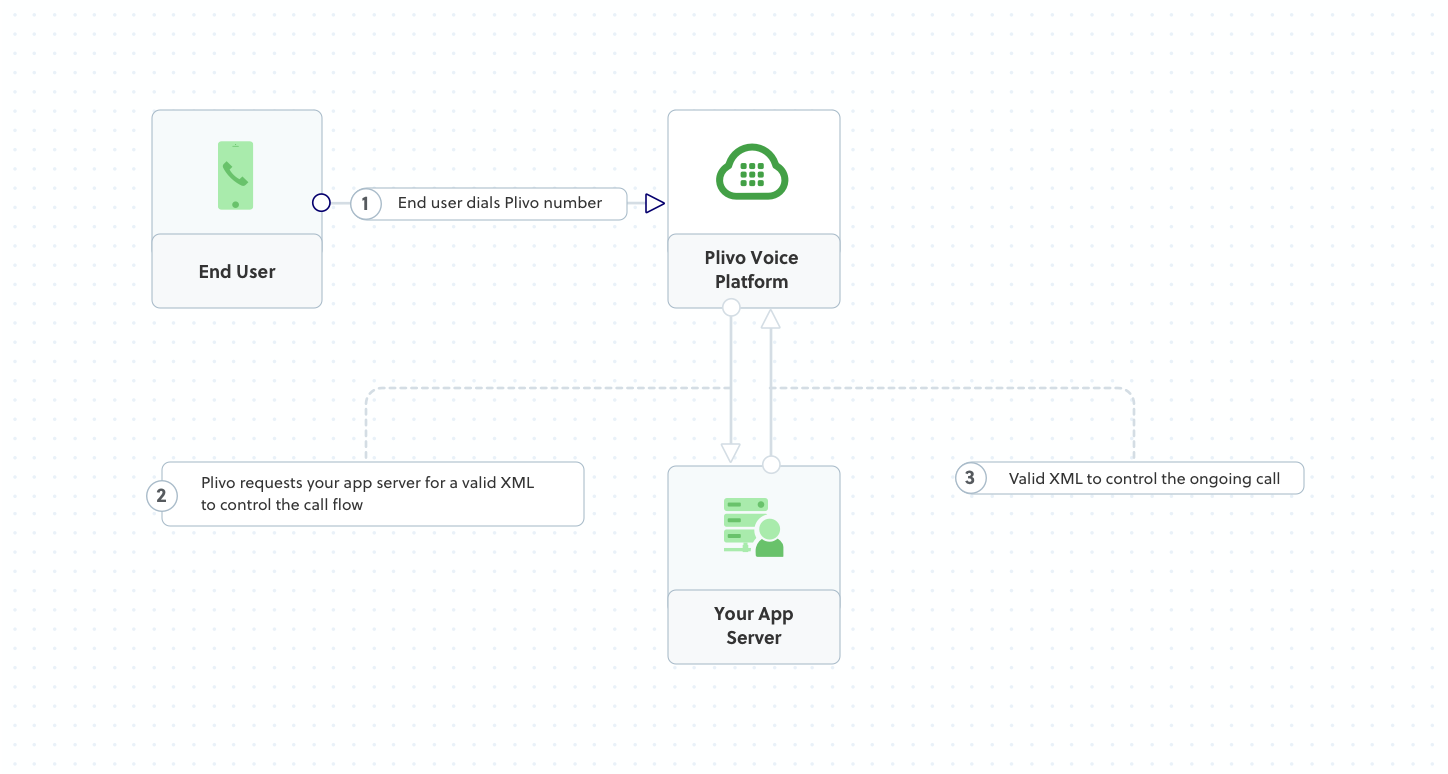
- Python
- Node.js
- Ruby
- PHP
- Java
- .NET
- Go
python app.pyExpose Your Server
Use ngrok to expose your local server to the internet:https://abc123.ngrok.io).
Configure Your Number
- Go to Voice Applications in the Plivo console
- Click Add New Application
- Set the Answer URL to your ngrok URL +
/answer/(e.g.,https://abc123.ngrok.io/answer/) - Save the application
- Go to Active Numbers
- Select your number and assign your application
Forward a Call
Dial another number when receiving an incoming call.- Python
- Node.js
- Ruby
- PHP
- cURL
Next Steps
Call API Reference
Complete API documentation for managing calls
XML Reference
All XML elements for call control
Use Cases
Common voice application patterns
Webhooks
Handle call events in real-time