
When clients and prospects ring your phone number, you need to have someone answering their calls. That “someone” could be an auto-attendant phone system — a prerecorded or computer-generated voice that serves as your business’s virtual receptionist. Virtual receptionists are cost-effective, provide a professional impression to customers, and are easy to integrate.
I looked at the most popular business phone systems that include an auto-attendant feature. I found no consistency in terms of the features they offer or the price, other than the more you pay, the more features you get — and if you choose a solution, you’re contractually bound to them and get only the features they offer.
My research inspired me to attempt and build a virtual receptionist using PHLO, Plivo’s visual workflow design studio. I created a call flow based on interactive voice response (IVR) and extension-based call forwarding to meet my needs, and if I need to customize it further, I can do that.
Basic IVR
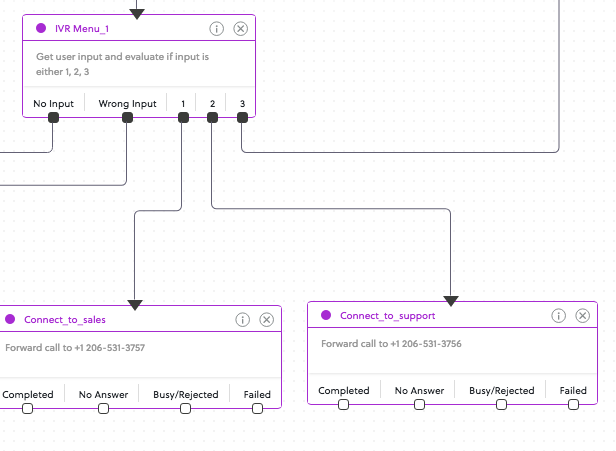
In my setup, basic IVR greets callers with a welcome message and offers choices for the caller. We’ve written a getting started guide to using PHLO for IVR, which I used as a springing-off point — look to that for the step-by-step setup process.
I entered the text that explains to callers key to press to reach our sales team and which for support. Alternately, you can upload an MP3 file that does the same thing. I connected the IVR menu choices to the next logical action — I dragged Call Forward components to the canvas and connected to them.
Extension-based call forwarding
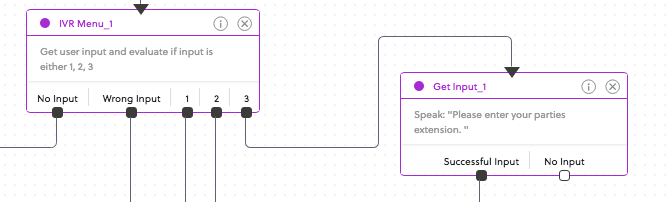
To implement extension-based call forwarding, I used a third number from the IVR Menu component with a voice prompt to tell callers, “If you know your party’s extension, please press 3.” If the caller does that, we then need to prompt them to enter the extension, then capture the digits they enter. I dragged the Get Input component to the canvas and set up a voice prompt on it.
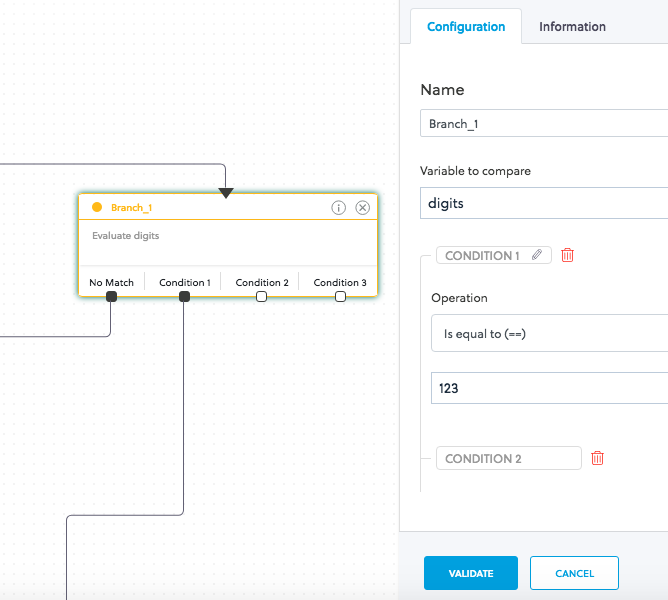
Get Input captures entered digits and passes on to the next node — in this case a Branch component that compares the input and sets up the next action…
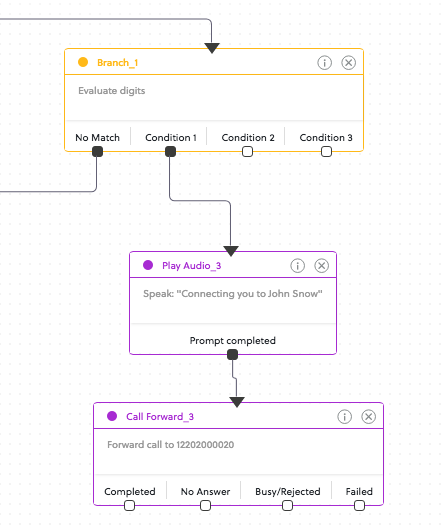
… which here is a Play Audio component prompt to inform the caller where the call is getting forwarded to, followed by a Call Forward component.
I named the PHLO, validated it, and saved it. Finally, following the steps in the guide, I attached the PHLO to a phone number from my Plivo account, and my virtual receptionist was ready to go.
Our auto-attendant worked great — and that was just the start! I built many other features on top of this basic setup, including SMS acknowledgement for callers, voicemail for callback, and time-based routing.
To try PHLO yourself, sign up for a free trial account.