At Plivo, we’re focused on making the 10DLC registration process as simple for our customers as possible — we’ve even won some awards in the process. Today, we’re excited to bring you an updated 10DLC console experience that gives you even more visibility into the entire brand and campaign registration process.
What’s new in the console experience?
Now you can view all the information you’ve submitted, including the sample messages provided to the carriers. In the event that your campaign is declined, you can see the error code and the reason for rejection. This enhanced visibility simplifies the process of fixing and resubmitting your campaign. Additionally, email alerts will instantly notify you of any status changes.
Let’s take a quick tour of what’s included in the console’s new profile, brand, and campaign screens.
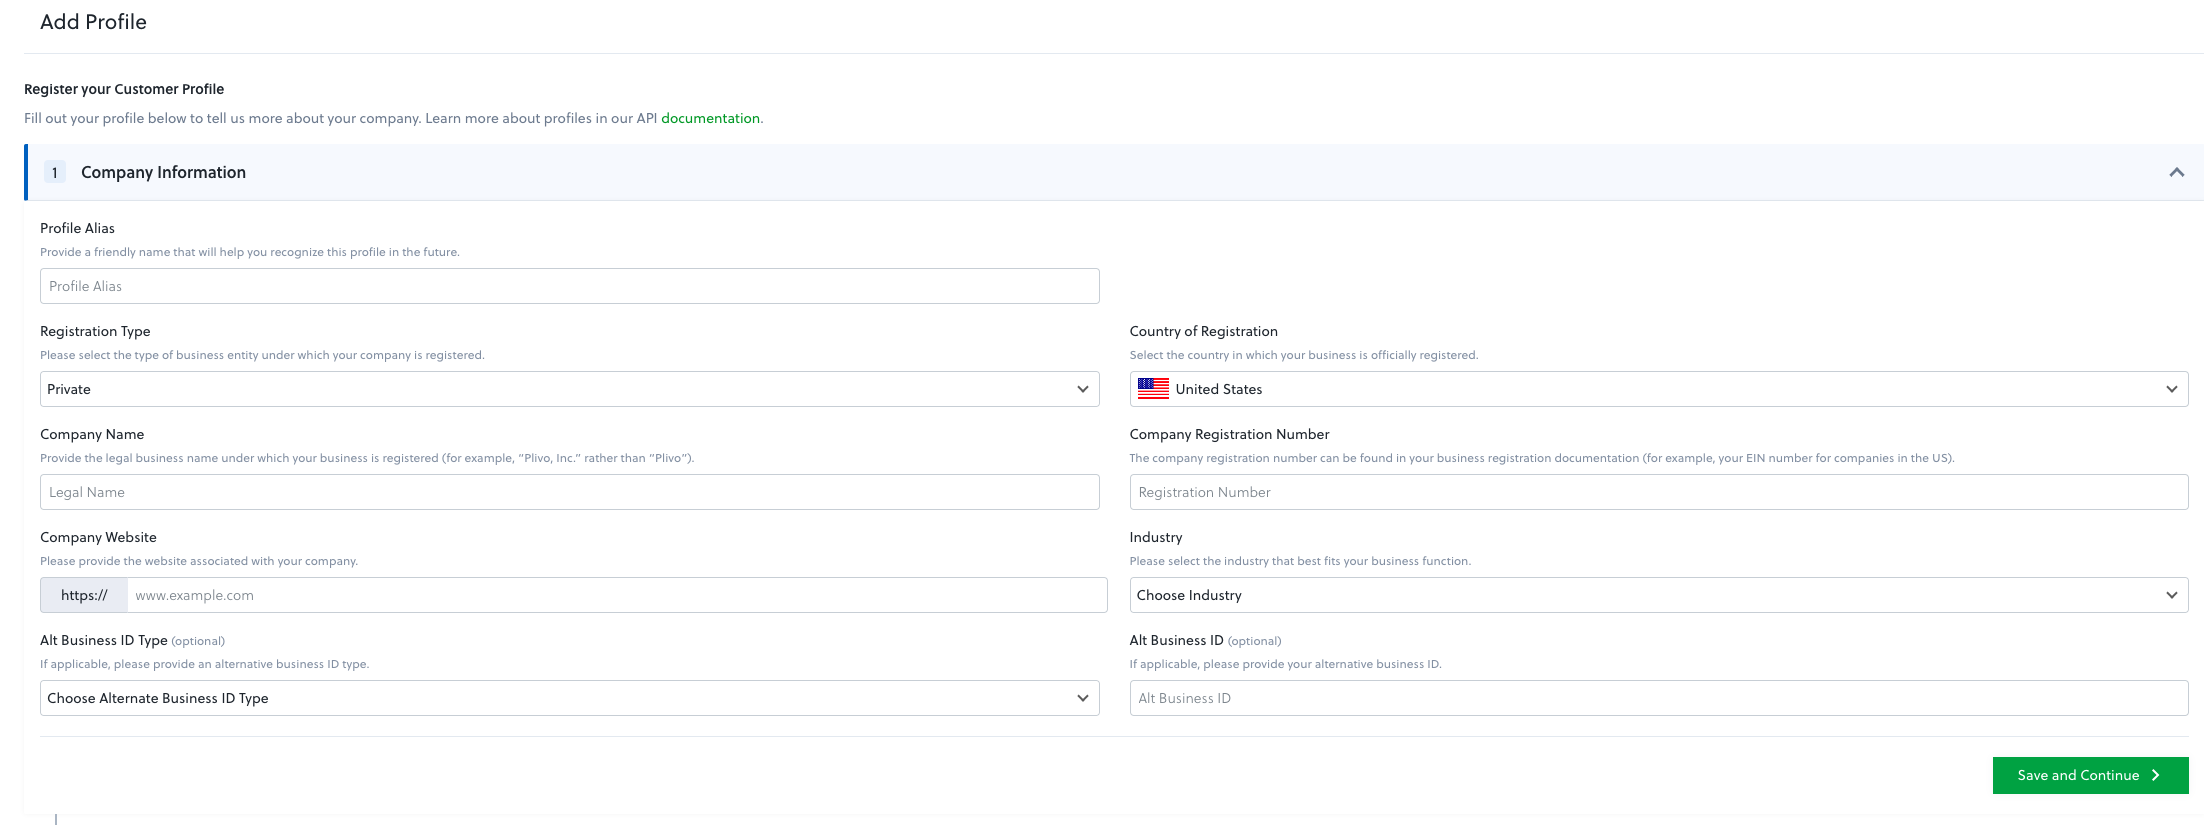
Step 1: The profile screen
Profiles help Plivo understand your business and the types of messages you’ll be sending. Complete the profile section with your company information, details like your website URL and industry, and your EIN or Tax ID number. We also need a physical address and a dedicated contact. Once you’ve completed and submitted your profile, you’ll move on to the brand registration page.
Step 2: The brand screen
Start by selecting the profile you want to use for brand registration and providing details about the level of vetting you want the carriers to provide.
Then, give consent to share the required documents with The Campaign Registry (TCR) before you hit submit. Note that it may take up to a week for your brand to be registered. The results will show on this screen; you’ll also receive an email from Plivo notifying you when your brand has been approved or rejected.
STOP and review these campaign registration tips
Before you register your campaign in the console, take the following steps to avoid any issues or delays.
- Review the costs associated with 10DLC campaign registration. Make sure you have a standard account with sufficient Plivo credits to cover these costs. Learn more here.
- Campaigns can only be created for verified brands. Ensure that your brand is verified before creating a campaign.
- The Campaign Registry (TCR) and carriers expect businesses to provide details in a certain format. Make sure you have reviewed our 10DLC registration guidelines.
Step 3: The campaign screen
When you’re ready to launch a new campaign, select the brand for which you want to create a campaign and provide the required details. Fill out the form and submit your campaign to the TCR.
All campaigns are manually reviewed by carriers; various aspects of the campaigns are examined closely. As a result, campaign reviews now take between six and eight weeks. You can check the status of your campaign registration in the console and you’ll be notified via email once it has been approved or declined.
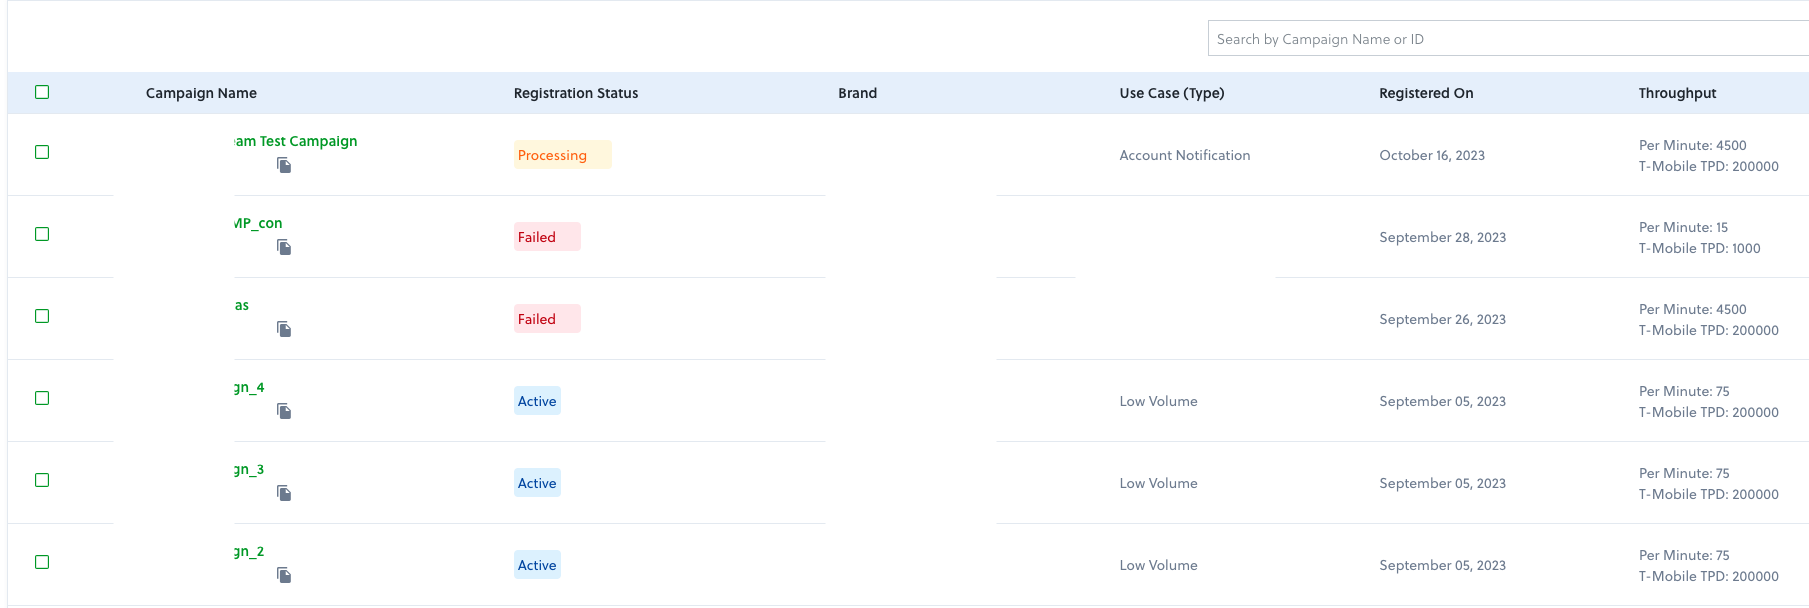
You also link phone numbers within the campaign screen. Keep in mind that numbers can only be linked to a campaign that has been approved by carriers (the “Registration Status” should be “active”).
To link a phone number, click on the campaign you want and navigate to the “Numbers” tab for that campaign. You will be able to see the list of numbers already linked to that campaign, add new numbers , or upload a list of numbers via CSV. You can also unlink a number to make it available for use somewhere else.
Email notifications
Users can now set up email alerts for up to 10 recipients in Plivo’s console. Receive an email each time a brand is registered, fails verification, or when a campaign is approved or rejected by carriers.

10DLC resources
10DLC registration is complex and there’s a lot to keep track of. Now, you can do it even more easily within the Plivo console. Check out our list of related resources below or contact our support team if you need help.