> ## Documentation Index
> Fetch the complete documentation index at: https://plivo.com/docs/llms.txt
> Use this file to discover all available pages before exploring further.
# Set Up a Ruby Dev Environment for PHLO
> Configure a Ruby development environment to trigger PHLOs with Plivo
Using this guide, you can set up a development environment in five minutes to trigger a PHLO.
## Install Ruby and Rails
To get started, install Ruby, Rails, and Plivo’s Ruby SDK. You can check whether you have Ruby installed by running `ruby --version` in a terminal window. If you don't have it, macOS and Linux users can install it using [homebrew](https://www.ruby-lang.org/en/documentation/installation/#homebrew), and Windows users can use [RubyInstaller](https://rubyinstaller.org/).
To install Rails, run
```shell theme={null}
gem install rails
```
Auto-generate code for a new Rails project with the command
```shell theme={null}
rails new plivotest
```
This command creates a directory named plivotest with the necessary folders and files for development.
### Install the Plivo Ruby SDK
Add the Plivo Ruby SDK by editing the Gemfile and adding the line
```shell theme={null}
gem 'plivo', '~> 4.16.0'
```
To install the Plivo-Ruby gem into the bundle, run
```shell theme={null}
bundle install
```
## Trigger the PHLO
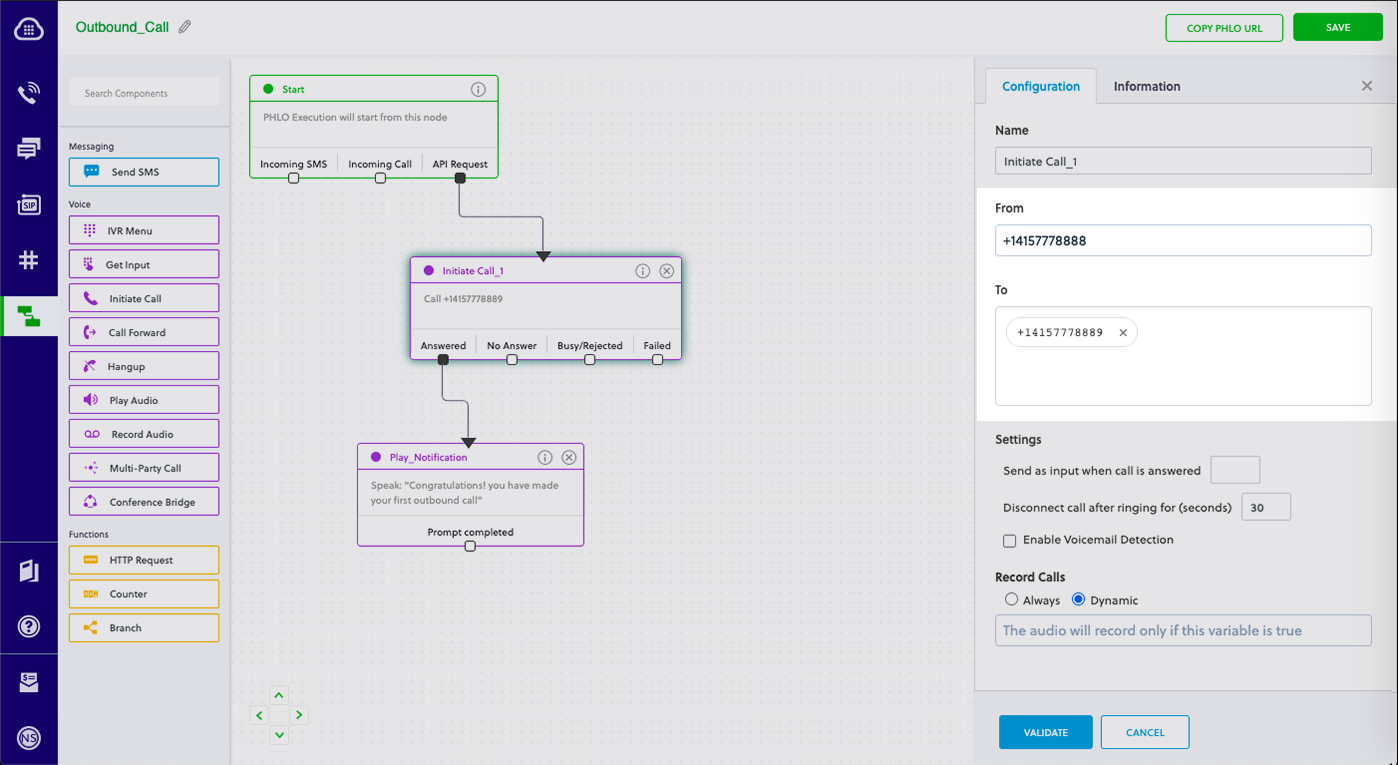
Create and configure a PHLO, then integrate the PHLO into your application workflow by making an API request to trigger the PHLO with the required payload.
You can run a PHLO with static payload values by entering specific values in fields like `from` and `to` on the PHLO console.
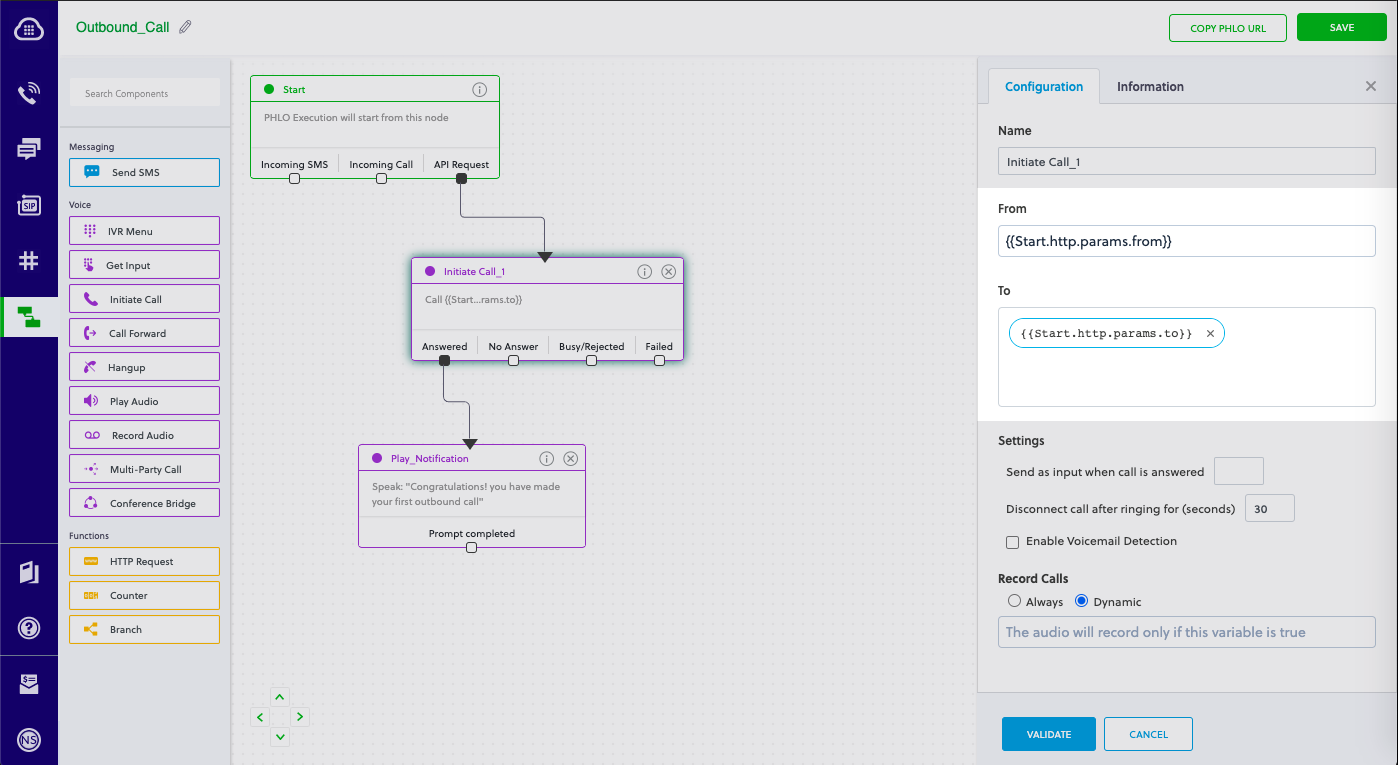
 To deliver a dynamic payload instead of a static one, define the payload keys as [Liquid](https://shopify.github.io/liquid/) templates on the PHLO console and pass the values at runtime.
 ### Create a Rails controller
Now you can create a file in the project directory and execute code to trigger any Plivo API. Change to the newly created plivotest project directory and run this command to create a Rails controller for outbound calls.
```shell theme={null}
rails generate controller Plivo voice
```
This command generates a controller named plivo\_controller in the app/controllers/ directory and a view in app/views/plivo. You can delete the view — we don’t need it.
```shell theme={null}
rm app/views/plivo/voice.html.erb
```
Edit the app/controllers/plivo\_controller.rb file and paste into it the code below for either a static or dynamic payload:
### Static payload
```rb theme={null}
require 'rubygems'
require 'plivo'
include Plivo
AUTH_ID = ''
AUTH_TOKEN = ''
client = Phlo.new(AUTH_ID, AUTH_TOKEN)
# if credentials are stored in the PLIVO_AUTH_ID and the PLIVO_AUTH_TOKEN environment variables
# then initialize client as:
# client = Phlo.new
begin
phlo = client.phlo.get('')
#parameters set in PHLO - params
params = {
from: '',
to: ''
}
response = phlo.run(params)
puts response
rescue PlivoRESTError => e
puts 'Exception: ' + e.message
end
```
### Dynamic payload
```rb theme={null}
require 'rubygems'
require 'plivo'
include Plivo
AUTH_ID = ''
AUTH_TOKEN = ''
client = Phlo.new(AUTH_ID, AUTH_TOKEN)
# if credentials are stored in the PLIVO_AUTH_ID and the PLIVO_AUTH_TOKEN environment variables
# then initialize client as:
# client = Phlo.new
begin
phlo = client.phlo.get('')
response = phlo.run()
puts response
rescue PlivoRESTError => e
puts 'Exception: ' + e.message
end
```
Note:
### Create a Rails controller
Now you can create a file in the project directory and execute code to trigger any Plivo API. Change to the newly created plivotest project directory and run this command to create a Rails controller for outbound calls.
```shell theme={null}
rails generate controller Plivo voice
```
This command generates a controller named plivo\_controller in the app/controllers/ directory and a view in app/views/plivo. You can delete the view — we don’t need it.
```shell theme={null}
rm app/views/plivo/voice.html.erb
```
Edit the app/controllers/plivo\_controller.rb file and paste into it the code below for either a static or dynamic payload:
### Static payload
```rb theme={null}
require 'rubygems'
require 'plivo'
include Plivo
AUTH_ID = ''
AUTH_TOKEN = ''
client = Phlo.new(AUTH_ID, AUTH_TOKEN)
# if credentials are stored in the PLIVO_AUTH_ID and the PLIVO_AUTH_TOKEN environment variables
# then initialize client as:
# client = Phlo.new
begin
phlo = client.phlo.get('')
#parameters set in PHLO - params
params = {
from: '',
to: ''
}
response = phlo.run(params)
puts response
rescue PlivoRESTError => e
puts 'Exception: ' + e.message
end
```
### Dynamic payload
```rb theme={null}
require 'rubygems'
require 'plivo'
include Plivo
AUTH_ID = ''
AUTH_TOKEN = ''
client = Phlo.new(AUTH_ID, AUTH_TOKEN)
# if credentials are stored in the PLIVO_AUTH_ID and the PLIVO_AUTH_TOKEN environment variables
# then initialize client as:
# client = Phlo.new
begin
phlo = client.phlo.get('')
response = phlo.run()
puts response
rescue PlivoRESTError => e
puts 'Exception: ' + e.message
end
```
Note:
- Replace the placeholders `<auth_id>` and `<auth_token>` with your authentication credentials, which you can find on the overview page of the Plivo console.
- We recommend that you store your credentials in the `auth_id` and `auth_token` environment variables to avoid the possibility of accidentally committing them to source control. If you do this, you can initialize the client with no arguments and it will automatically fetch the values from the environment variables.
- Replace the placeholder `<phlo_id>` with the PHLO\_ID from the PHLO list screen of the Plivo console.
- Replace the placeholder `<Caller_ID>` with a phone number you’ve purchased, and `<Destination_Number>` with the phone number you’ll be calling. Both phone numbers should be in E.164 format.
### Add a route
To add a route for the outbound function in the PlivoController class, open the config/routes.rb file and change the line:
```shell theme={null}
get 'plivo/voice'
```
to
```shell theme={null}
get 'plivo/outbound'
```
Now plivo\_controller is ready. Use this command to initiate an outbound call.
```shell theme={null}
rails server
```
Your local development server will be started and you can test the application for outbound calls via the URL [http://localhost:3000/plivo/outbound/](http://localhost:3000/plivo/outbound/).
Note: If you’re using a free trial account you must verify (sandbox) your destination number, unless you use the phone number you used for signup verification as your destination number. We require this as a security measure to avoid abuse. To sandbox a number in a Plivo trial account, visit Phone Numbers > Sandbox Numbers and click on Add Sandbox Number.