> ## Documentation Index
> Fetch the complete documentation index at: https://plivo.com/docs/llms.txt
> Use this file to discover all available pages before exploring further.
# Plivo iOS SDK — Setting Up Push Credentials
> Configure iOS PushKit credentials for incoming call notifications
This document explains how to get the credentials you need in order to receive incoming calls on the Plivo iOS SDK using PushKit. To receive an incoming call, you must:
1. Enable VoIP services in your application.
2. Create a VoIP Service Certificate.
3. Create a provisioning profile for your app.
4. Create a push credential (.p12 file) using the VoIP certificate.
5. Update the information on the Plivo console.
Let’s see how to accomplish each of these steps.
## Enable VoIP services in your application
To enable VoIP services from Xcode, select the Capabilities tab, then:
1. Make sure Push Notifications and Background Modes are added.
2. Within Background Modes, enable Audio, AirPlay, and Picture in Picture; Voice over IP; Background Fetch; and Remote Notifications settings.
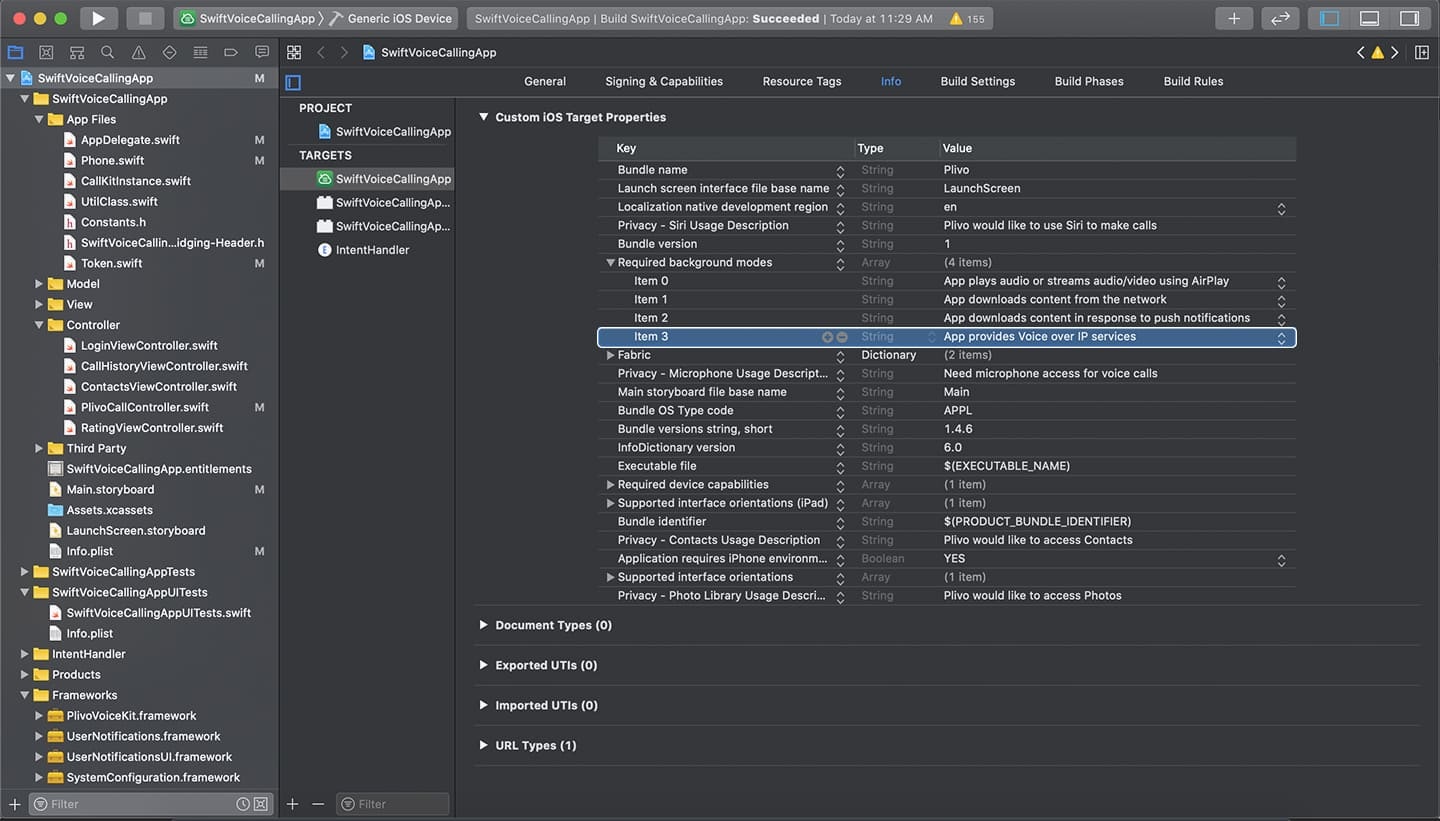
 3. On the Info tab, add “App provides Voice over IP services” to the list of Required Background Modes.
 ## Create a VoIP Service Certificate
To create a VoIP Service Certificate, create a certificate signing request (CSR), then create the service certificate using the CSR.
### Create a Certificate Signing Request (CSR)
Certificate signing request (CSR) is a prerequisite for creating a certificate in the iOS [Dev Center](https://developer.apple.com/membercenter). To generate the CSR:
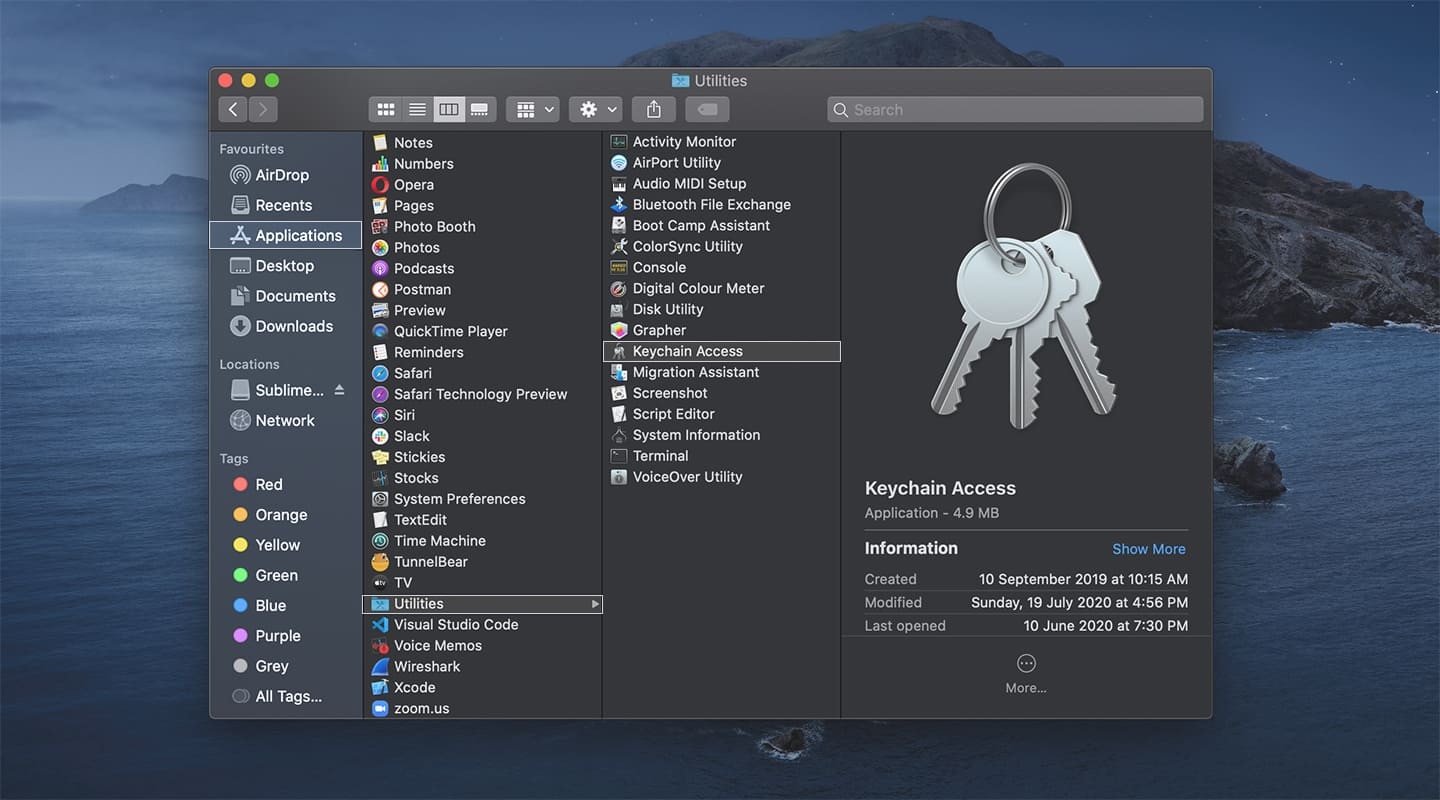
1. Open Keychain access by selecting "Keychain Access" in Utilities folder.
## Create a VoIP Service Certificate
To create a VoIP Service Certificate, create a certificate signing request (CSR), then create the service certificate using the CSR.
### Create a Certificate Signing Request (CSR)
Certificate signing request (CSR) is a prerequisite for creating a certificate in the iOS [Dev Center](https://developer.apple.com/membercenter). To generate the CSR:
1. Open Keychain access by selecting "Keychain Access" in Utilities folder.
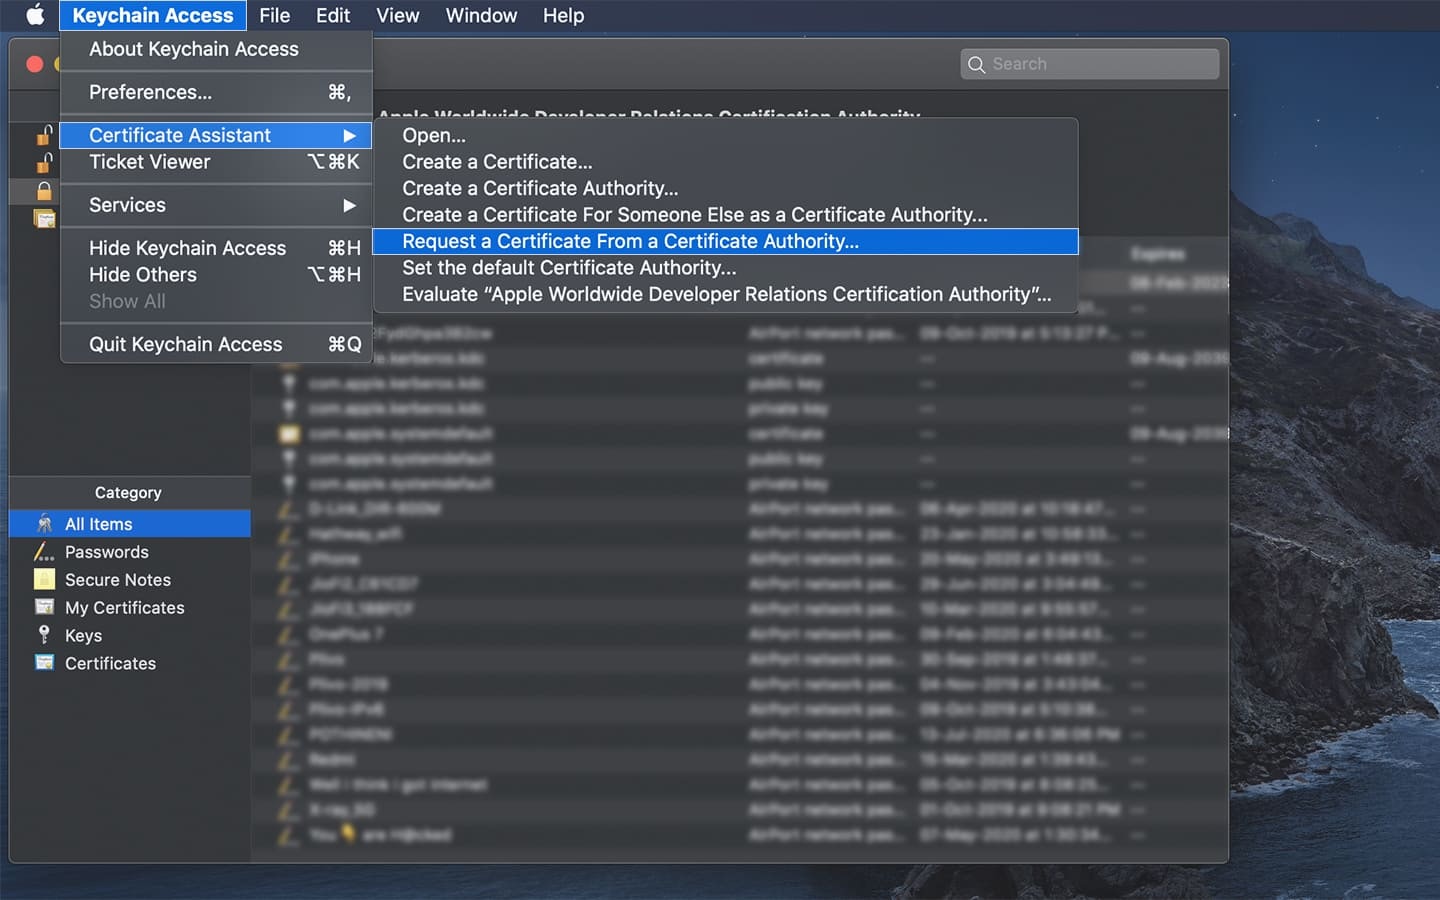
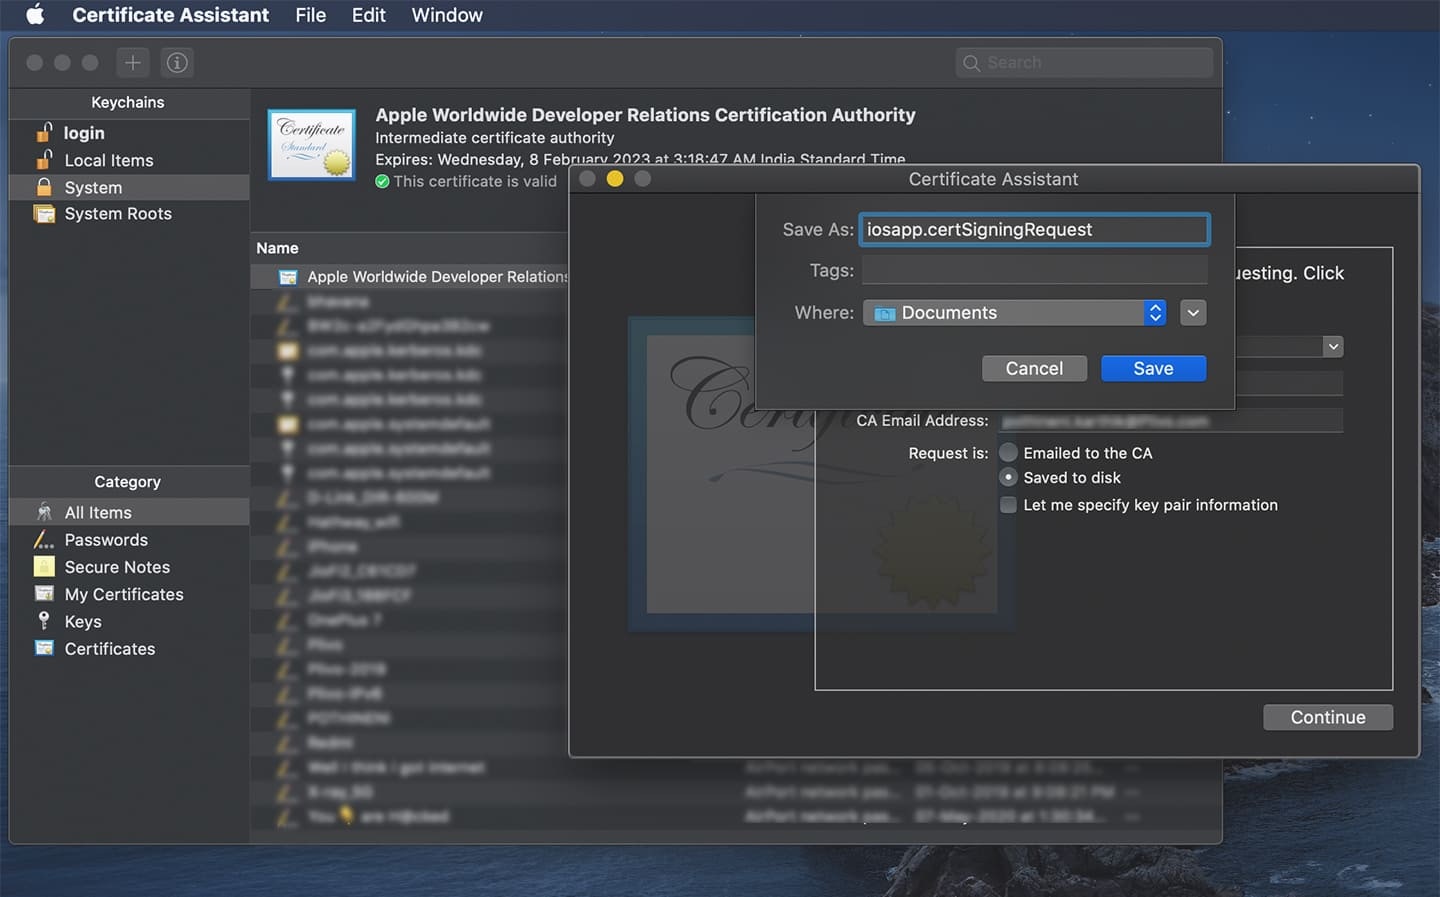
 2. From the "Keychain Access" menu, navigate to **Certificate Assistant** > **Request a Certificate From a Certificate Authority**.
 3. Enter a descriptive name for your CSR. For example, iosplivoapp.certSigningRequest.
4. Choose the location to save it on your hard drive, and then click **Save**.
3. Enter a descriptive name for your CSR. For example, iosplivoapp.certSigningRequest.
4. Choose the location to save it on your hard drive, and then click **Save**.
 5. Login to the [Apple Developer Console](https://developer.apple.com/).
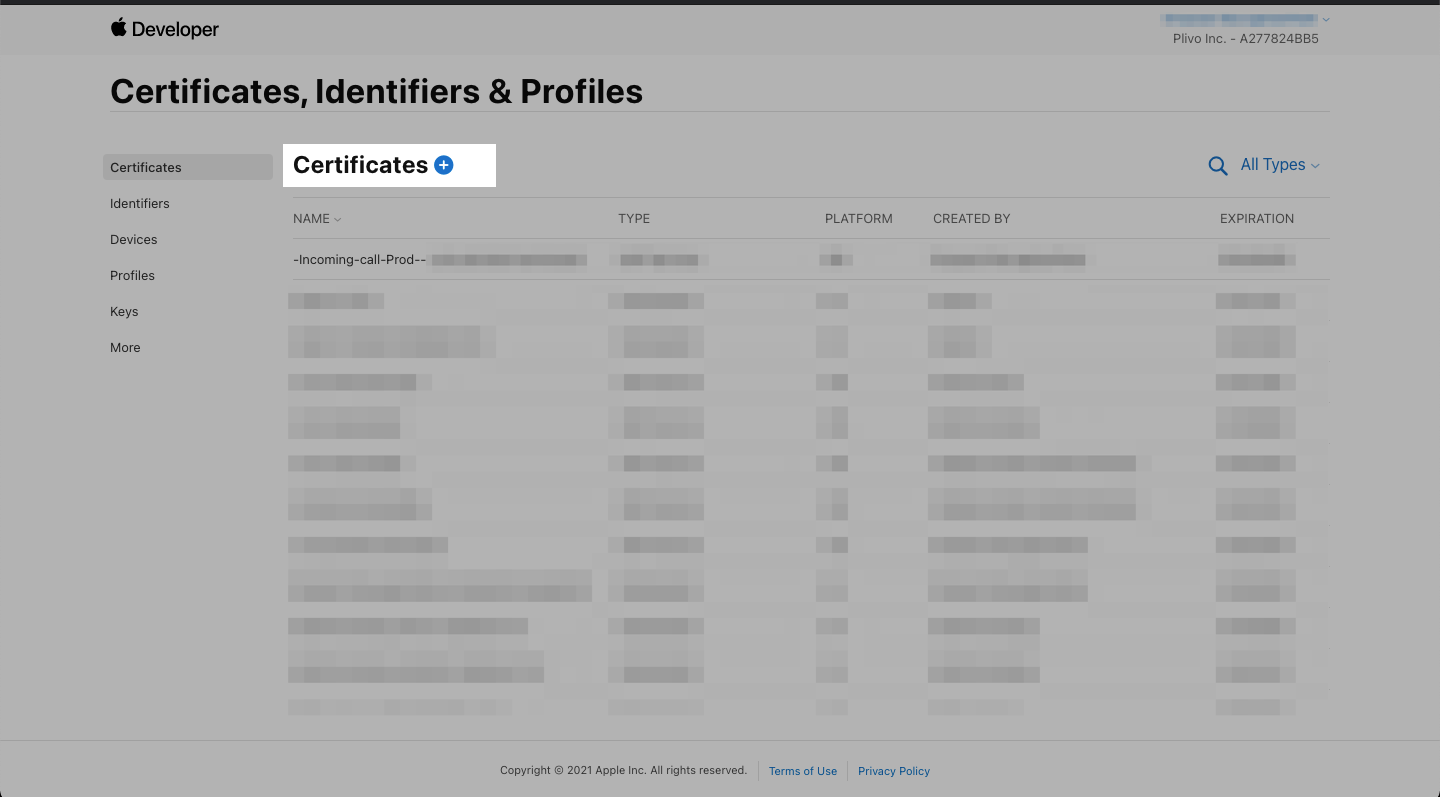
 6. Navigate to [Certificates, Identifiers & Profiles](https://developer.apple.com/account/resources/certificates/list) page and click '+' to add a new certificate.
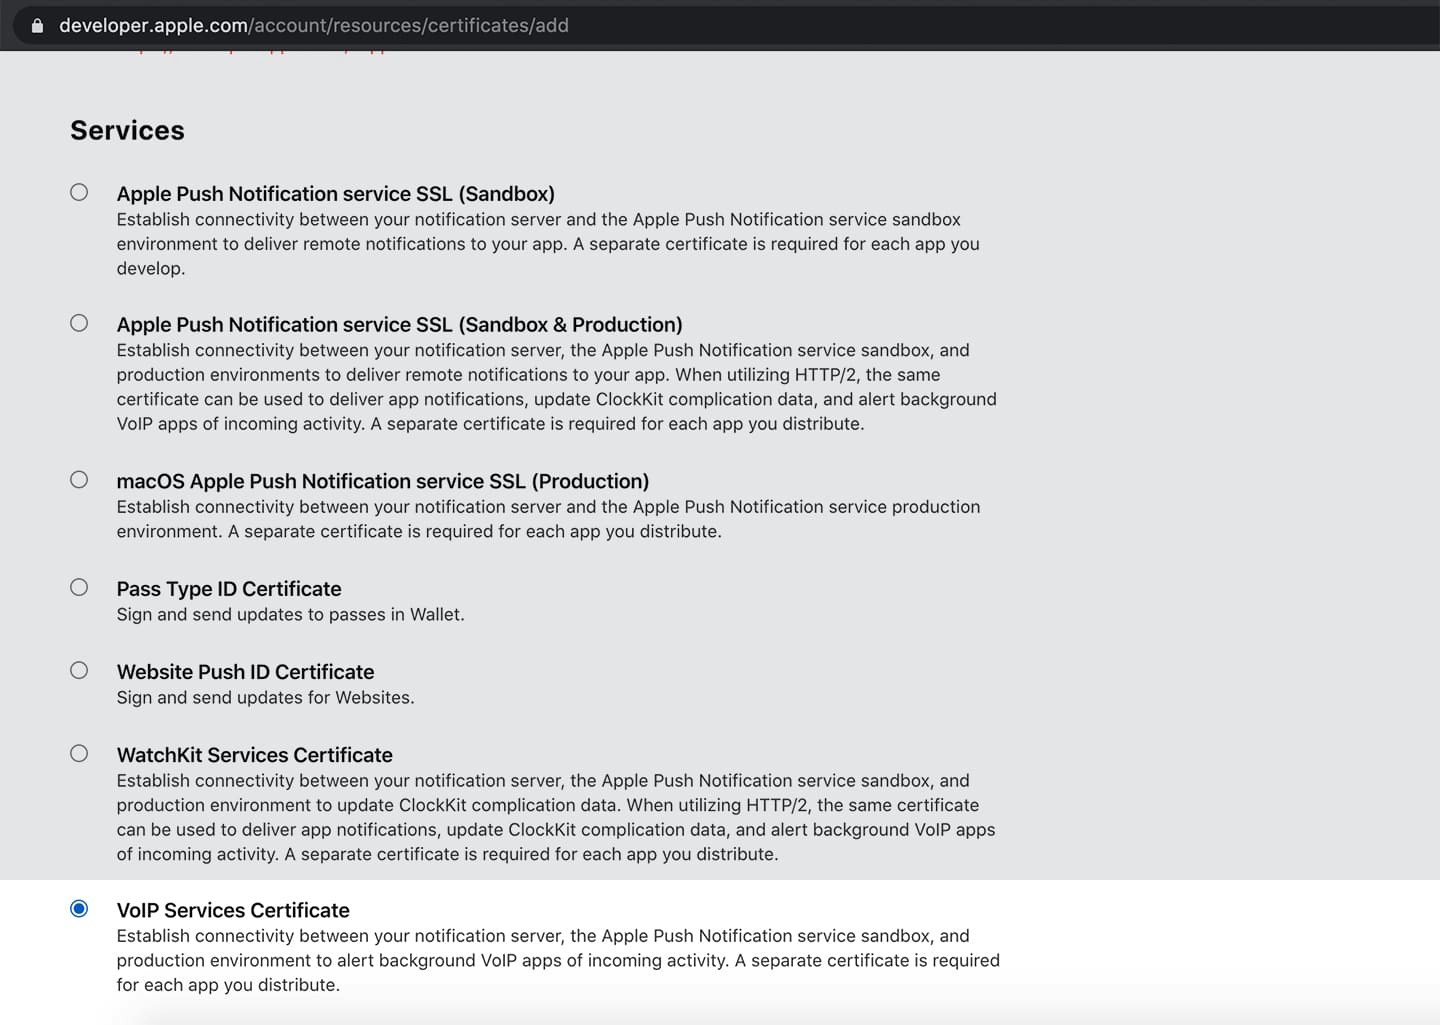
 7. In the certificate type, select 'VoIP Services Certificate', and then click 'Continue'.
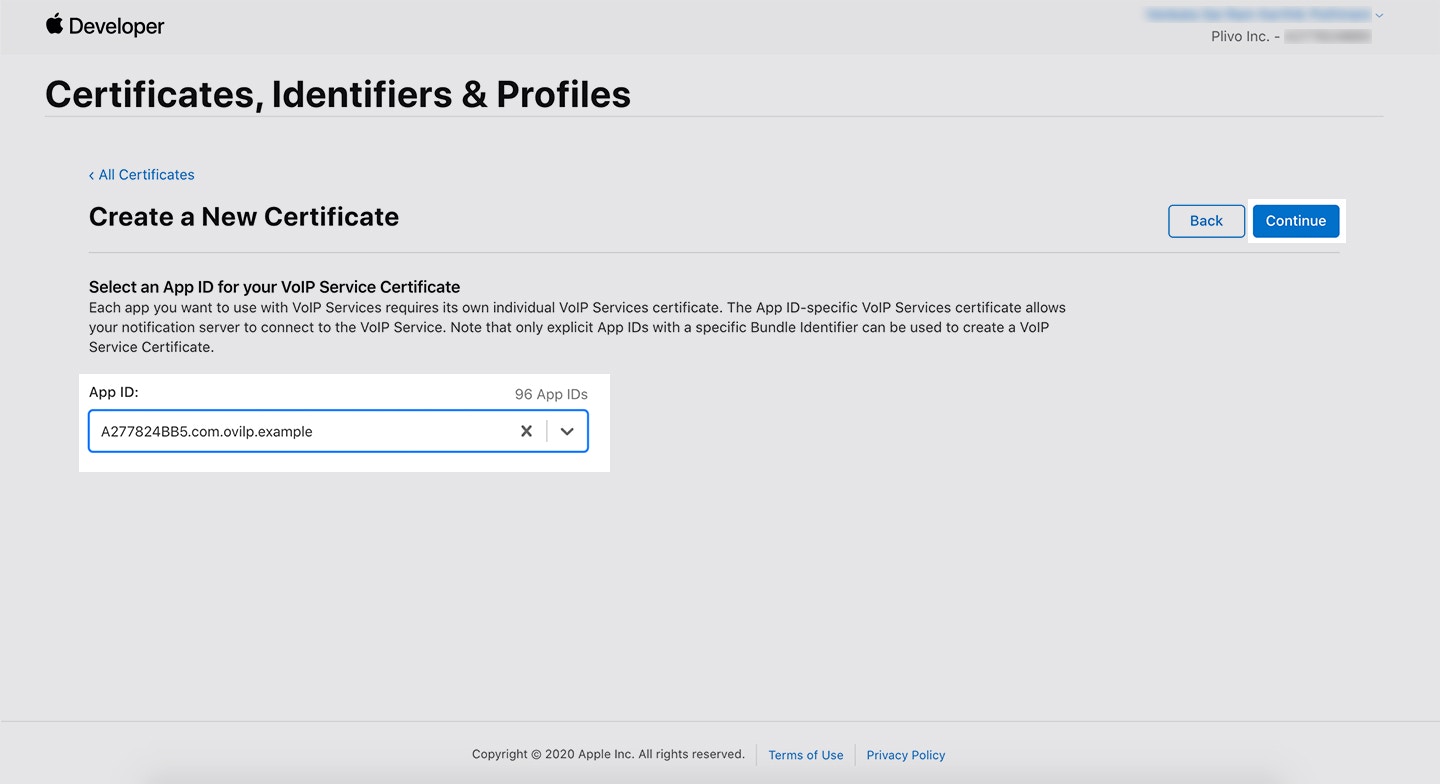
 8. Click 'Continue' to proceed.
9. From the App ID list, select the App ID associated with your app.
8. Click 'Continue' to proceed.
9. From the App ID list, select the App ID associated with your app.
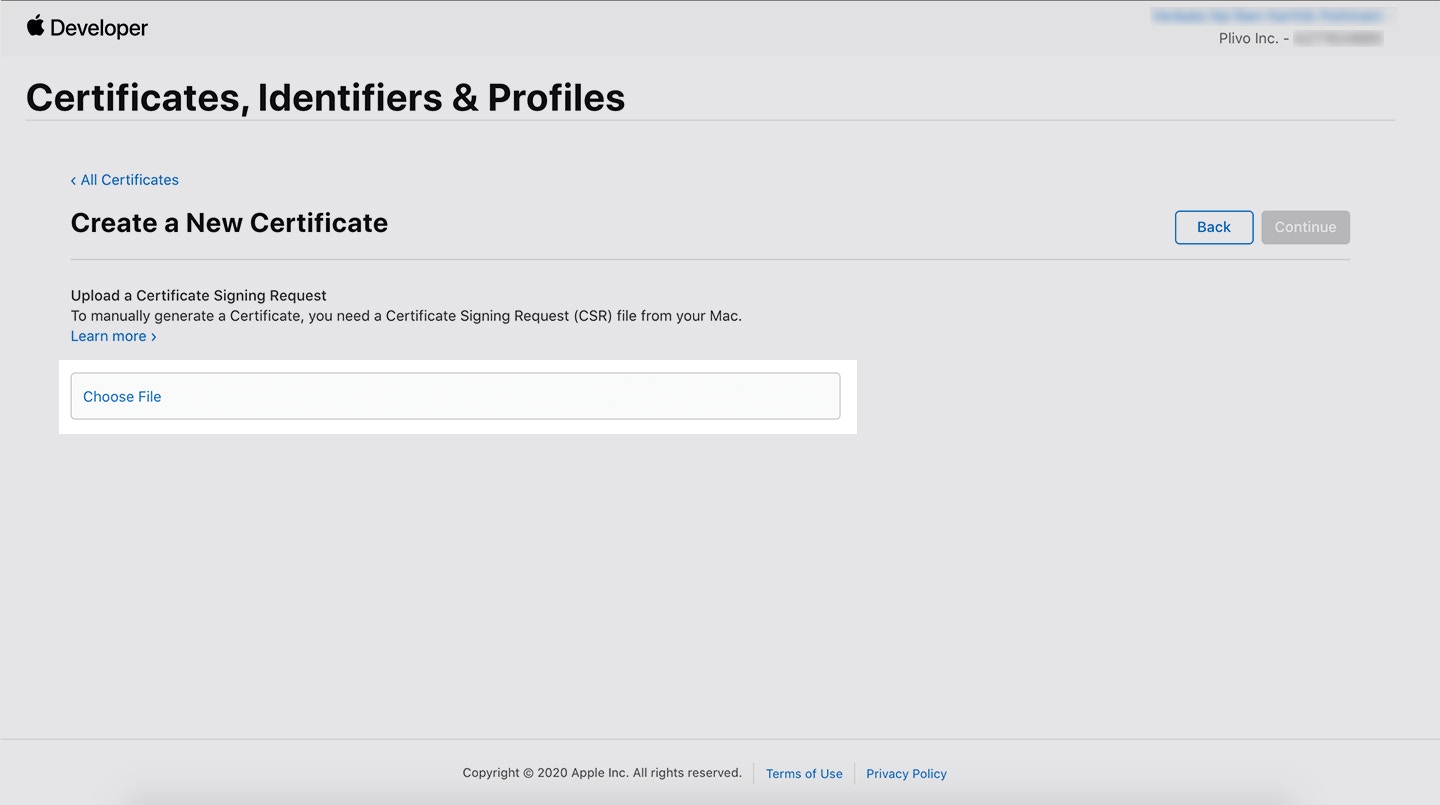
 10. To select and upload the CSR file generated from Keychain, click 'Choose'.
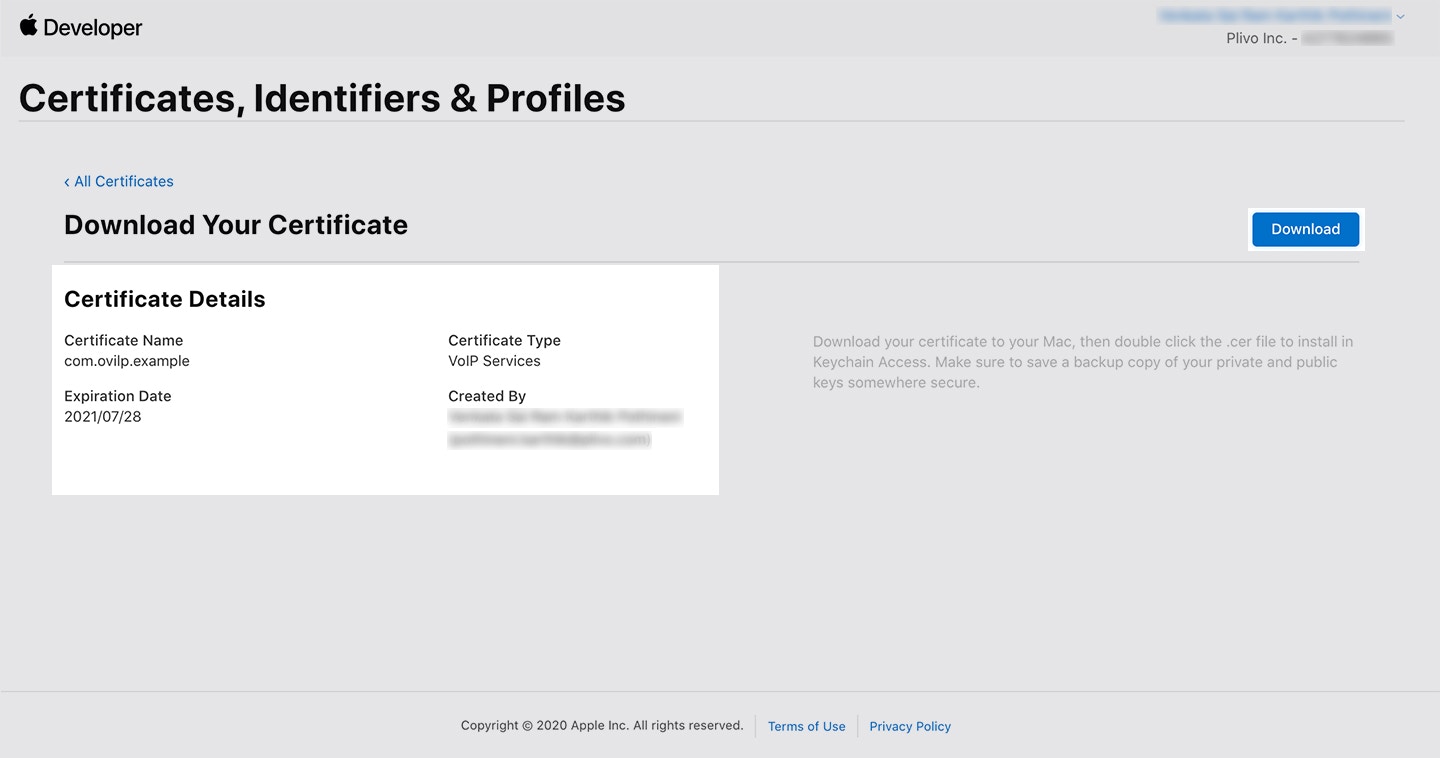
 11. To download and save the VoIP certificate, click 'Download'.
 ## Create a provisioning profile for your app
To create a provisioning profile for your app:
1. Navigate to the Provisioning Profiles section on [Apple Developer Portal](https://developer.apple.com/account/ios/profile/).
2. Click “+” to add a new Provisioning Profile.
### To set up a provisioning profile for a sandbox environment
1. Select iOS App Development as the provisioning profile type.
## Create a provisioning profile for your app
To create a provisioning profile for your app:
1. Navigate to the Provisioning Profiles section on [Apple Developer Portal](https://developer.apple.com/account/ios/profile/).
2. Click “+” to add a new Provisioning Profile.
### To set up a provisioning profile for a sandbox environment
1. Select iOS App Development as the provisioning profile type.
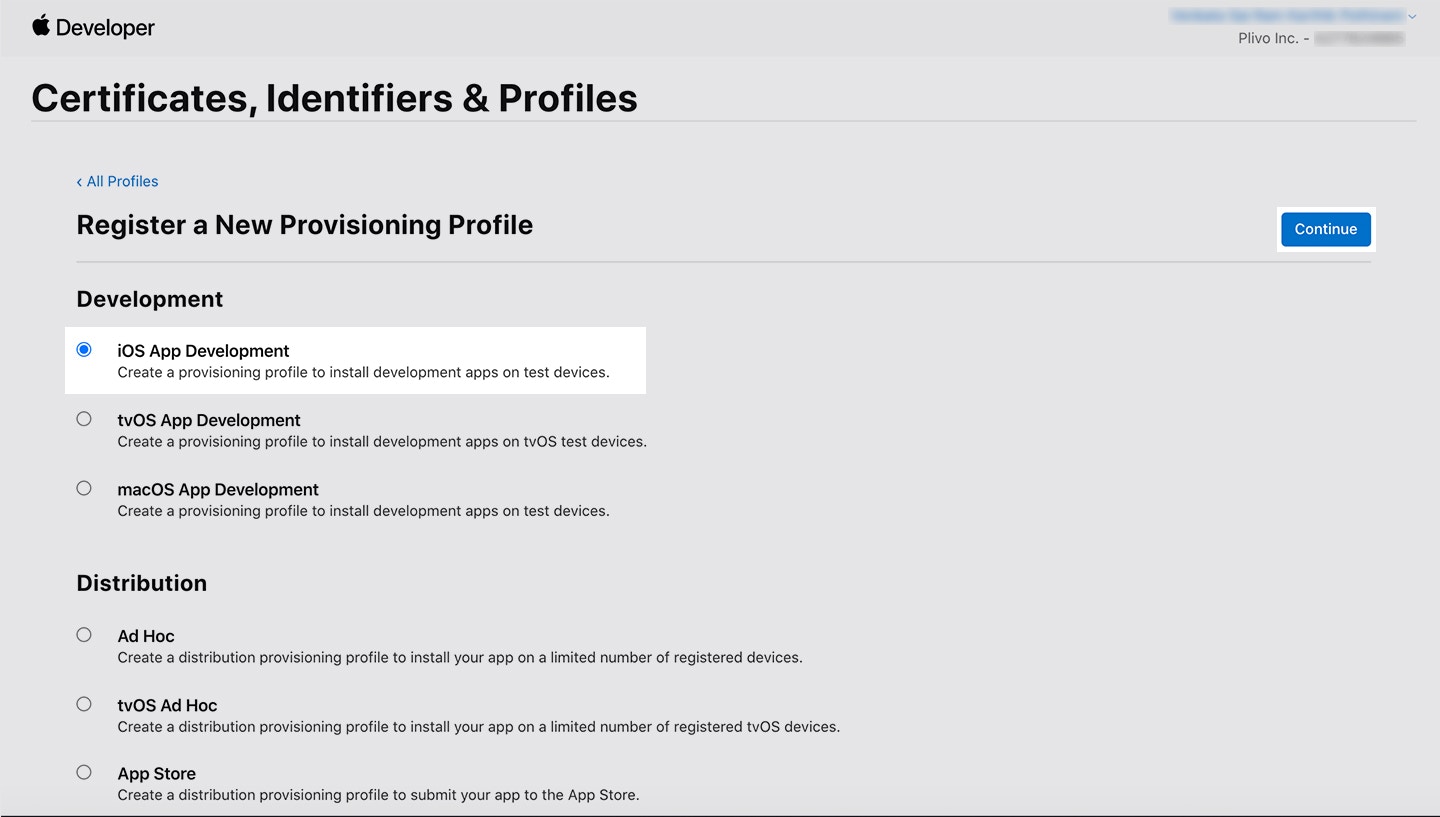 2. Click Continue.
3. Select your App ID.
4. Select the developer certificates you’d like to include in this provisioning profile.
5. Select the developer devices you’d like to include in this provisioning profile.
6. Enter a name for the provisioning profile.
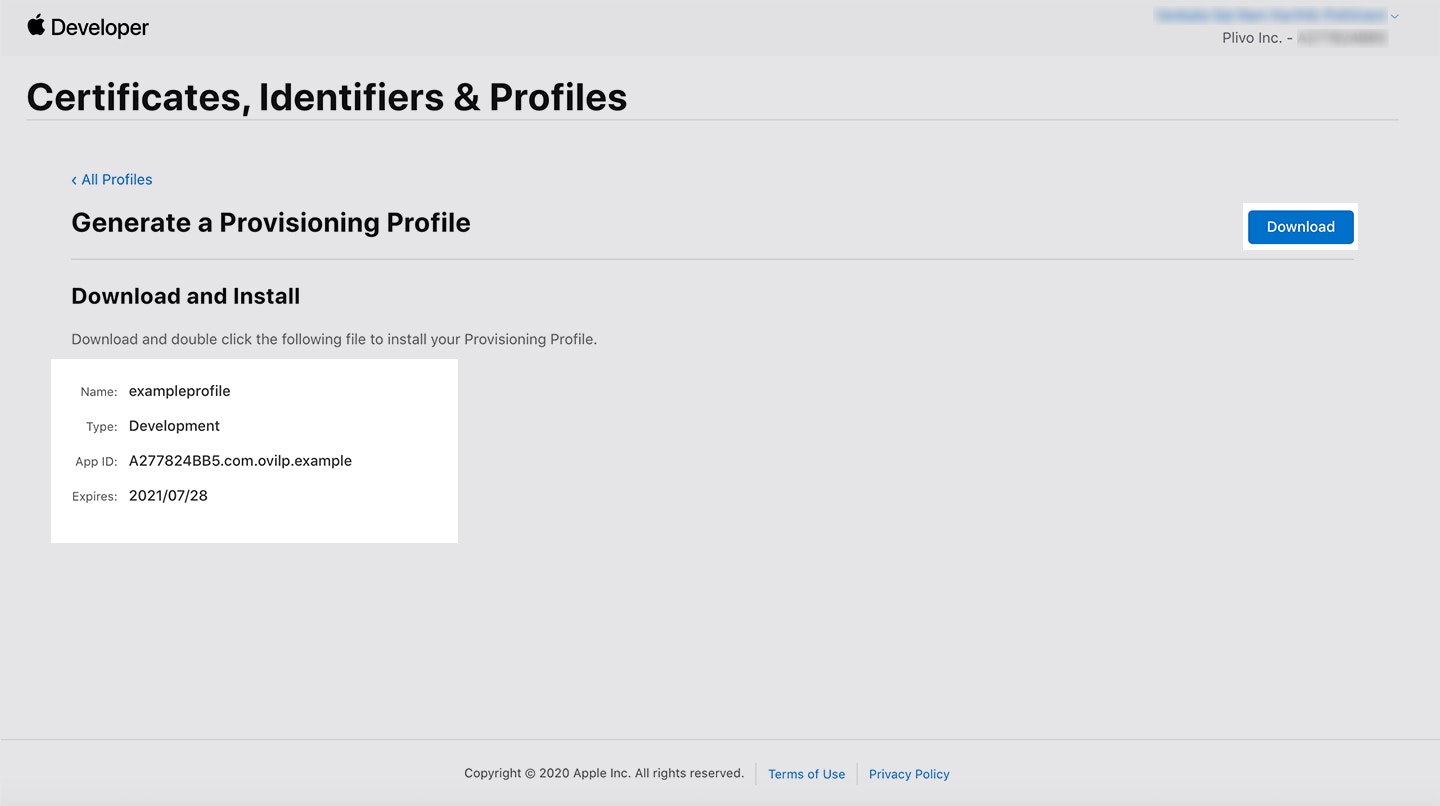
7. Click Download to download and save the generated profile.
2. Click Continue.
3. Select your App ID.
4. Select the developer certificates you’d like to include in this provisioning profile.
5. Select the developer devices you’d like to include in this provisioning profile.
6. Enter a name for the provisioning profile.
7. Click Download to download and save the generated profile.
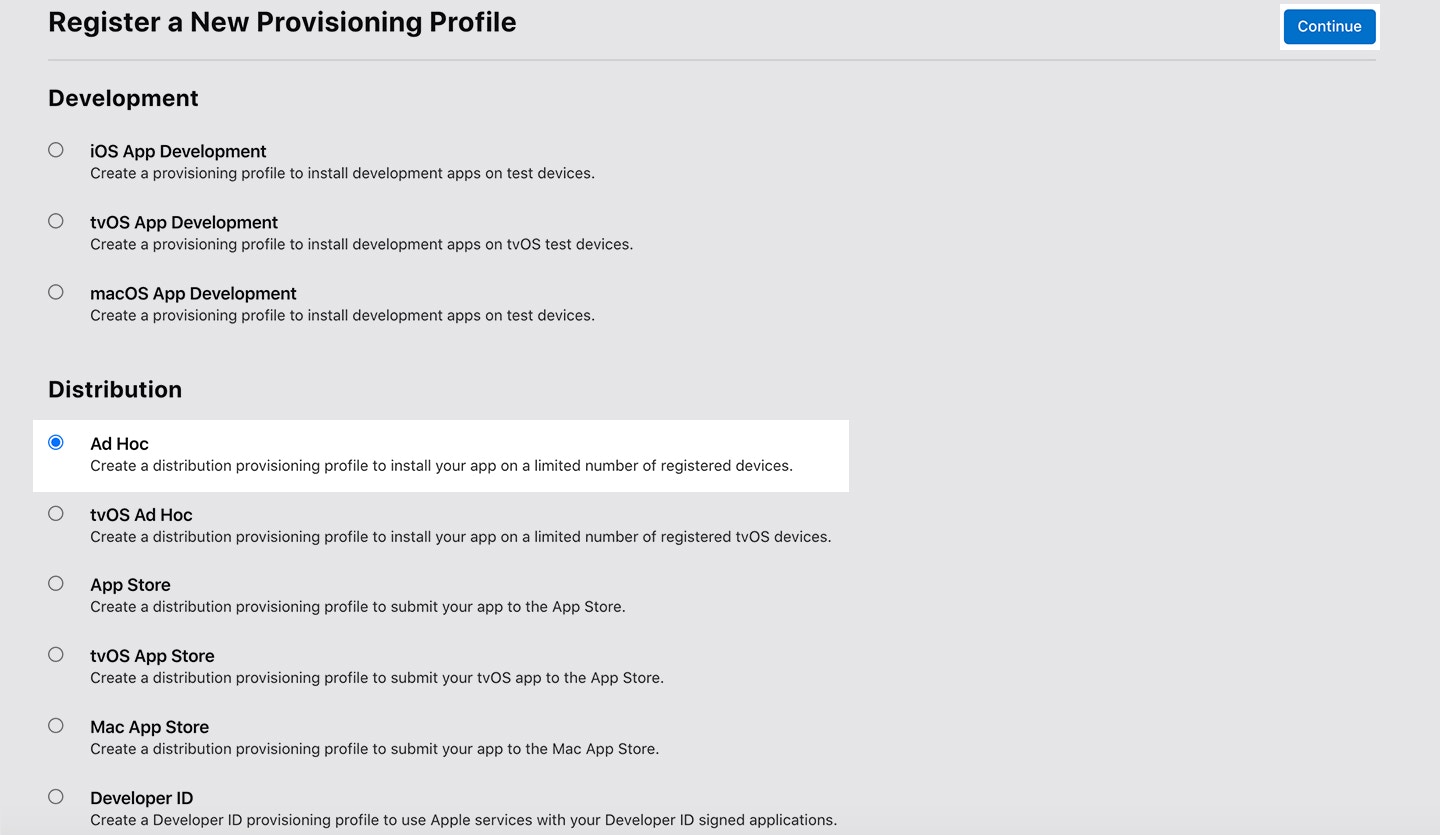
 ### To set up a provisioning profile for a production environment
1. If you intend to submit your app to the app store, select App Store under Distribution for the production environment. Otherwise, select the Ad Hoc distribution type.
### To set up a provisioning profile for a production environment
1. If you intend to submit your app to the app store, select App Store under Distribution for the production environment. Otherwise, select the Ad Hoc distribution type.
 2. Click Continue.
3. Select your App ID.
4. Select the iOS distribution certificate you wish to include in this provisioning profile. This should be the App Store or Ad Hoc certificate for your production app.
5. Enter a name the provisioning profile.
6. Click Download to download and save the generated profile.
2. Click Continue.
3. Select your App ID.
4. Select the iOS distribution certificate you wish to include in this provisioning profile. This should be the App Store or Ad Hoc certificate for your production app.
5. Enter a name the provisioning profile.
6. Click Download to download and save the generated profile.
 **Note:**
The file is downloaded with a .mobileprovision extension.
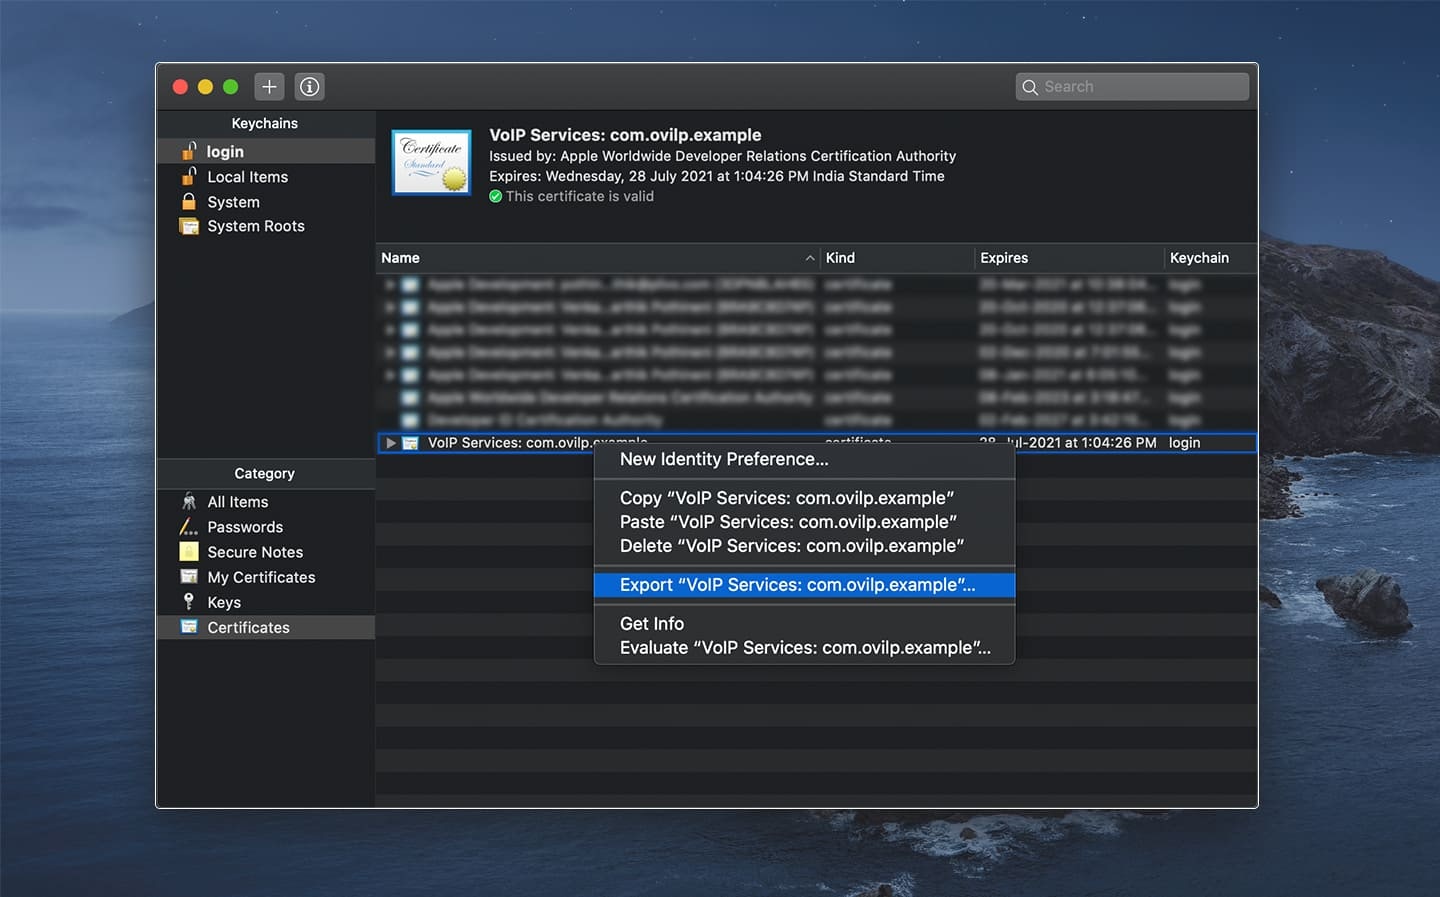
## Create a push credential with your VoIP Service Certificate
To create push credentials with your VoIP Service Certificate:
1. Export your VoIP Service Certificate as a **.p12** file from Keychain Access.
**Note:**
The file is downloaded with a .mobileprovision extension.
## Create a push credential with your VoIP Service Certificate
To create push credentials with your VoIP Service Certificate:
1. Export your VoIP Service Certificate as a **.p12** file from Keychain Access.
 2. Enter a unique name for the certificate, then click Save.
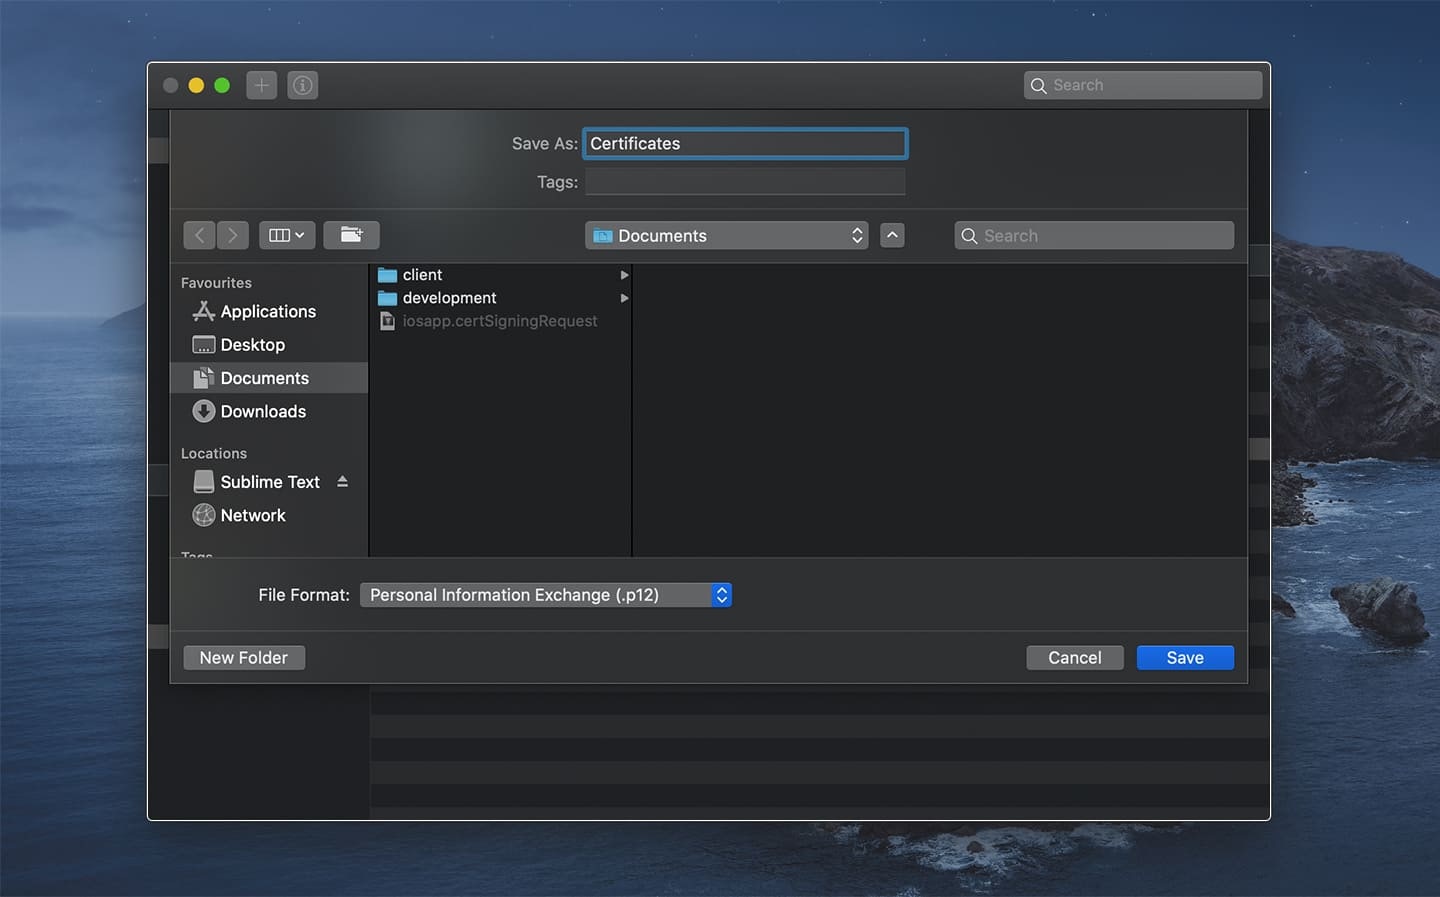 **Note:**
You need not enter a password to create the .p12 file. Click OK if you’re prompted to enter a password to protect the exported item. The app private key will get stored in .p12 format.
**Note:**
You need not enter a password to create the .p12 file. Click OK if you’re prompted to enter a password to protect the exported item. The app private key will get stored in .p12 format.
 ## Update the information on the Plivo console
The certificate key and the private key need to be generated from the .p12 file. To generate the files:
### 1. Create a certificate key
In a terminal window, generate the certificate key by running:
```shell theme={null}
openssl pkcs12 -in VOIP_SNS.p12 -nokeys -out cert.pem -nodes
```
### 2. Create a private key
Generate the private key by running:
```shell theme={null}
openssl pkcs12 -in Certificates.p12 -nocerts -out key.pem -nodes
```
Then, to process the RSA key, run:
```shell theme={null}
openssl rsa -in key.pem -out key.pem
```
The RSA key and certificate will be generated.
### 3. Updating the information on the Plivo console
**Note:**
You can change the environment from sandbox to production, but not from production to sandbox. To change your environment to sandbox from production, delete the certificate and create a new one for sandbox. If you delete the production certificate, you’ll stop receiving incoming calls by all live apps.
1. From the certificate file, strip anything outside of —–BEGIN CERTIFICATE—– and —–END CERTIFICATE—– boundaries.
2. From the key file, strip anything outside of —–BEGIN RSA PRIVATE KEY—– and —–END RSA PRIVATE KEY—– boundaries.
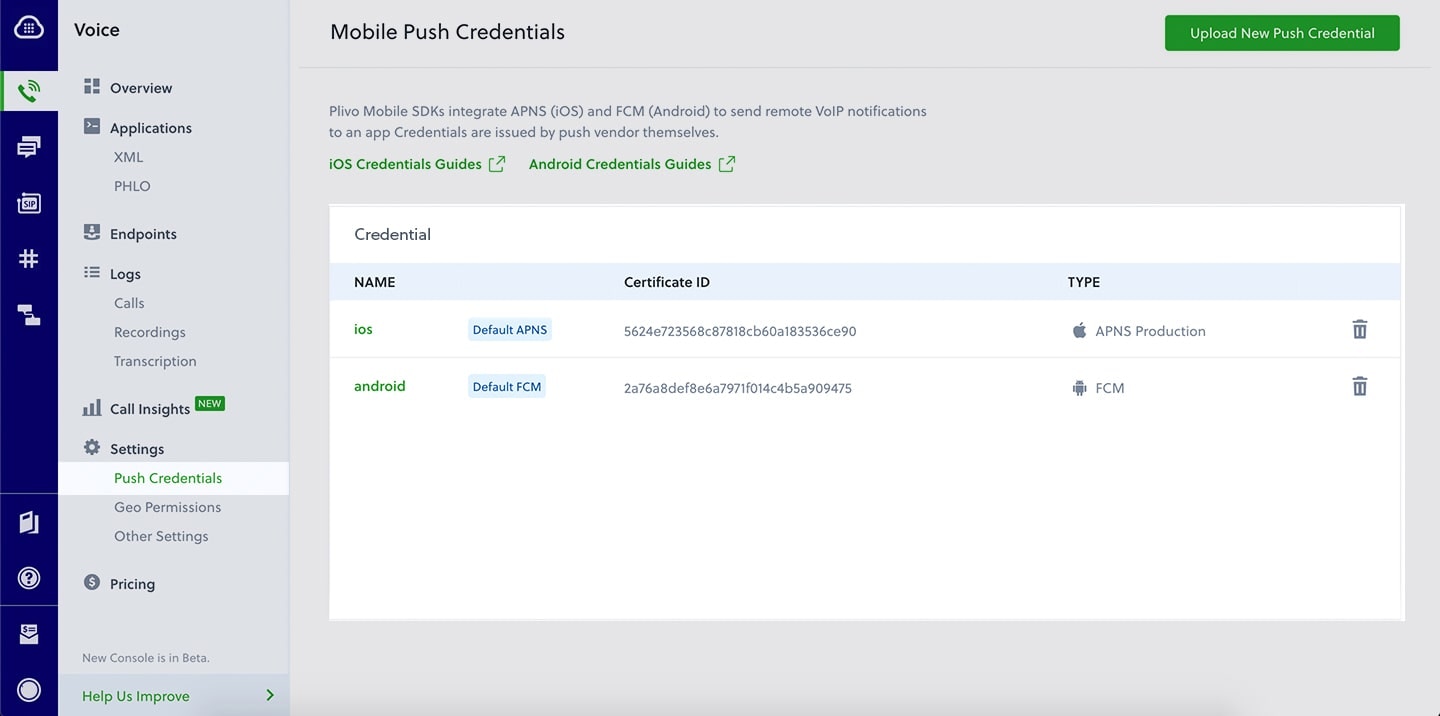
3. In the Plivo console, go to Voice > [Push Credentials](https://cx.plivo.com/home) and paste the text from the respective files in the Certificate and Private Key boxes.
## Update the information on the Plivo console
The certificate key and the private key need to be generated from the .p12 file. To generate the files:
### 1. Create a certificate key
In a terminal window, generate the certificate key by running:
```shell theme={null}
openssl pkcs12 -in VOIP_SNS.p12 -nokeys -out cert.pem -nodes
```
### 2. Create a private key
Generate the private key by running:
```shell theme={null}
openssl pkcs12 -in Certificates.p12 -nocerts -out key.pem -nodes
```
Then, to process the RSA key, run:
```shell theme={null}
openssl rsa -in key.pem -out key.pem
```
The RSA key and certificate will be generated.
### 3. Updating the information on the Plivo console
**Note:**
You can change the environment from sandbox to production, but not from production to sandbox. To change your environment to sandbox from production, delete the certificate and create a new one for sandbox. If you delete the production certificate, you’ll stop receiving incoming calls by all live apps.
1. From the certificate file, strip anything outside of —–BEGIN CERTIFICATE—– and —–END CERTIFICATE—– boundaries.
2. From the key file, strip anything outside of —–BEGIN RSA PRIVATE KEY—– and —–END RSA PRIVATE KEY—– boundaries.
3. In the Plivo console, go to Voice > [Push Credentials](https://cx.plivo.com/home) and paste the text from the respective files in the Certificate and Private Key boxes.
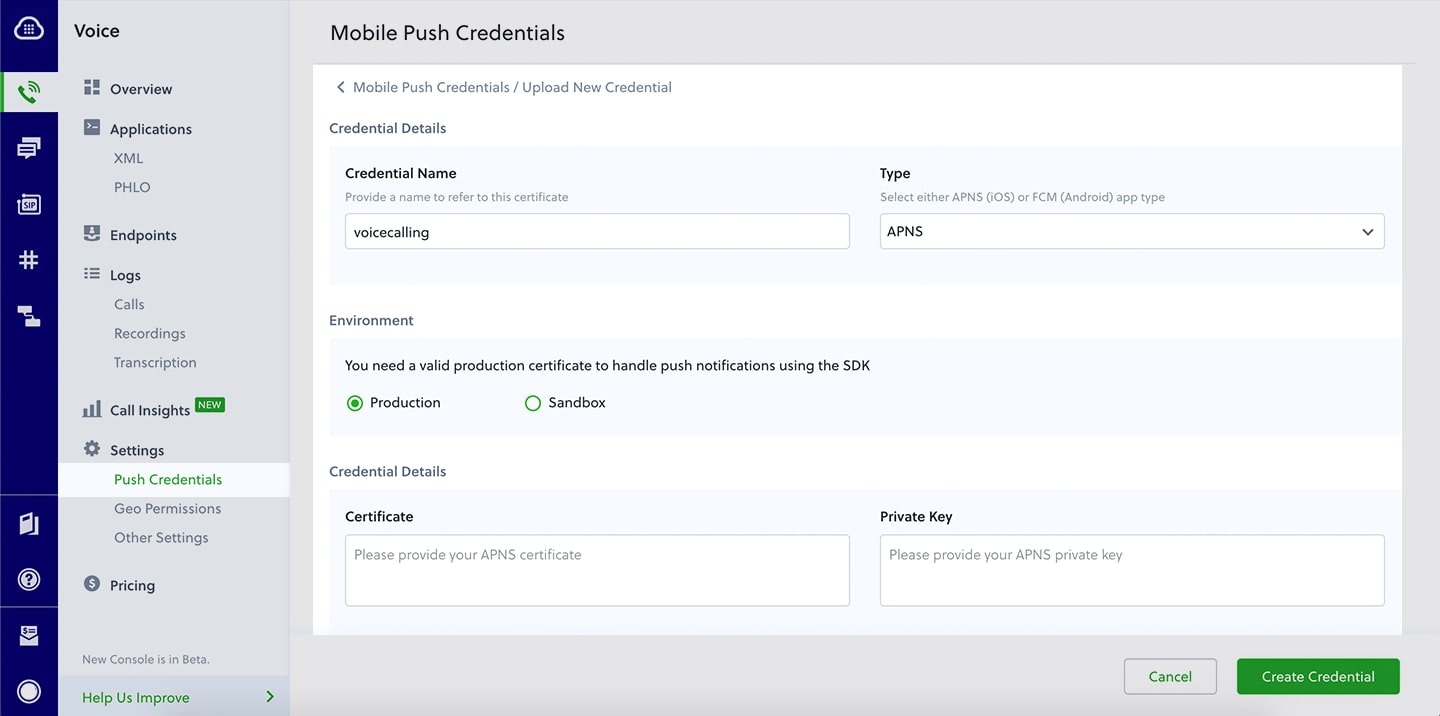 Based on the types of profile and certificate generated from Apple Developer console, choose either **Production** or **Sandbox** environment.
4. Click **Create Credential** to update the changes.
Based on the types of profile and certificate generated from Apple Developer console, choose either **Production** or **Sandbox** environment.
4. Click **Create Credential** to update the changes.