> ## Documentation Index
> Fetch the complete documentation index at: https://plivo.com/docs/llms.txt
> Use this file to discover all available pages before exploring further.
# Get Started with Node.js Using the Sails Framework
> Send your first SMS using Node.js and Sails with Plivo APIs
## Sign up for a Plivo account
When you [sign up with Plivo](https://cx.plivo.com/signup), we give you a free trial account and free credits to experiment with and learn about our services. You can [add a number](https://cx.plivo.com/phone-numbers) to your account to start testing the full range of our voice and SMS service features.
Follow these steps to get a free trial account:
1. [Sign up](https://cx.plivo.com/signup) with your work email address.
2. Check your inbox for an activation email message from Plivo. Click on the link in the message to activate your account.
3. Enter your mobile number to complete the phone verification step.
### Sign up with your work email address
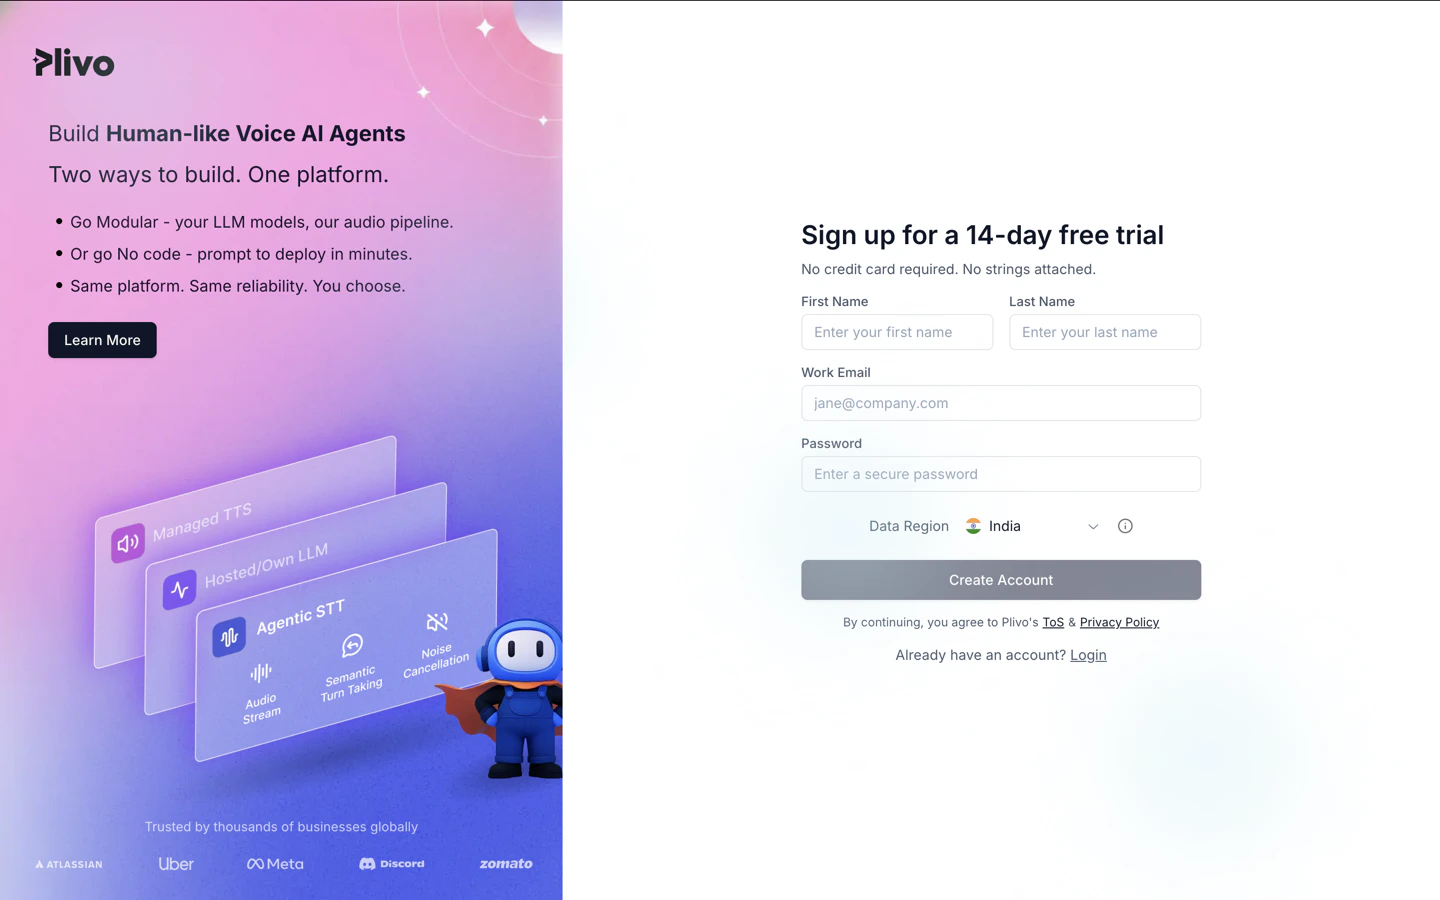 If you have any issues creating a Plivo account, please contact our [support team](https://support.plivo.com/hc/en-us/) for assistance.
To get started, try sending an SMS message either by using our API and XML documents, or via {/* [PHLO](/docs/phlo/getting-started/getting-started) */}, our visual design tool, which allows you to create message flows using an intuitive canvas and deploy them with few clicks.
## Install Node.js, Sails, and the Plivo Node.js SDK
You must set up and install Node.js, Sails, and Plivo’s Node SDK before you send your first SMS message.
### Install Node.js
You can check whether you have Node.js installed under macOS or Linux by running the command `node --version` in a terminal window. Under Windows, open a Windows command prompt or PowerShell and type `node -v`. If you don’t have Node.js installed or want a more current version, download and install it.
### Install Sails
Install Sails using [npm](https://www.npmjs.com/package/sails).
```shell theme={null}
$ npm install sails -g
```
Choose the npm package manager when prompted for which package manager to use.
Create a new (empty) Sails project and change to the project directory.
```shell theme={null}
$ sails new
$ cd
```
### Install the Plivo Node.js SDK
Install the Plivo Node.js SDK using [npm](https://www.npmjs.com/package/plivo).
```shell theme={null}
$ npm install plivo
```
Once you’ve set up your development environment, you can start sending and receiving messages using our APIs and XML documents. Here are three common use cases to get you started.
## Send your first outbound SMS/MMS message
You must have a Plivo phone number to send messages to the US or Canada; you can rent a Plivo number from Phone Numbers > [Buy Numbers](https://cx.plivo.com/phone-numbers) on the Plivo console or via the [Numbers API](/docs/numbers/phone-numbers#buy-a-phone-number).
### Create a Sails controller
Create a new controller called “hello.”
```shell theme={null}
$ sails generate controller hello
```
Edit api/controllers/HelloController.js and paste into it this code.
```js theme={null}
var plivo = require('plivo');
module.exports = {
send_sms: function(req, res) {
var client = new plivo.Client("", "");
client.messages.create({
src: "",
dst: "",
text: "Hello, this is from Sails"
}).then(function(response) {
return res.status(200).json(response);
});
},
};
```
```js theme={null}
var plivo = require('plivo');
module.exports = {
send_sms: function(req, res) {
var client = new plivo.Client("", "");
client.messages.create({
src: "",
dst: "",
text: "Hello, MMS from from Sails",
type: 'mms',
media_urls: ['https://media.giphy.com/media/26gscSULUcfKU7dHq/source.gif'],
media_ids: ['801c2056-33ab-499c-80ef-58b574a462a2']
}).then(function(response) {
return res.status(200).json(response);
});
},
};
```
Replace the auth placeholders with your authentication credentials from the [Plivo console](https://cx.plivo.com/home). Replace the phone number placeholders with actual phone numbers in [E.164 format](https://en.wikipedia.org/wiki/E.164) (for example, +12025551234). In countries other than the US and Canada you can use a [sender ID](/docs/messaging/concepts/sender-id-usage/) for the message source.
**Note:** We recommend that you store your credentials in the `auth_id` and `auth_token` environment variables to avoid the possibility of accidentally committing them to source control. If you do this, you can initialize the client with no arguments and Plivo will automatically fetch the values from the environment variables. You can use `process.env` to store environment variables and fetch them when initializing the client.
Edit **config/route.js** to set the route.
```javascript theme={null}
'POST /send_sms' : 'HelloController.send_sms',
```
### Test
Save the file and run it.
```shell theme={null}
$ sails lift
```
You should see your basic server application in action at [http://localhost:1337/send\_sms/](http://localhost:1337/send_sms/).
## Receive your first inbound SMS/MMS message
To receive incoming messages, you must have a Plivo phone number that supports SMS; you can rent numbers from the [Numbers](https://cx.plivo.com/phone-numbers) page of the Plivo console or by using the [Numbers API](/docs/numbers/).
### Create a Sails server
Edit api/controllers/HelloController.js and paste into it this code.
```js theme={null}
var plivo = require('plivo');
module.exports = {
receive_sms: function(req, res) {
let from_number = req.param("From");
let to_number = req.param("To");
let text = req.param("Text");
console.log('Message received - From: ' + from_number + ', To: ' + to_number + ', Text: ' + text);
return res.status(200).send('message received');
},
};
```
```js theme={null}
var plivo = require('plivo');
module.exports = {
receive_sms: function(req, res) {
let from_number = req.param("From");
let to_number = req.param("To");
let text = req.param("Text");
let media_url = req.param("Media0");
console.log('Message received - From: ' + from_number + ', To: ' + to_number + ', Text: ' + text + ' Media: ' + media_url);
return res.status(200).json("message received");
},
};
```
Edit config/route.js to set the route.
```javascript theme={null}
'POST /receive_sms' : 'HelloController.receive_sms',
```
Save the file and run it.
```shell theme={null}
$ sails lift
```
You should see your basic server application in action at [http://localhost:1337/receive\_sms/](http://localhost:1337/receive_sms/).
### Expose your local server to the internet
To receive incoming messages, your local server must connect with Plivo API services. For that, we recommend using [ngrok](https://ngrok.com/download), which exposes local servers running behind NATs and firewalls to the public internet over secure tunnels. Using ngrok, you can set webhooks that can talk to the Plivo server.
If you have any issues creating a Plivo account, please contact our [support team](https://support.plivo.com/hc/en-us/) for assistance.
To get started, try sending an SMS message either by using our API and XML documents, or via {/* [PHLO](/docs/phlo/getting-started/getting-started) */}, our visual design tool, which allows you to create message flows using an intuitive canvas and deploy them with few clicks.
## Install Node.js, Sails, and the Plivo Node.js SDK
You must set up and install Node.js, Sails, and Plivo’s Node SDK before you send your first SMS message.
### Install Node.js
You can check whether you have Node.js installed under macOS or Linux by running the command `node --version` in a terminal window. Under Windows, open a Windows command prompt or PowerShell and type `node -v`. If you don’t have Node.js installed or want a more current version, download and install it.
### Install Sails
Install Sails using [npm](https://www.npmjs.com/package/sails).
```shell theme={null}
$ npm install sails -g
```
Choose the npm package manager when prompted for which package manager to use.
Create a new (empty) Sails project and change to the project directory.
```shell theme={null}
$ sails new
$ cd
```
### Install the Plivo Node.js SDK
Install the Plivo Node.js SDK using [npm](https://www.npmjs.com/package/plivo).
```shell theme={null}
$ npm install plivo
```
Once you’ve set up your development environment, you can start sending and receiving messages using our APIs and XML documents. Here are three common use cases to get you started.
## Send your first outbound SMS/MMS message
You must have a Plivo phone number to send messages to the US or Canada; you can rent a Plivo number from Phone Numbers > [Buy Numbers](https://cx.plivo.com/phone-numbers) on the Plivo console or via the [Numbers API](/docs/numbers/phone-numbers#buy-a-phone-number).
### Create a Sails controller
Create a new controller called “hello.”
```shell theme={null}
$ sails generate controller hello
```
Edit api/controllers/HelloController.js and paste into it this code.
```js theme={null}
var plivo = require('plivo');
module.exports = {
send_sms: function(req, res) {
var client = new plivo.Client("", "");
client.messages.create({
src: "",
dst: "",
text: "Hello, this is from Sails"
}).then(function(response) {
return res.status(200).json(response);
});
},
};
```
```js theme={null}
var plivo = require('plivo');
module.exports = {
send_sms: function(req, res) {
var client = new plivo.Client("", "");
client.messages.create({
src: "",
dst: "",
text: "Hello, MMS from from Sails",
type: 'mms',
media_urls: ['https://media.giphy.com/media/26gscSULUcfKU7dHq/source.gif'],
media_ids: ['801c2056-33ab-499c-80ef-58b574a462a2']
}).then(function(response) {
return res.status(200).json(response);
});
},
};
```
Replace the auth placeholders with your authentication credentials from the [Plivo console](https://cx.plivo.com/home). Replace the phone number placeholders with actual phone numbers in [E.164 format](https://en.wikipedia.org/wiki/E.164) (for example, +12025551234). In countries other than the US and Canada you can use a [sender ID](/docs/messaging/concepts/sender-id-usage/) for the message source.
**Note:** We recommend that you store your credentials in the `auth_id` and `auth_token` environment variables to avoid the possibility of accidentally committing them to source control. If you do this, you can initialize the client with no arguments and Plivo will automatically fetch the values from the environment variables. You can use `process.env` to store environment variables and fetch them when initializing the client.
Edit **config/route.js** to set the route.
```javascript theme={null}
'POST /send_sms' : 'HelloController.send_sms',
```
### Test
Save the file and run it.
```shell theme={null}
$ sails lift
```
You should see your basic server application in action at [http://localhost:1337/send\_sms/](http://localhost:1337/send_sms/).
## Receive your first inbound SMS/MMS message
To receive incoming messages, you must have a Plivo phone number that supports SMS; you can rent numbers from the [Numbers](https://cx.plivo.com/phone-numbers) page of the Plivo console or by using the [Numbers API](/docs/numbers/).
### Create a Sails server
Edit api/controllers/HelloController.js and paste into it this code.
```js theme={null}
var plivo = require('plivo');
module.exports = {
receive_sms: function(req, res) {
let from_number = req.param("From");
let to_number = req.param("To");
let text = req.param("Text");
console.log('Message received - From: ' + from_number + ', To: ' + to_number + ', Text: ' + text);
return res.status(200).send('message received');
},
};
```
```js theme={null}
var plivo = require('plivo');
module.exports = {
receive_sms: function(req, res) {
let from_number = req.param("From");
let to_number = req.param("To");
let text = req.param("Text");
let media_url = req.param("Media0");
console.log('Message received - From: ' + from_number + ', To: ' + to_number + ', Text: ' + text + ' Media: ' + media_url);
return res.status(200).json("message received");
},
};
```
Edit config/route.js to set the route.
```javascript theme={null}
'POST /receive_sms' : 'HelloController.receive_sms',
```
Save the file and run it.
```shell theme={null}
$ sails lift
```
You should see your basic server application in action at [http://localhost:1337/receive\_sms/](http://localhost:1337/receive_sms/).
### Expose your local server to the internet
To receive incoming messages, your local server must connect with Plivo API services. For that, we recommend using [ngrok](https://ngrok.com/download), which exposes local servers running behind NATs and firewalls to the public internet over secure tunnels. Using ngrok, you can set webhooks that can talk to the Plivo server.
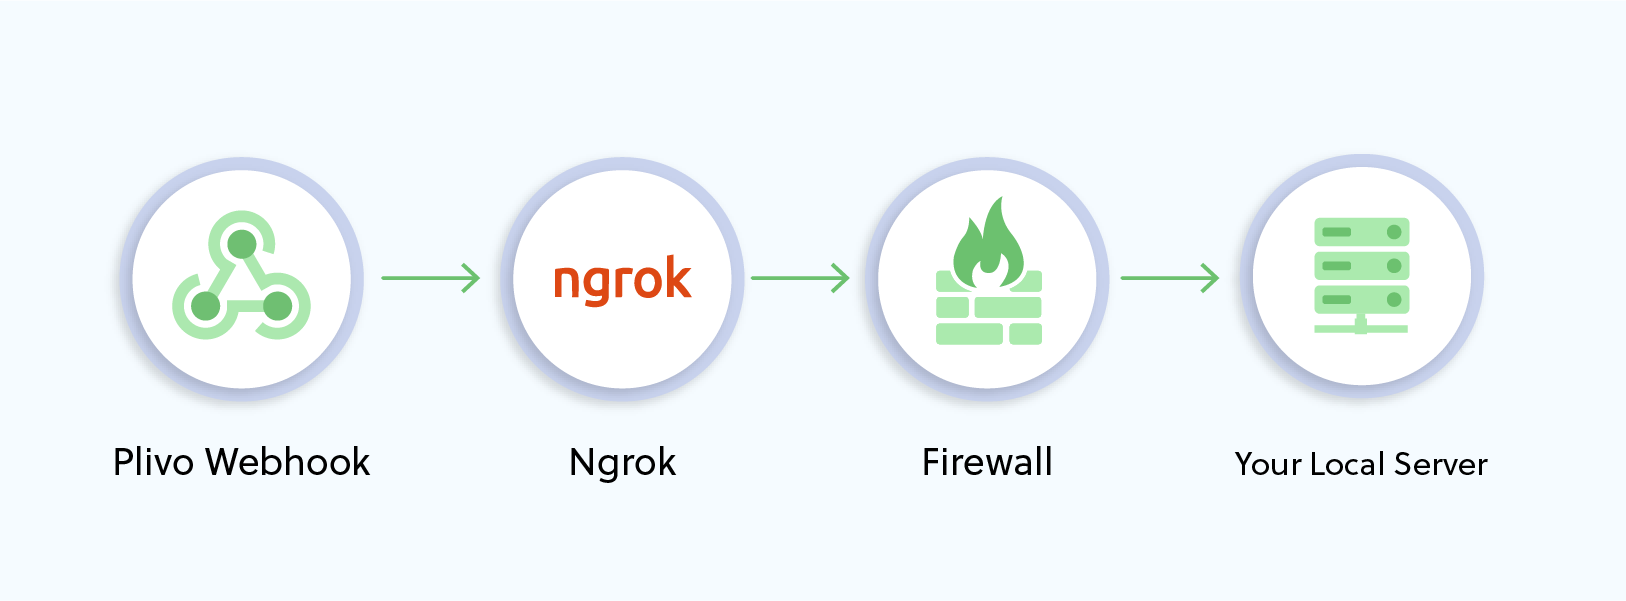 Install ngrok and run it on the command line, specifying the port that hosts the application on which you want to receive messages (80 in this case):
```shell theme={null}
$ ./ngrok http 80
```
This starts the ngrok server on your local server. Ngrok will display a forwarding link that you can use as a webhook to access your local server over the public network.
Install ngrok and run it on the command line, specifying the port that hosts the application on which you want to receive messages (80 in this case):
```shell theme={null}
$ ./ngrok http 80
```
This starts the ngrok server on your local server. Ngrok will display a forwarding link that you can use as a webhook to access your local server over the public network.
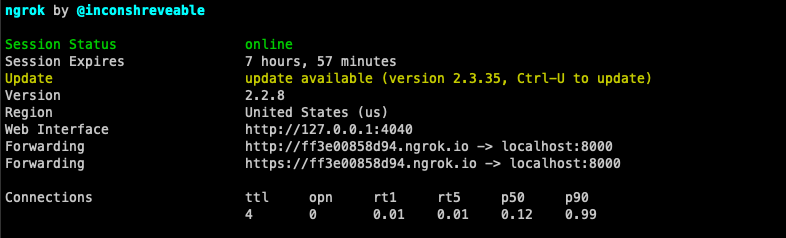 Now people can send messages to your Plivo number.
### Create a Plivo application to receive messages
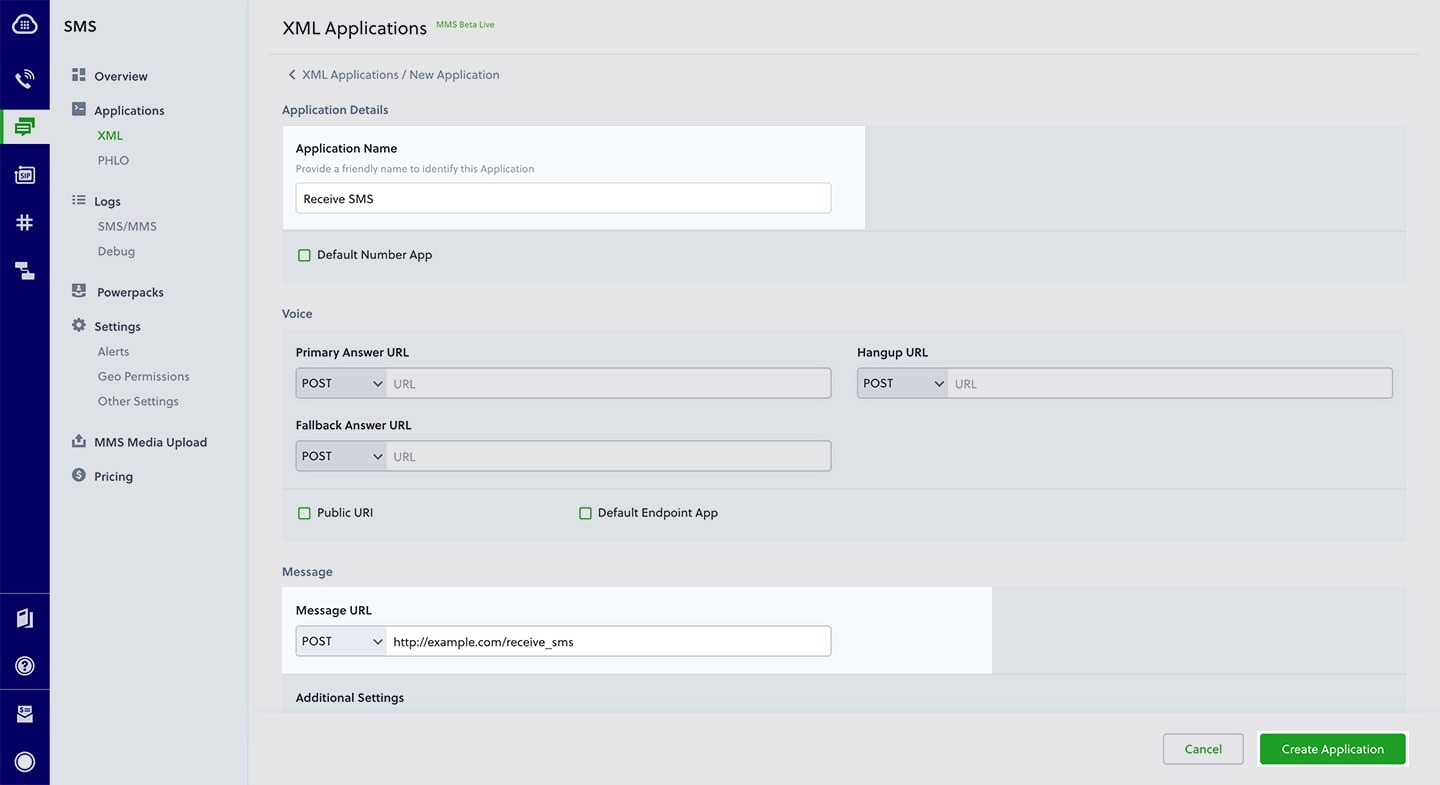
Associate the controller you created with Plivo by creating a Plivo application. Visiting Messaging > [Applications](https://cx.plivo.com/xml-applications) and click **Add New Application**. You can also use Plivo's [Application API](/docs/account/api/application/#create-an-application).
Give your application a name — we called ours `Receive SMS`. Enter the server URL you want to use (for example `https://.com/receive_sms/`) in the `Message URL` field and set the method to `POST`. Click **Create Application** to save your application.
Now people can send messages to your Plivo number.
### Create a Plivo application to receive messages
Associate the controller you created with Plivo by creating a Plivo application. Visiting Messaging > [Applications](https://cx.plivo.com/xml-applications) and click **Add New Application**. You can also use Plivo's [Application API](/docs/account/api/application/#create-an-application).
Give your application a name — we called ours `Receive SMS`. Enter the server URL you want to use (for example `https://.com/receive_sms/`) in the `Message URL` field and set the method to `POST`. Click **Create Application** to save your application.
 ### Assign a Plivo number to your application
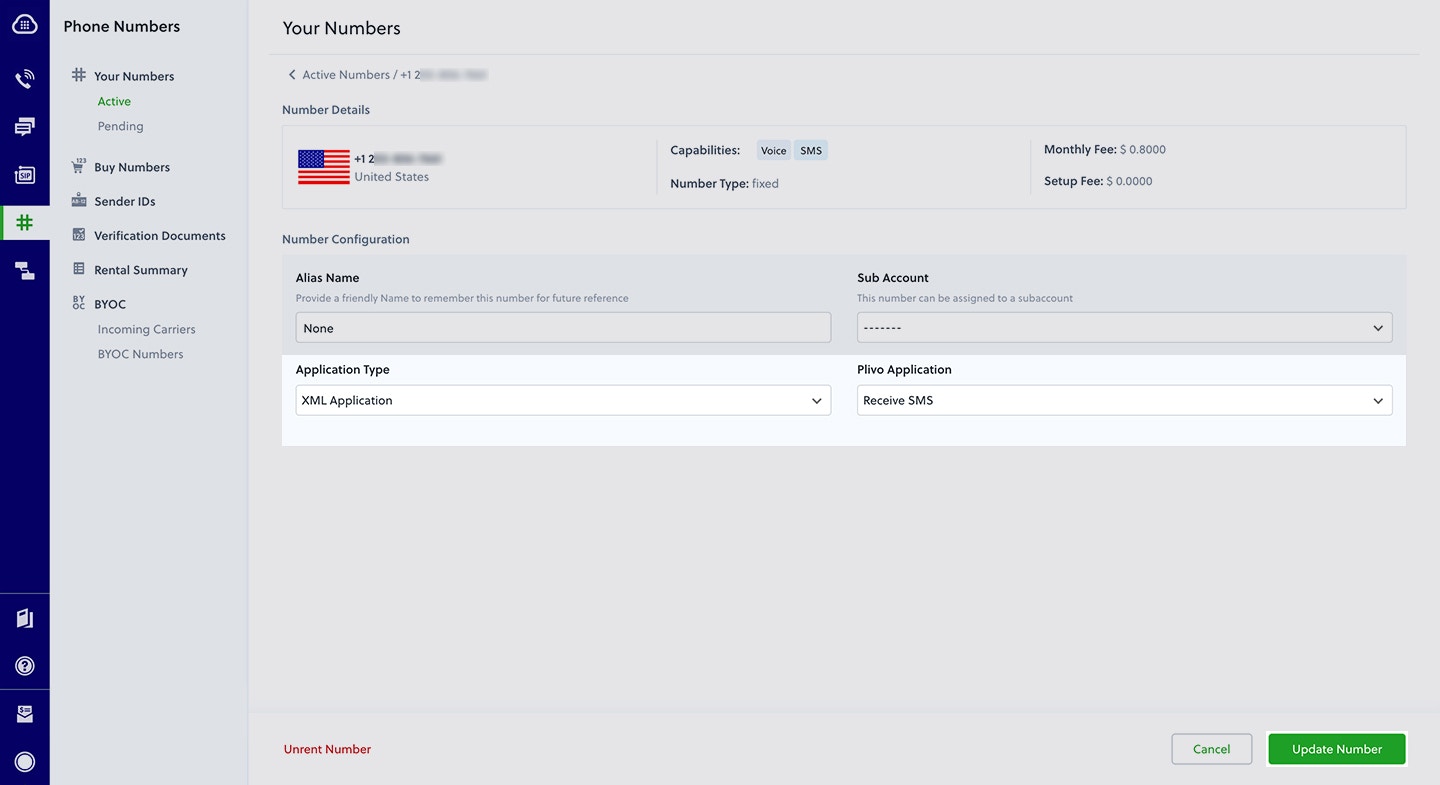
Navigate to the [Numbers](https://cx.plivo.com/phone-numbers) page and select the phone number you want to use for this application.
From the Application Type drop-down, select `XML Application`.
From the Plivo Application drop-down, select `Receive SMS` (the name we gave the application).
Click **Update Number** to save.
### Assign a Plivo number to your application
Navigate to the [Numbers](https://cx.plivo.com/phone-numbers) page and select the phone number you want to use for this application.
From the Application Type drop-down, select `XML Application`.
From the Plivo Application drop-down, select `Receive SMS` (the name we gave the application).
Click **Update Number** to save.
 ### Test
Send a text message to the Plivo number you specified using any phone.
## Reply to an incoming SMS/MMS message
To receive incoming messages, you must have a Plivo phone number that supports SMS; you can rent numbers from the [Numbers](https://cx.plivo.com/phone-numbers) page of the Plivo console or by using the [Numbers API](/docs/numbers/).
### Create a Sails server
Edit api/controllers/HelloController.js and paste into it this code.
```js theme={null}
var plivo = require('plivo');
module.exports = {
reply_sms: function(req, res) {
let from_number = req.param("From");
let to_number = req.param("To");
let text = req.param("Text");
console.log('Message received - From: ' + from_number + ', To: ' + to_number + ', Text: ' + text);
var response = plivo.Response();
var params = {
'src': to_number,
'dst': from_number,
'type': "sms",
'callbackUrl': "https://.com/sms_status",
'callbackMethod': "POST"
};
var message_body = "This is an automatic response";
response.addMessage(message_body, params);
res.setHeader("Content-type", "text/xml");
return res.status(200).send(response.toXML());
},
};
```
Edit config/route.js to set the route.
```javascript theme={null}
'POST /reply_sms' : 'HelloController.reply_sms',
```
Save the file and run it.
```shell theme={null}
$ sails lift
```
You should see your basic server application in action at [http://localhost:1337/reply\_sms/](http://localhost:1337/reply_sms/).
If you haven’t done so already, expose your local server to the internet.
### Create a Plivo application to reply to messages
Associate the controller you created with Plivo by creating a Plivo application. Visiting Messaging > [Applications](https://cx.plivo.com/xml-applications) and click **Add New Application**. You can also use Plivo's [Application API](/docs/account/api/application/#create-an-application).
Give your application a name — we called ours `Reply Incoming SMS`. Enter the server URL you want to use (for example `http://.com/replysms/`) in the `Message URL` field and set the method to `POST`. Click **Create Application** to save your application.
### Test
Send a text message to the Plivo number you specified using any phone.
## Reply to an incoming SMS/MMS message
To receive incoming messages, you must have a Plivo phone number that supports SMS; you can rent numbers from the [Numbers](https://cx.plivo.com/phone-numbers) page of the Plivo console or by using the [Numbers API](/docs/numbers/).
### Create a Sails server
Edit api/controllers/HelloController.js and paste into it this code.
```js theme={null}
var plivo = require('plivo');
module.exports = {
reply_sms: function(req, res) {
let from_number = req.param("From");
let to_number = req.param("To");
let text = req.param("Text");
console.log('Message received - From: ' + from_number + ', To: ' + to_number + ', Text: ' + text);
var response = plivo.Response();
var params = {
'src': to_number,
'dst': from_number,
'type': "sms",
'callbackUrl': "https://.com/sms_status",
'callbackMethod': "POST"
};
var message_body = "This is an automatic response";
response.addMessage(message_body, params);
res.setHeader("Content-type", "text/xml");
return res.status(200).send(response.toXML());
},
};
```
Edit config/route.js to set the route.
```javascript theme={null}
'POST /reply_sms' : 'HelloController.reply_sms',
```
Save the file and run it.
```shell theme={null}
$ sails lift
```
You should see your basic server application in action at [http://localhost:1337/reply\_sms/](http://localhost:1337/reply_sms/).
If you haven’t done so already, expose your local server to the internet.
### Create a Plivo application to reply to messages
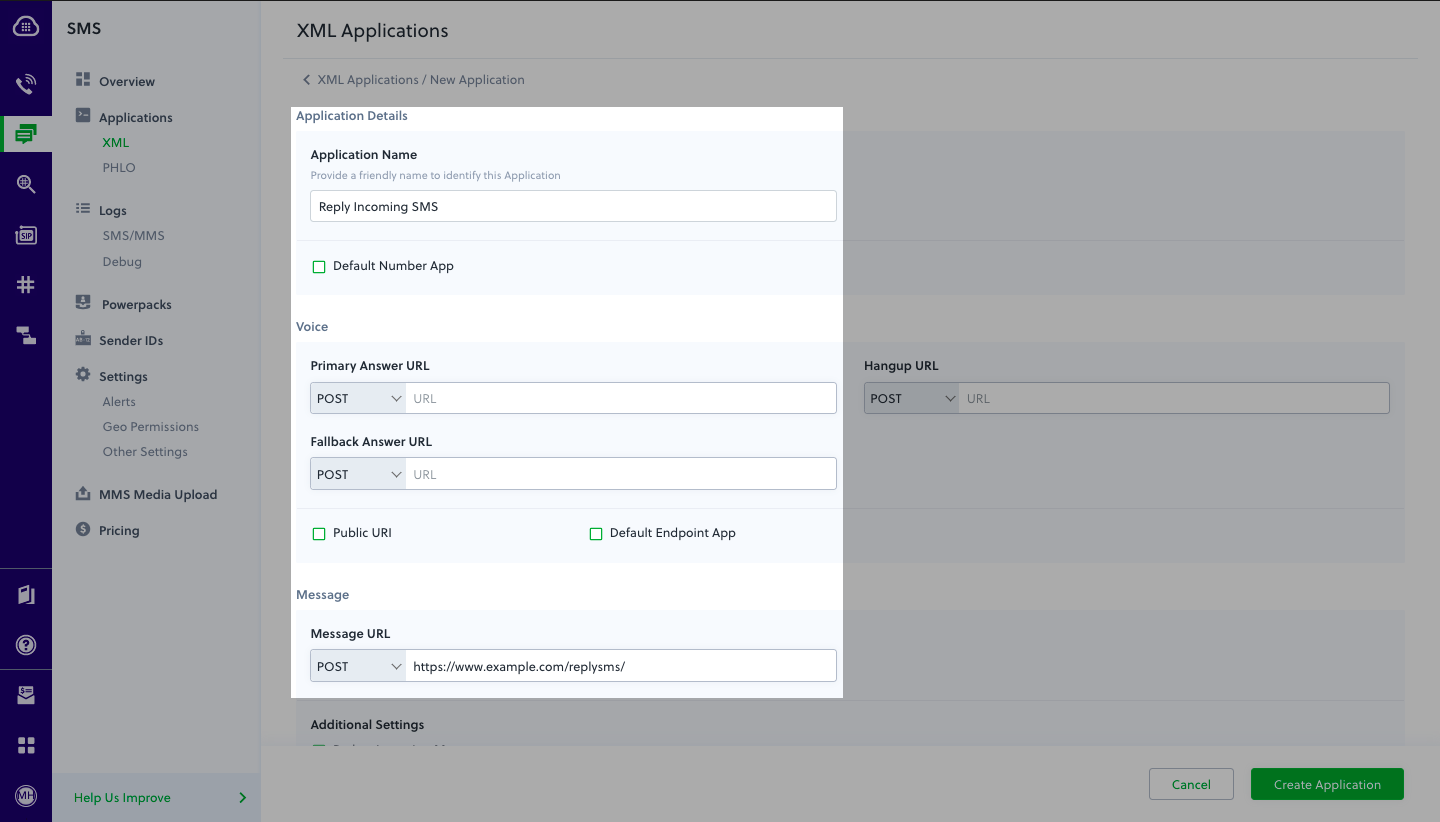
Associate the controller you created with Plivo by creating a Plivo application. Visiting Messaging > [Applications](https://cx.plivo.com/xml-applications) and click **Add New Application**. You can also use Plivo's [Application API](/docs/account/api/application/#create-an-application).
Give your application a name — we called ours `Reply Incoming SMS`. Enter the server URL you want to use (for example `http://.com/replysms/`) in the `Message URL` field and set the method to `POST`. Click **Create Application** to save your application.
 ### Assign a Plivo number to your application
Navigate to the [Numbers](https://cx.plivo.com/phone-numbers) page and select the phone number you want to use for this application.
From the Application Type drop-down, select `XML Application`.
From the Plivo Application drop-down, select `Reply Incoming SMS` (the name we gave the application).
Click **Update Number** to save.
### Test
Send a text message to the Plivo number you specified using any phone. You should## -use-cases">More use cases
We illustrate [more than a dozen use cases](/docs/messaging/use-cases/send-an-sms) with code for both API/XML and PHLO on our documentation pages.
### Assign a Plivo number to your application
Navigate to the [Numbers](https://cx.plivo.com/phone-numbers) page and select the phone number you want to use for this application.
From the Application Type drop-down, select `XML Application`.
From the Plivo Application drop-down, select `Reply Incoming SMS` (the name we gave the application).
Click **Update Number** to save.
### Test
Send a text message to the Plivo number you specified using any phone. You should## -use-cases">More use cases
We illustrate [more than a dozen use cases](/docs/messaging/use-cases/send-an-sms) with code for both API/XML and PHLO on our documentation pages.