> ## Documentation Index
> Fetch the complete documentation index at: https://plivo.com/docs/llms.txt
> Use this file to discover all available pages before exploring further.
# Get started using Postman Collections to Lookup a Phone Number
> Set up and test Plivo Lookup API requests using the Postman collection
## Overview
Plivo APIs are packaged and ready to use with Postman, an API testing tool that helps developers set up, test, and explore APIs. Plivo’s Postman collection includes APIs for our SMS, Voice, Phone Numbers, Account, Lookup, and PHLO products, along with documentation for each API to help you learn about them.
We’ve created a ready-to-use set of the applicable APIs so you don’t have to manually add endpoints that you’d like to use inside Postman. Each endpoint comprises all the available parameters and the necessary authentication process, along with example responses, so you only need to declare your credentials and parameter values globally to start exploring the features.
Let’s walk through the process.
## Install Postman and download the Postman collection
First, [download and install Postman](https://www.postman.com/downloads/). You also need a Plivo account; if you don’t have one yet, [sign up](https://cx.plivo.com/signup) now. Next, click on the below button
A window will appear asking if you want the collection to be added to your local Postman app or if you want to use a web app.
You'll see the collection in your chosen space based on the options you've chosen.
## Add Keys and Tokens
Now you can add your keys and tokens to your Postman collection. Open Postman from Applications under macOS or your desktop on Windows. The first thing you need to do is add your authentication credentials.
* Click on the collection **Plivo REST API**.
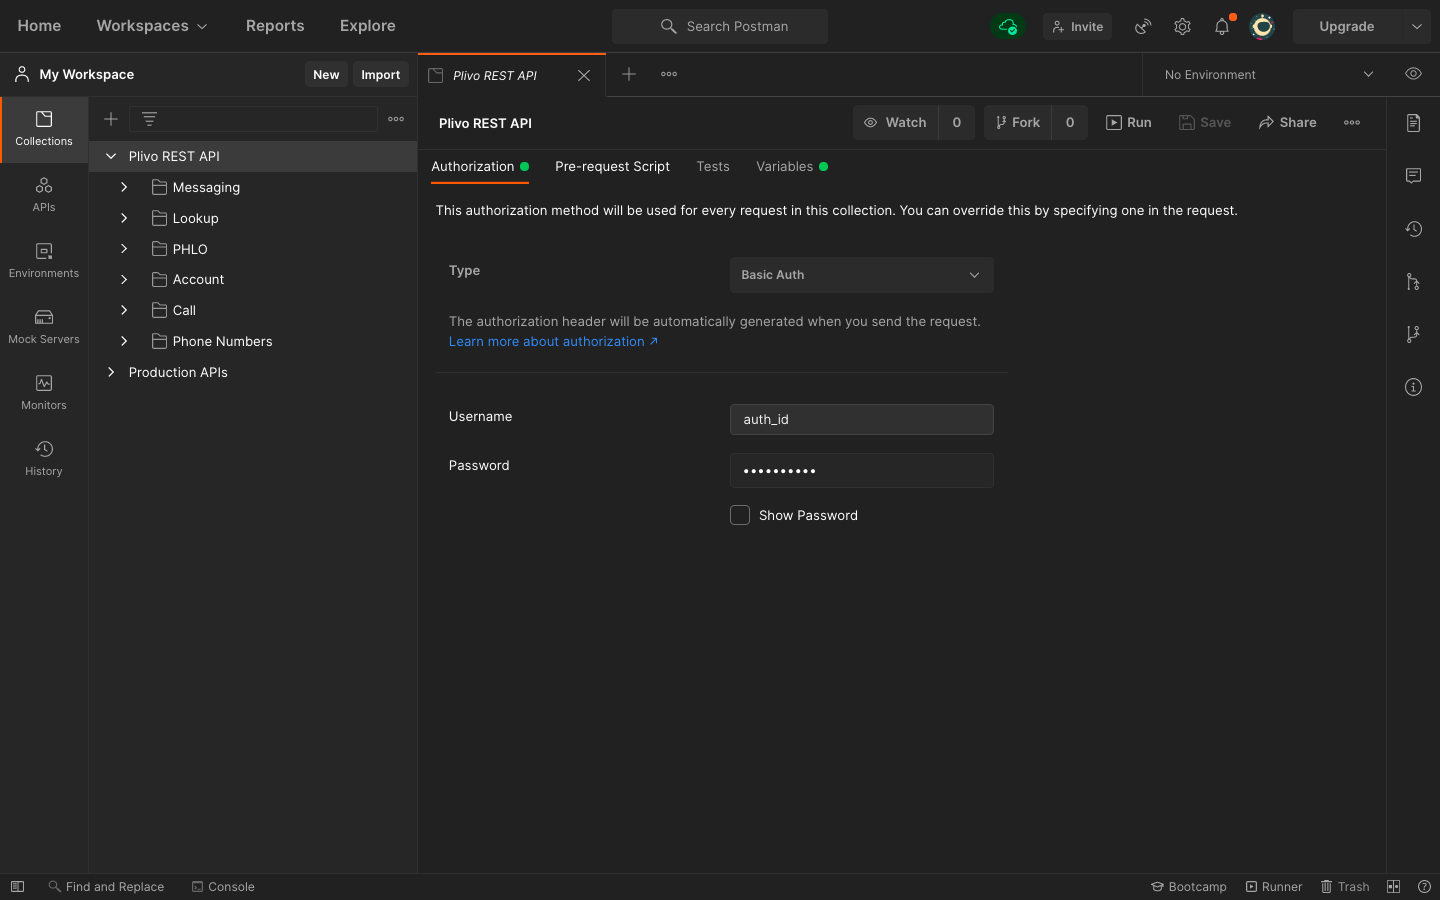 * Select **Authorization**, then, from the drop-down list, set the Type as Basic Auth.
 * For **Username** and **Password**, fill in your Plivo Auth ID and Auth Token respectively, which you can find on the overview page of the [console](https://cx.plivo.com/home).
You’ve now authenticated Postman to your Plivo account. The next step is to make that authentication available for every endpoint.
#### Set up environment variables
Set up the `auth_id` as an environment variable, so you can use it in every endpoint you have.
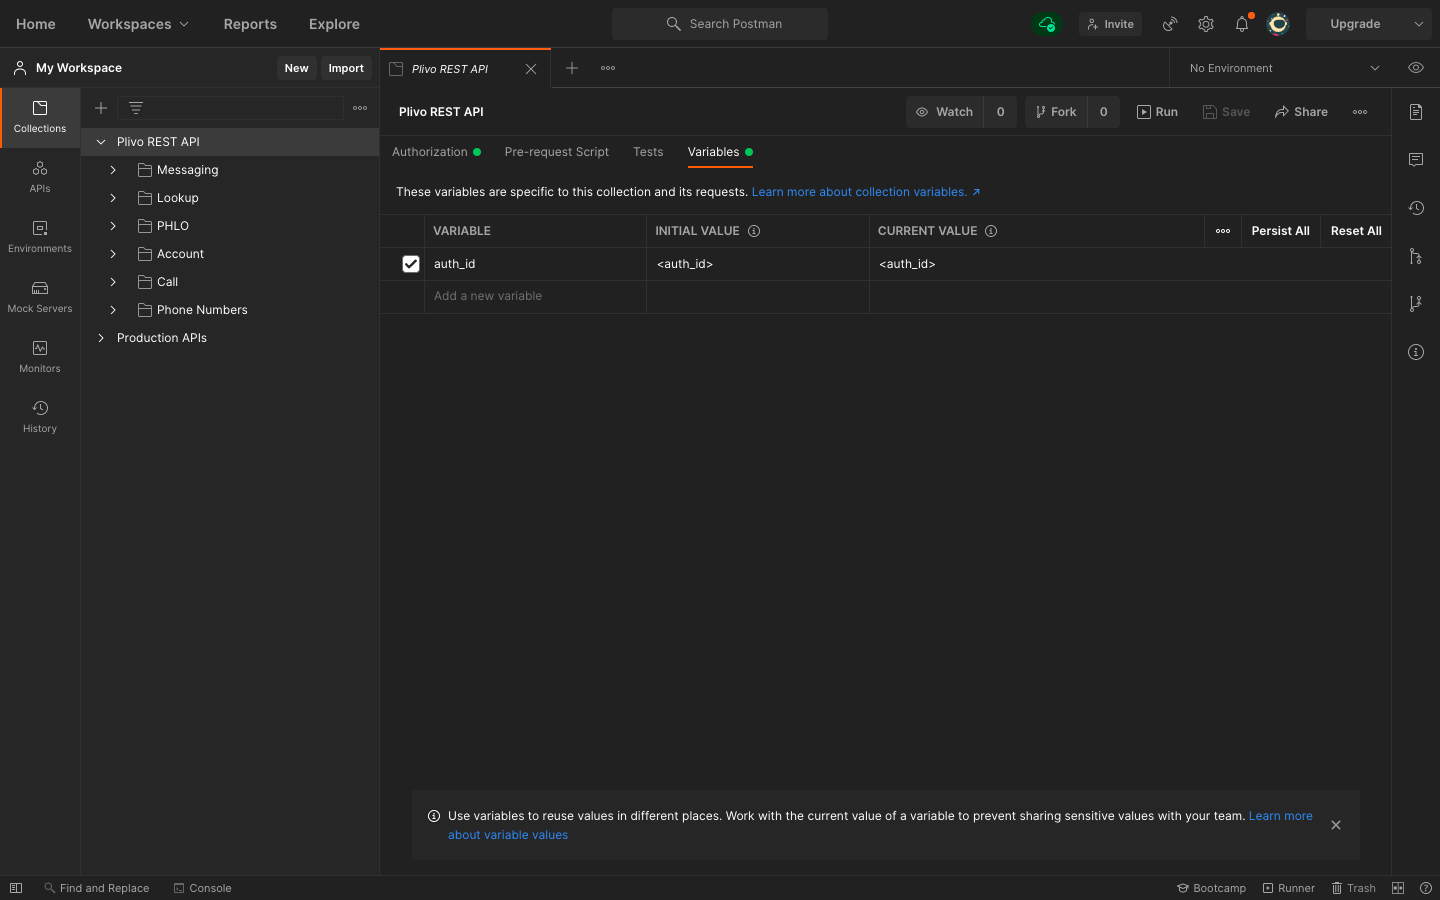
* Click on the collection **Plivo REST API**.
* Click on **Variables**. Declare the variable `auth_id`, and provide the initial and current value as the Auth ID from the [console](https://cx.plivo.com/home).
* For **Username** and **Password**, fill in your Plivo Auth ID and Auth Token respectively, which you can find on the overview page of the [console](https://cx.plivo.com/home).
You’ve now authenticated Postman to your Plivo account. The next step is to make that authentication available for every endpoint.
#### Set up environment variables
Set up the `auth_id` as an environment variable, so you can use it in every endpoint you have.
* Click on the collection **Plivo REST API**.
* Click on **Variables**. Declare the variable `auth_id`, and provide the initial and current value as the Auth ID from the [console](https://cx.plivo.com/home).
 * Once you’ve done that, you can access your Auth ID by writing **\{\{auth\_id}}** within your Postman collection. We’ve already done that for you for all the APIs in the Plivo collection.
Now we’re ready to test some APIs!!
## Example: Phone Number Lookup
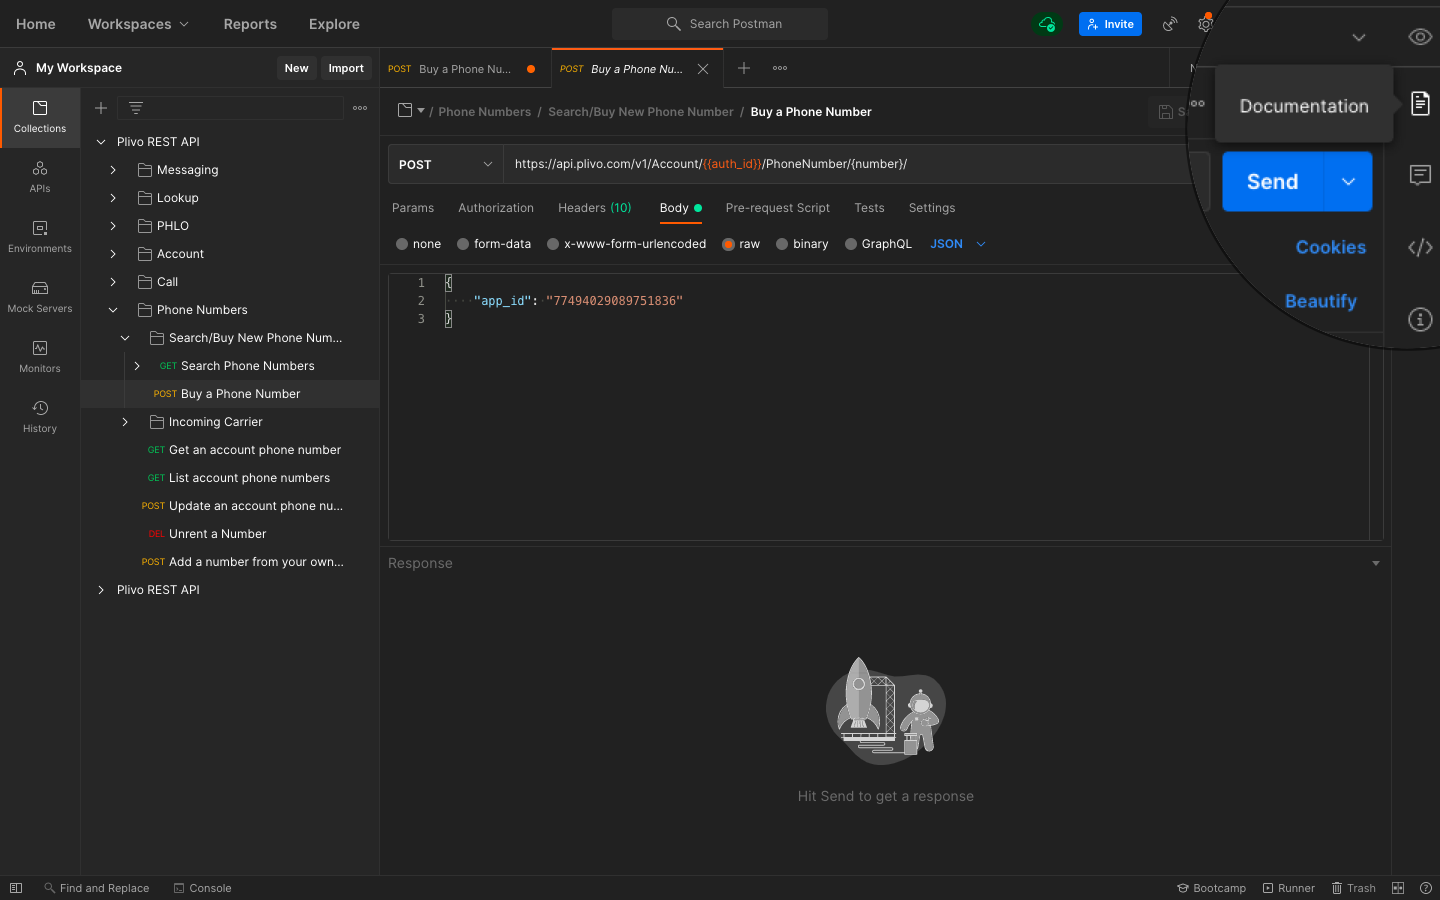
To see how Plivo and Postman work together, let’s start by performing a lookup for a phone number. From the imported Plivo REST API collection, select the folder named Lookup, and select the request to Lookup a Phone Number. Under Params, the mandatory parameter type has already been updated with the required value carrier. You must also include the number you want to search for in the URL:
```
https://lookup.plivo.com/v1/Number/13863877367?type=carrier
```
To learn more about optional and required parameters, either refer to the documentation available within the Postman collection or visit our Lookup [API reference guide](/lookup/api/lookup-phone-number/).
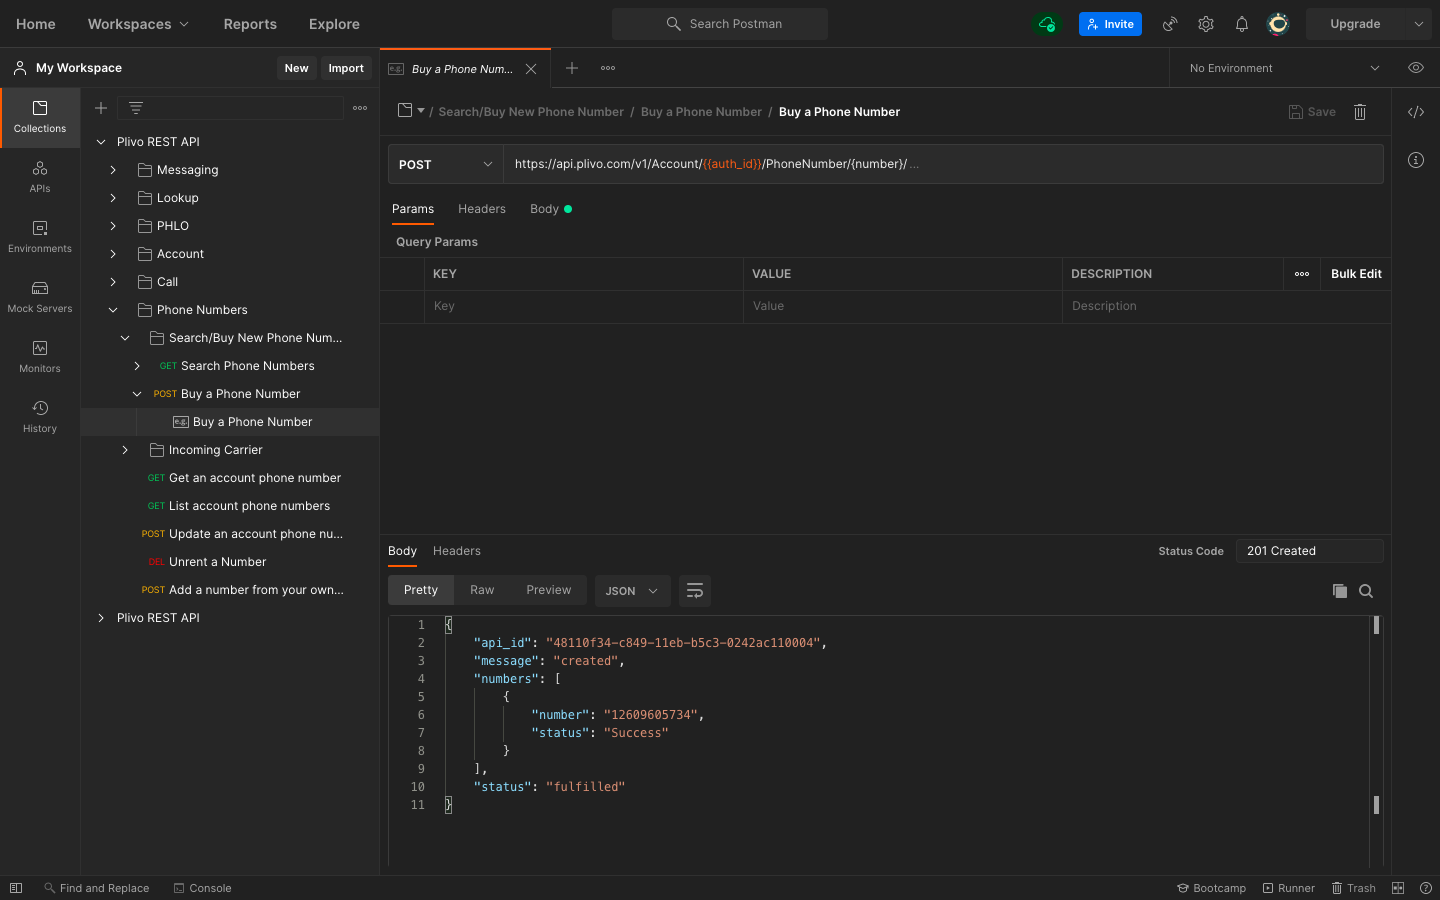
 You can also find an example API response and status code for each API directly beneath the API tab, as in this example:
 Postman helps us keep all of our APIs organized, categorized, and always ready to use with just a few modifications depending on our needs. It helps us not only with triggering API requests but also with [testing APIs](https://www.postman.com/api-platform/api-testing/). Overall, Postman makes it easier for developers to test and integrate their systems with Plivo.