> ## Documentation Index
> Fetch the complete documentation index at: https://plivo.com/docs/llms.txt
> Use this file to discover all available pages before exploring further.
# Live poll with Integromat and Google Sheets
> Build an SMS-based live poll using Plivo, Integromat, and Google Sheets
To start building a live poll using Plivo SMS, Integromat, and Google Sheets, you need:
* A [Plivo account](https://cx.plivo.com/signup)
* A Plivo phone number. You can buy one by visiting the [Phone Numbers](https://cx.plivo.com/home) page of the console or using the [PhoneNumber API](/docs/numbers/phone-numbers)
* A paid or trial [Integromat account](https://www.integromat.com/en/register?ref=plivo-devdocs)
* A [Google account](https://accounts.google.com/SignUp?ref=plivo-devdocs)
## Step 1: Set up Plivo
* Log in to your Integromat account.
* Click on Create a **new scenario** on the top right of the screen.
* In the next screen, search for “Plivo.”
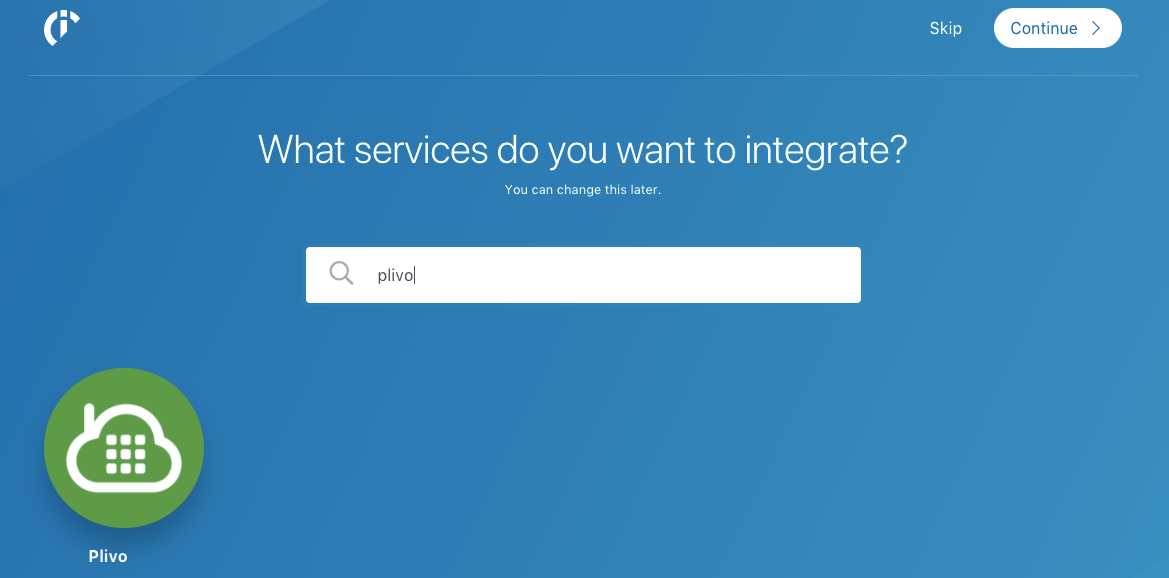 * Select the Plivo integration and **Continue**. You’ll be taken to a screen where you can create a scenario from scratch.
* Click on the big “?” area to start adding modules to the scenario. You should see something like this:
* Select the Plivo integration and **Continue**. You’ll be taken to a screen where you can create a scenario from scratch.
* Click on the big “?” area to start adding modules to the scenario. You should see something like this:
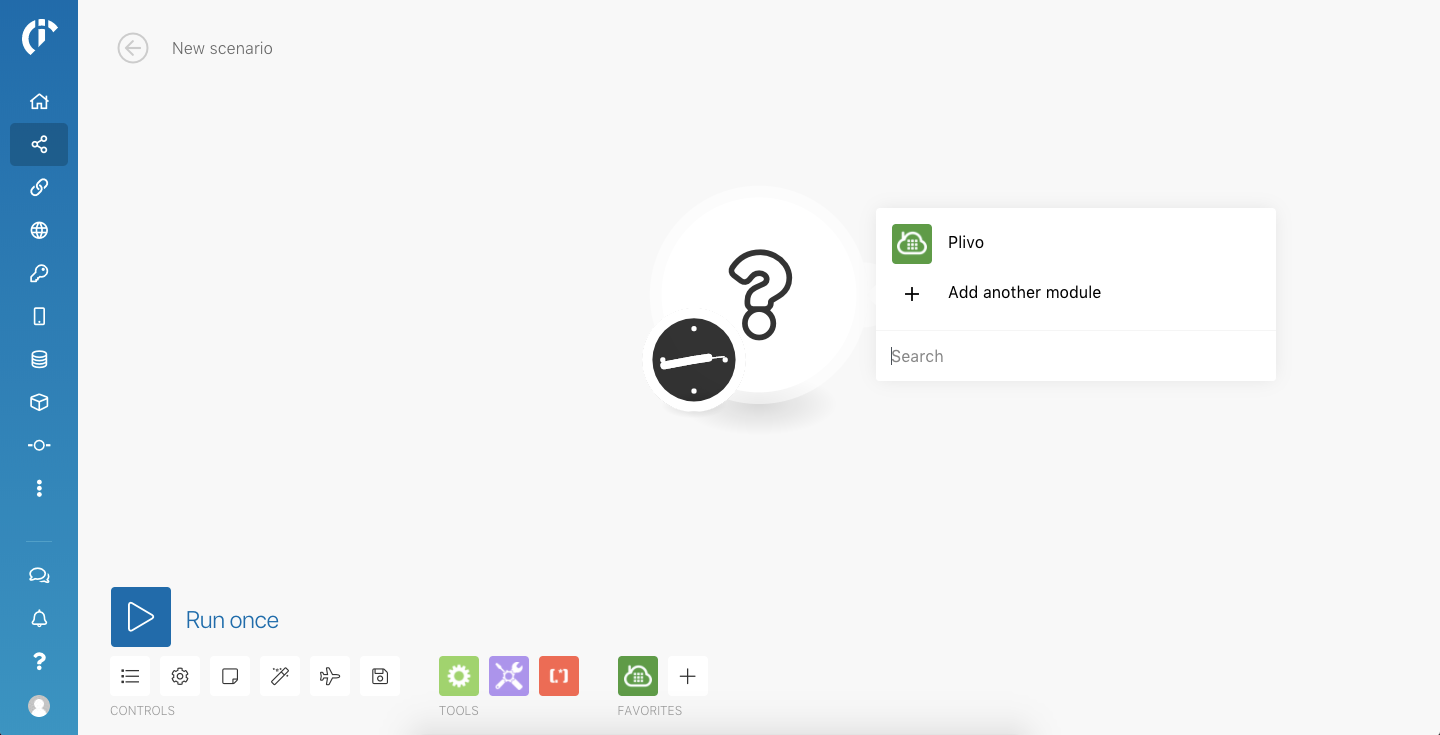 * Click on Plivo module and you’ll see the possible triggers and actions:
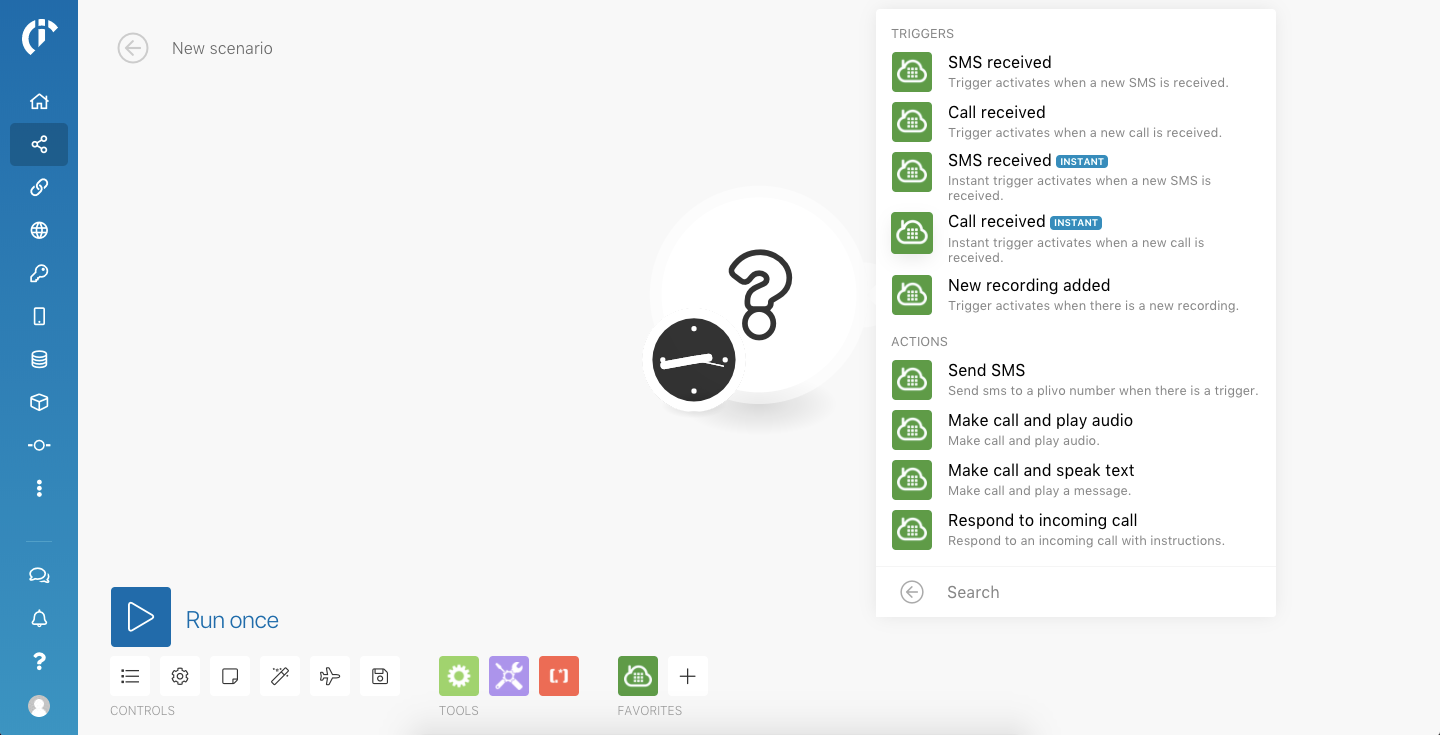 * Select **SMS received INSTANT** and you’ll see an interface to set up a webhook. Click on **Add** beside the drop-down:
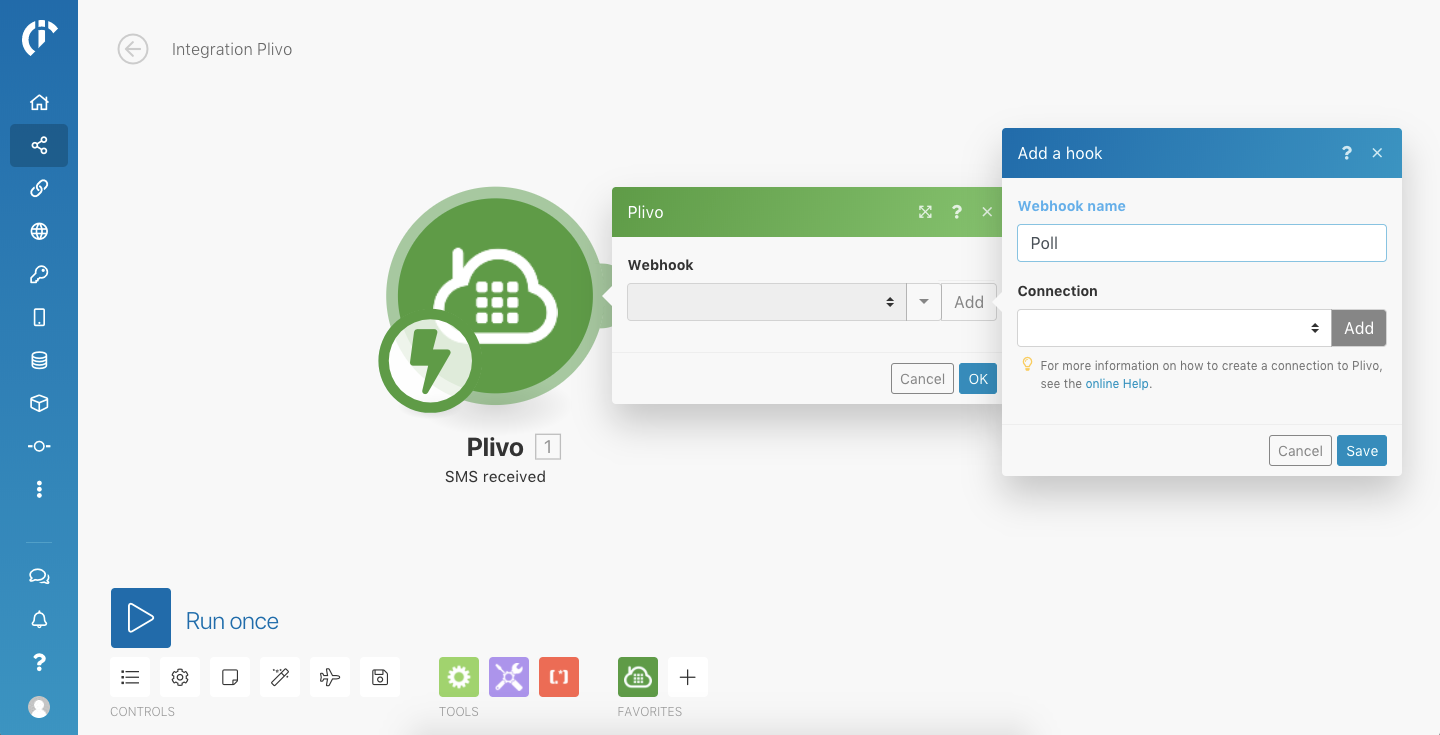 * Give the webhook a name. In this example, we called it “Poll.”
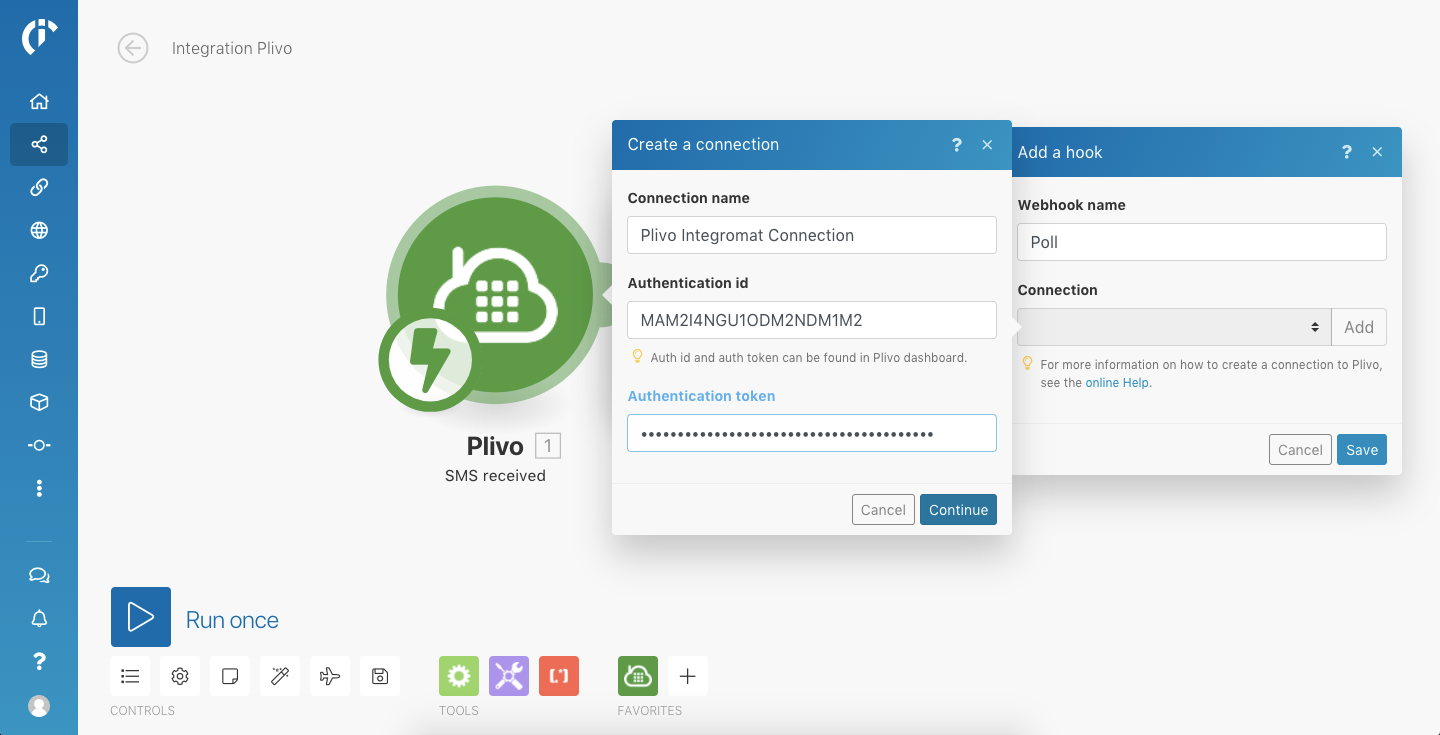
* Select the Plivo connection you want to use. If this is your first time, or if you want to add a new connection, click **Add**.
* In the next form, give the connection a name, enter your Plivo Auth ID and Auth Token, and **Continue**. You can find your Plivo authorization credentials on the overview page of the [Plivo dashboard](https://cx.plivo.com/home).
* Give the webhook a name. In this example, we called it “Poll.”
* Select the Plivo connection you want to use. If this is your first time, or if you want to add a new connection, click **Add**.
* In the next form, give the connection a name, enter your Plivo Auth ID and Auth Token, and **Continue**. You can find your Plivo authorization credentials on the overview page of the [Plivo dashboard](https://cx.plivo.com/home).
 * Select the phone number you want to use for this scenario. Since this scenario will be triggered instantly using webhooks, any application that might be using this number for webhooks will break.
* Give this application a name and select the number you want to use. Click **Save**.
* Select the phone number you want to use for this scenario. Since this scenario will be triggered instantly using webhooks, any application that might be using this number for webhooks will break.
* Give this application a name and select the number you want to use. Click **Save**.
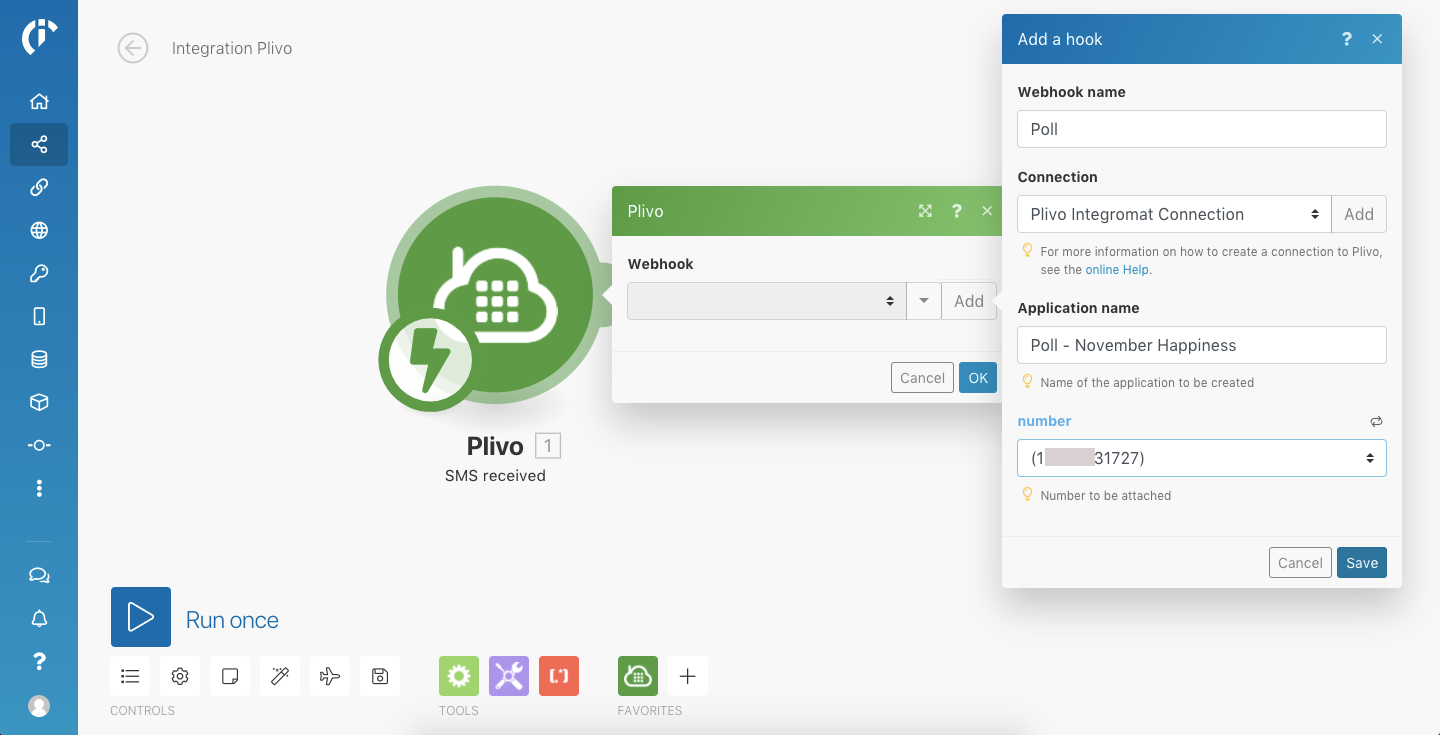 * You now have a trigger that will be auto-triggered whenever there‘s a new incoming message to the Plivo number you specified.
## Step 2: Set up Google Sheets
* Open [Google Drive](https://drive.google.com/). You may be asked to sign in. We’ll connect the Google account to Integromat in a moment.
* Create a blank spreadsheet.
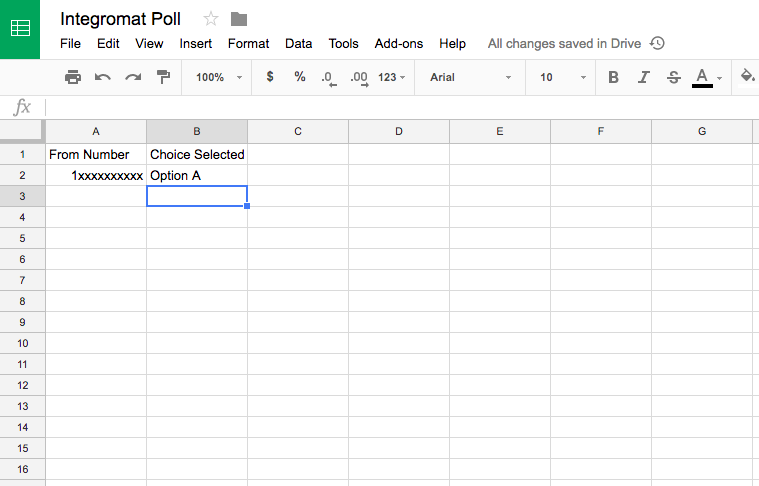
* Give the sheet a name and add column headers. In this example, we named the sheet “Integromat Poll” and added “From Number” and “Choice Selected” as column headers.
* Now add a Google Sheets connection to Integromat. Heading back to the Integromat scenario creation, click on the big “?” area, and search for Google Sheets.
* You now have a trigger that will be auto-triggered whenever there‘s a new incoming message to the Plivo number you specified.
## Step 2: Set up Google Sheets
* Open [Google Drive](https://drive.google.com/). You may be asked to sign in. We’ll connect the Google account to Integromat in a moment.
* Create a blank spreadsheet.
* Give the sheet a name and add column headers. In this example, we named the sheet “Integromat Poll” and added “From Number” and “Choice Selected” as column headers.
* Now add a Google Sheets connection to Integromat. Heading back to the Integromat scenario creation, click on the big “?” area, and search for Google Sheets.
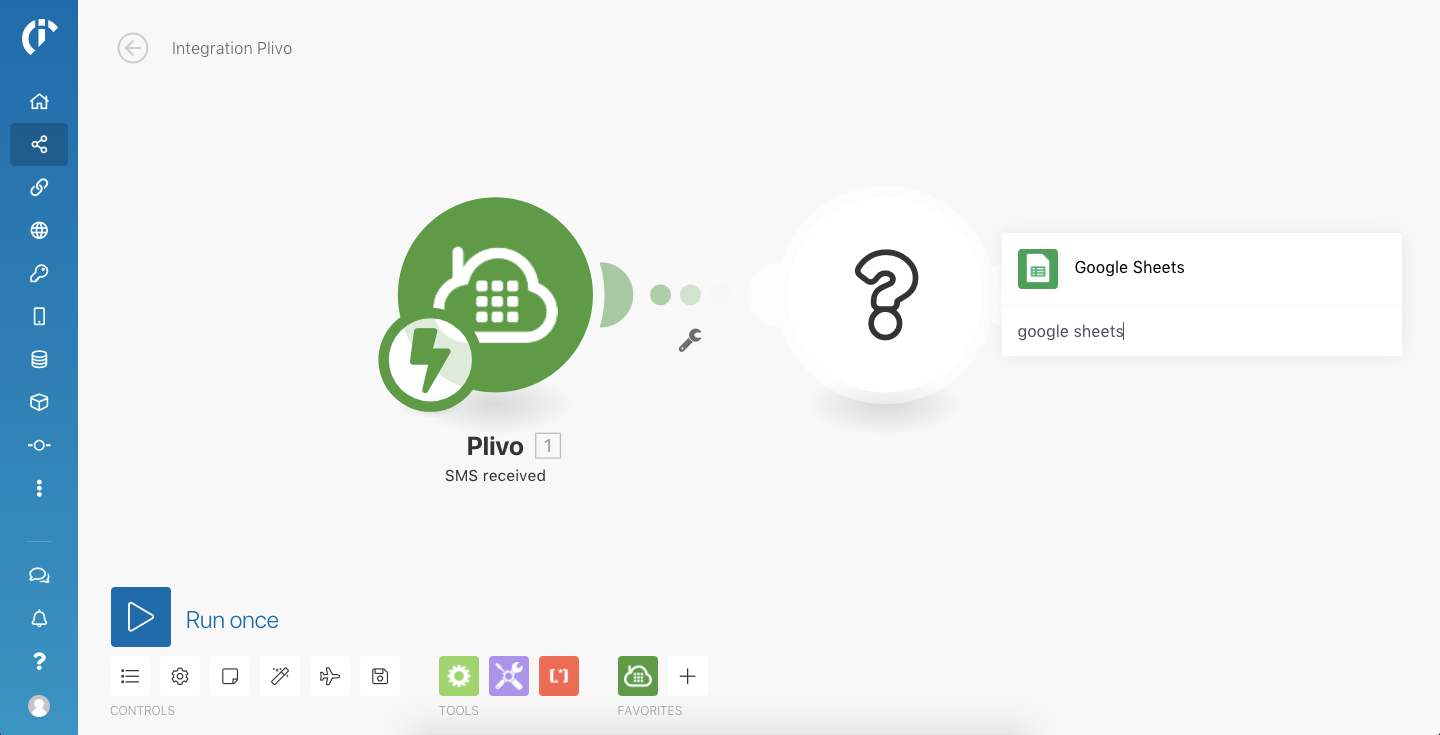 * Select Google Sheets to add the module to the scenario, then click on the added module to see the possible triggers and actions.
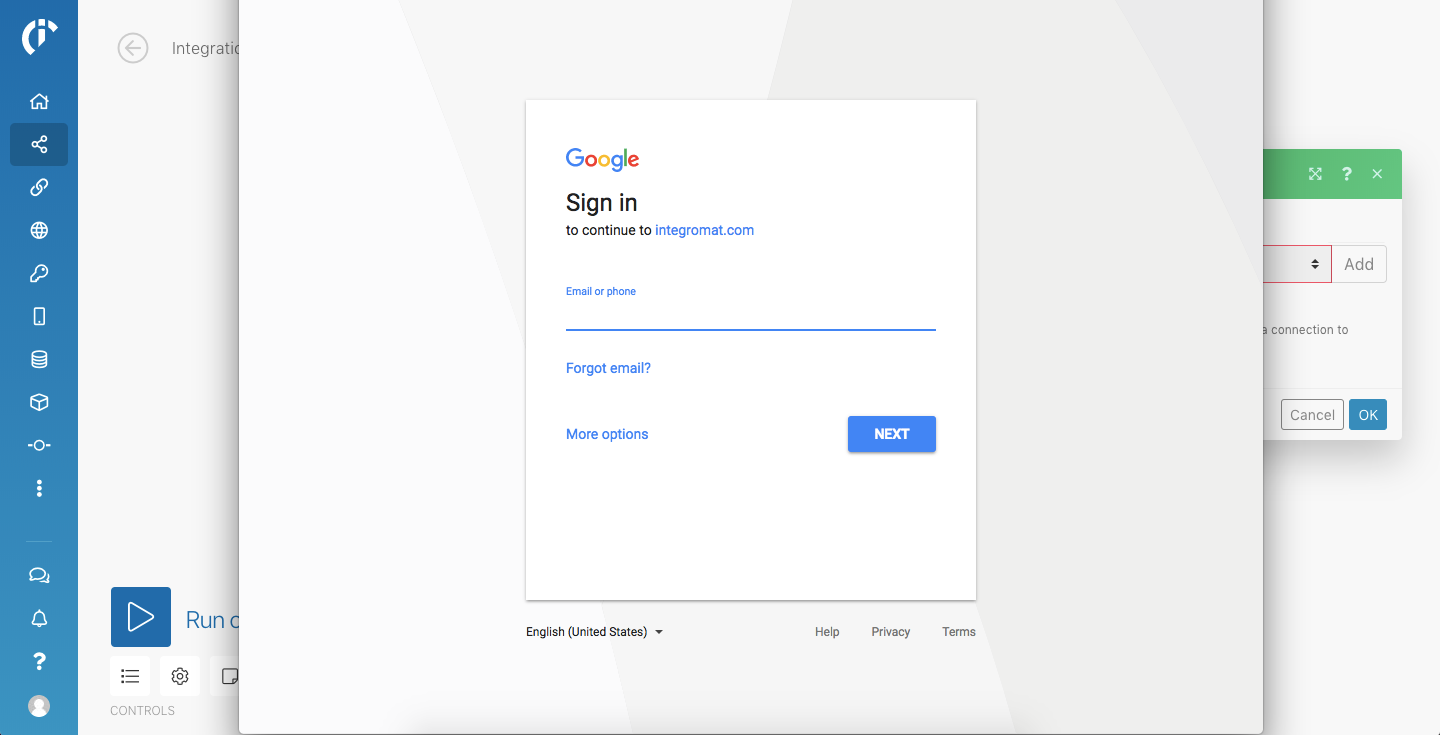
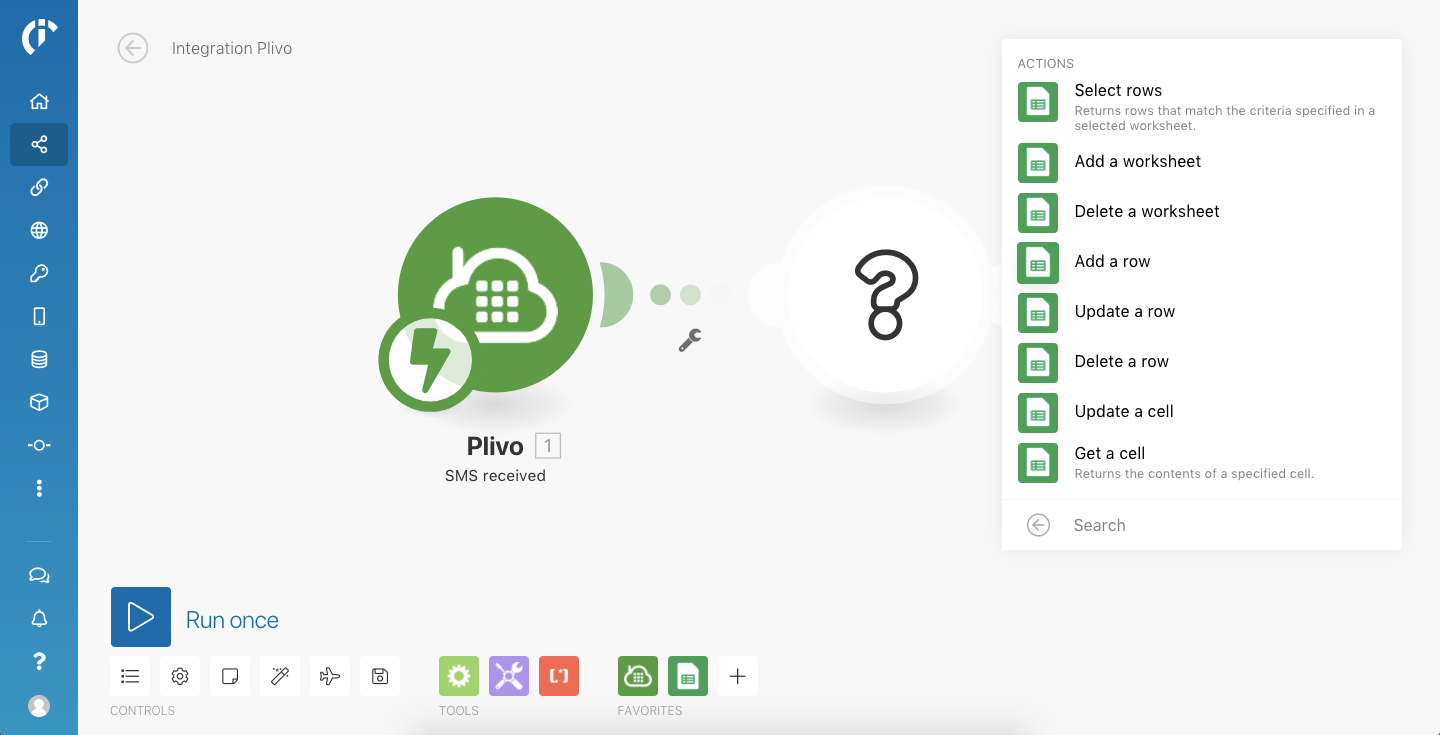 * Select the **Add a row** action. You’ll be asked to select a connection. You can choose an existing connection or create a new one by clicking **Add**. Once you click **Add** you’ll be taken to a Google login page or directly to the permissions page for you to give permission to access your spreadsheets.
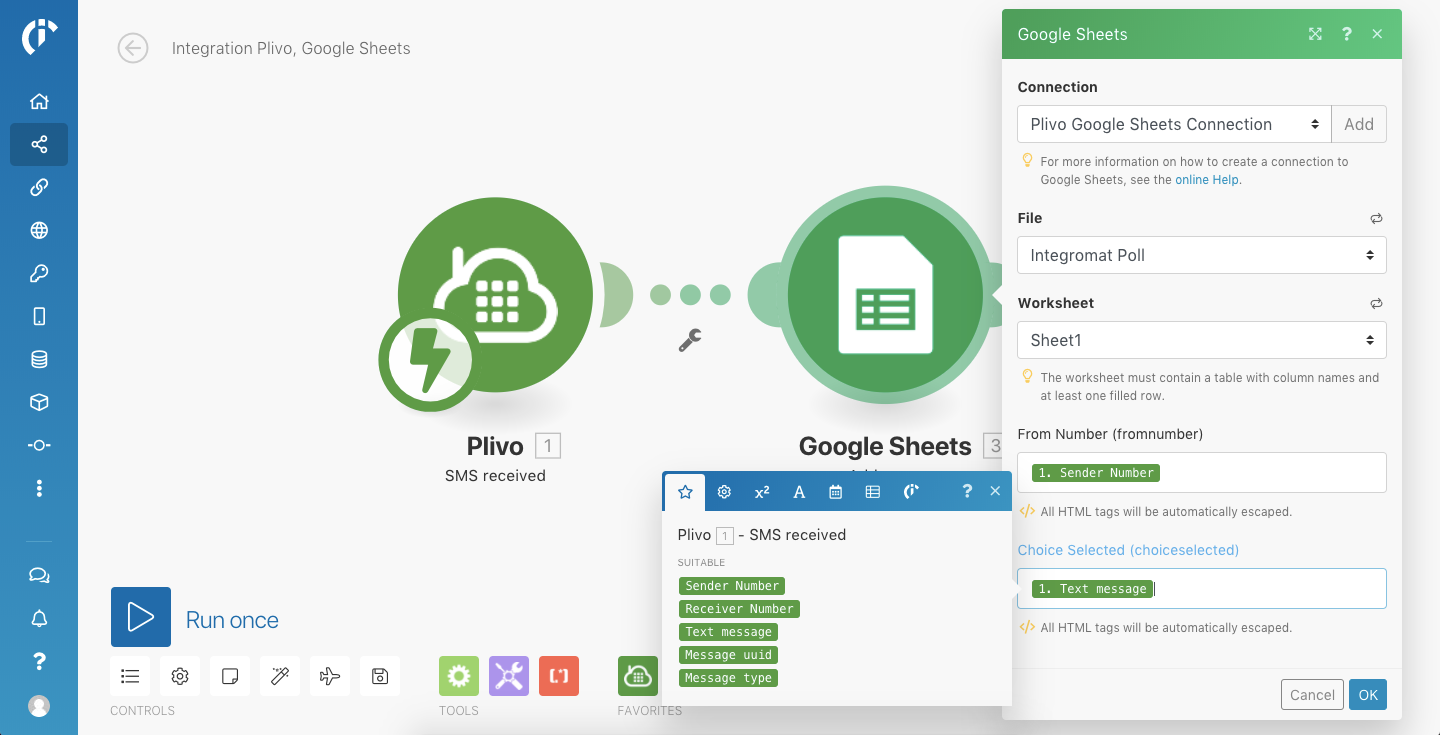
 * Once you log in and give the required permission, select the sheet you created earlier. Integromat will detect the column headers and give you an option to select which data needs to go to which column. Select the relevant data and click **OK**.
 * The scenario is now ready. Let’s test it.
## Step 3: Test the scenario
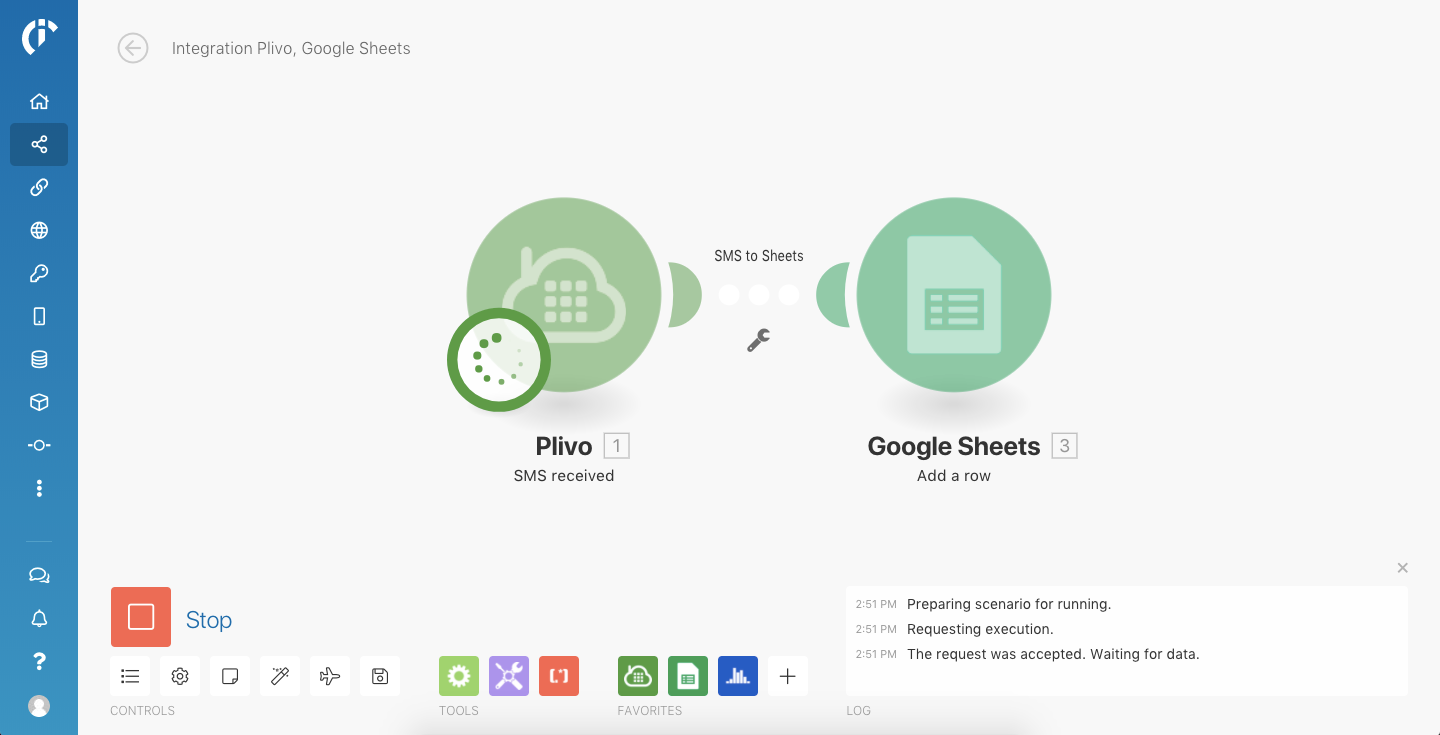
* To test this scenario, click on **Run once** to put the scenario into listening mode.
* Send a text message to the Plivo number you configured earlier. You can use your mobile phone to do this or use the Plivo Message API to send the message. We sent the text “Option A” to the Plivo number we configured.
* The scenario is now ready. Let’s test it.
## Step 3: Test the scenario
* To test this scenario, click on **Run once** to put the scenario into listening mode.
* Send a text message to the Plivo number you configured earlier. You can use your mobile phone to do this or use the Plivo Message API to send the message. We sent the text “Option A” to the Plivo number we configured.
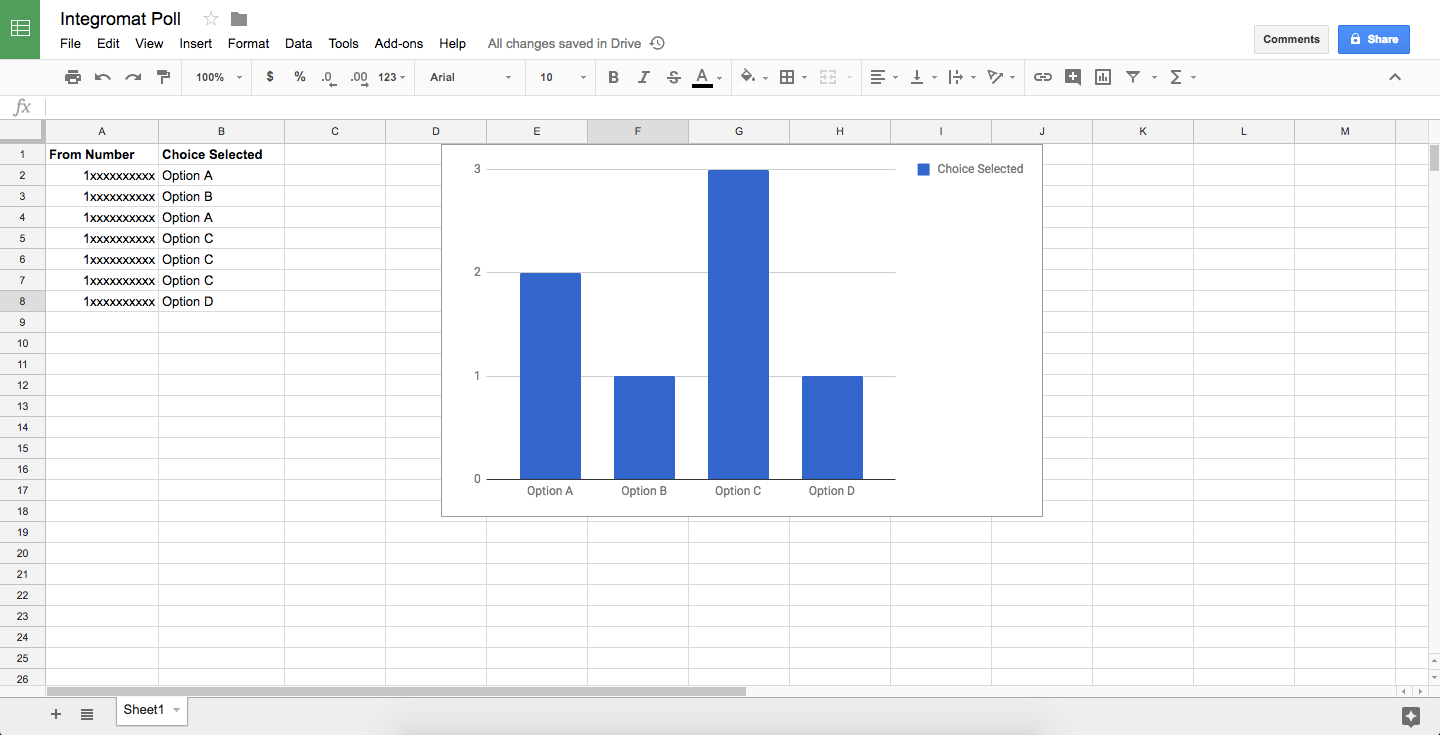
 * To check whether the scenario ran successfully, open the spreadsheet you created earlier. You should see a new row added, like this:
 * It’s great that the scenario works, but it’s kind of boring to just see a huge table with results. We can add a nice chart.
## Step 4: Create a chart in Google Sheets
* Select all of Column B, then go to Insert > Chart:
* It’s great that the scenario works, but it’s kind of boring to just see a huge table with results. We can add a nice chart.
## Step 4: Create a chart in Google Sheets
* Select all of Column B, then go to Insert > Chart:
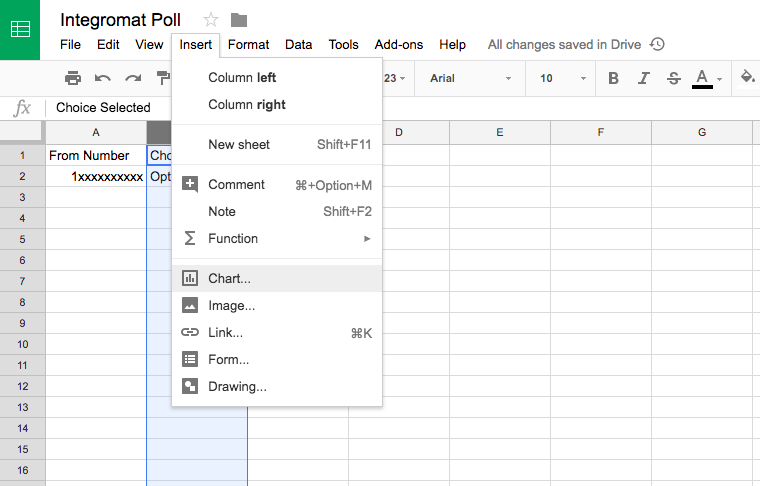 * This should draw a chart that says “No Data.” Select “Use row 1 as headers” and “Aggregate column B.” You should then see a column chart:
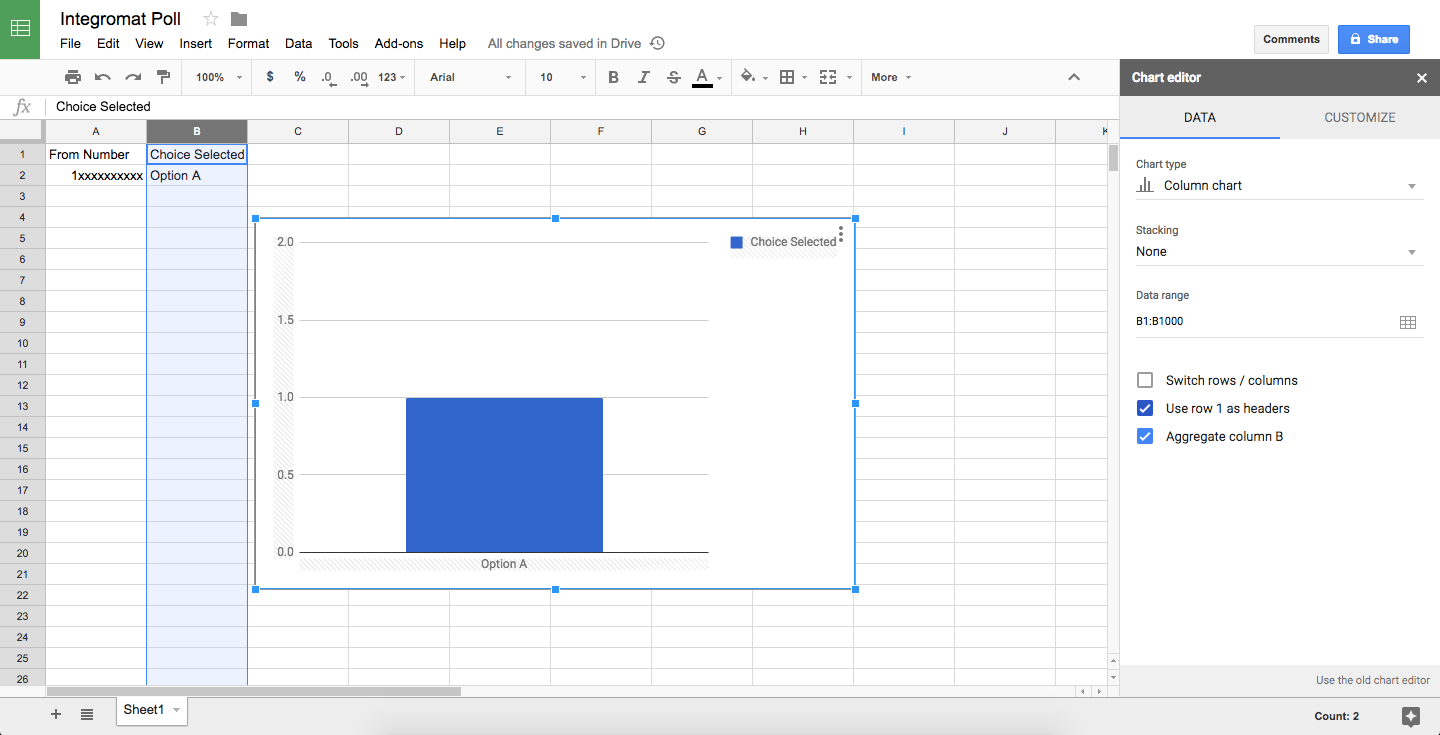 * You can make the first row **bold** so the table looks better.
## Step 5: Go live
* To make the scenario live, click on the back button near “Integration Plivo, Google Sheets” on the top left. Save the scenario if you’re prompted to do so.
* In the scenario summary screen, you can see the overview of the scenario you just created and the run history.
* You can make the first row **bold** so the table looks better.
## Step 5: Go live
* To make the scenario live, click on the back button near “Integration Plivo, Google Sheets” on the top left. Save the scenario if you’re prompted to do so.
* In the scenario summary screen, you can see the overview of the scenario you just created and the run history.
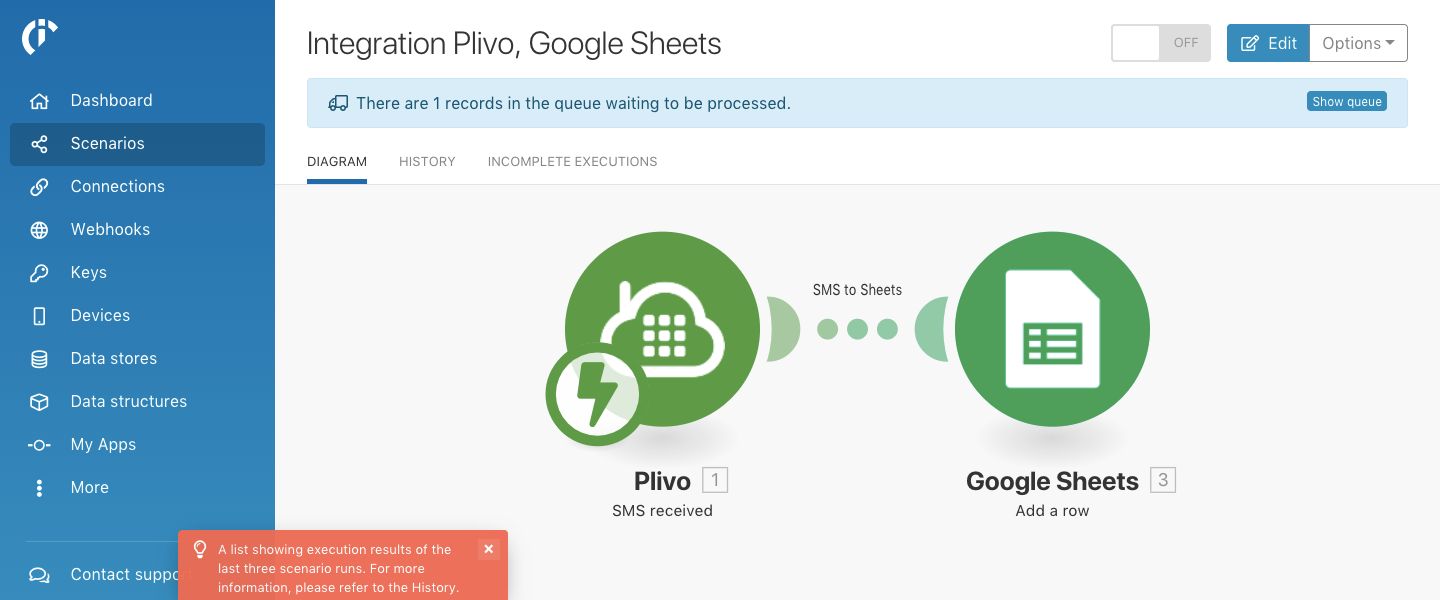 * Use the toggle button on the top right to turn the scenario “ON” (also known as activating the scenario).
* Select “Immediately” from the drop-down displayed and click on **Activate**.
* Use the toggle button on the top right to turn the scenario “ON” (also known as activating the scenario).
* Select “Immediately” from the drop-down displayed and click on **Activate**.
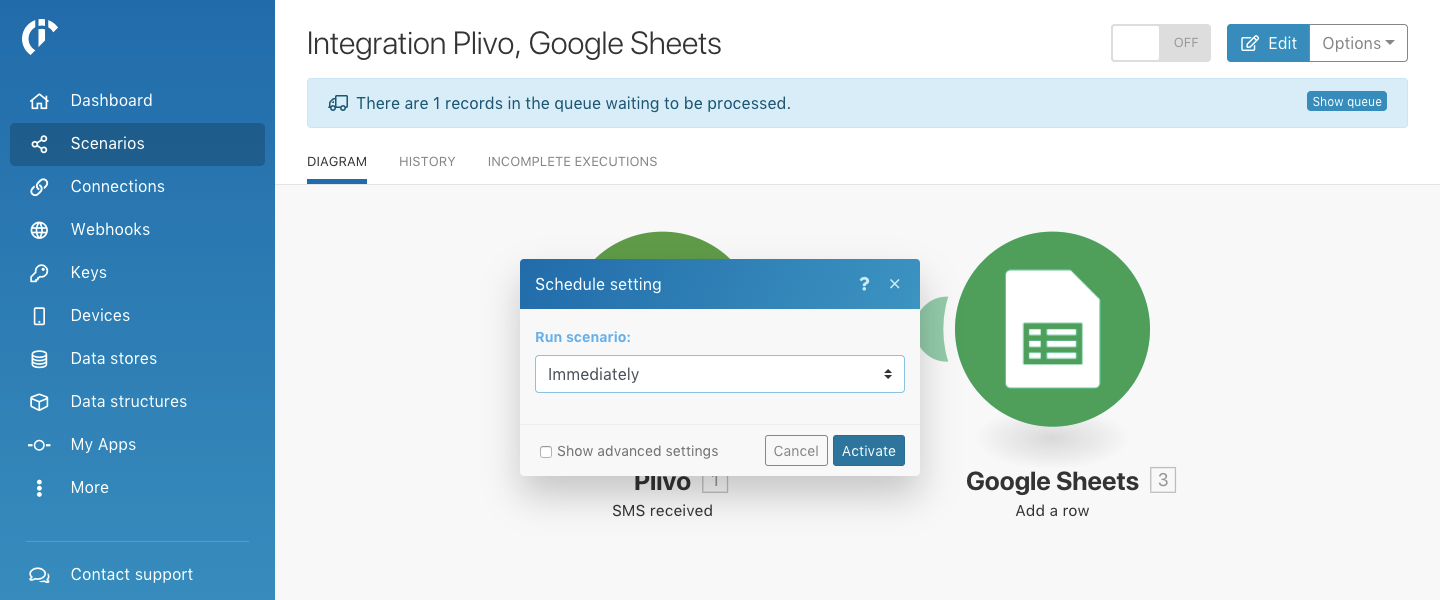 * And that’s a wrap! Your poll application is now live. Whenever someone sends a text message to the Plivo number that you configured with this scenario, a new row should be added and the chart should be updated.
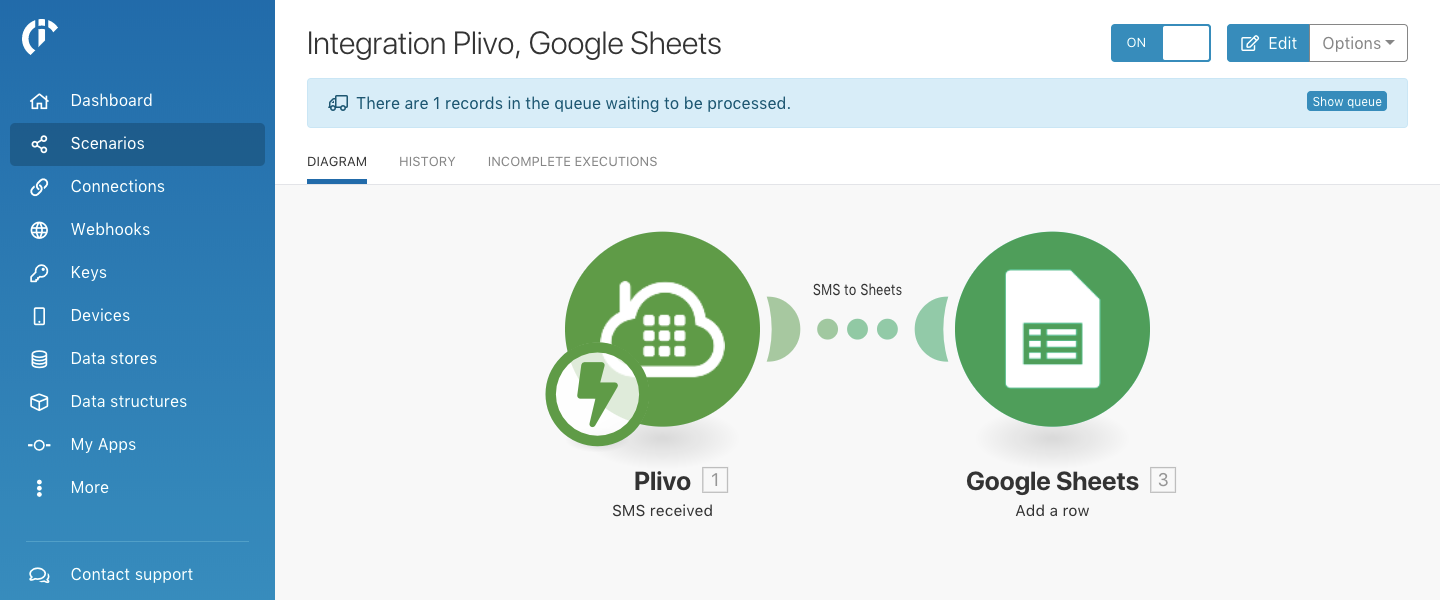 * Send out a few text messages to see the magic. This is how it looks when people start sending their opinions in.
 Congratulations — you just built a great application!