> ## Documentation Index
> Fetch the complete documentation index at: https://plivo.com/docs/llms.txt
> Use this file to discover all available pages before exploring further.
# Triggers
> Define how agent flows start — calls, messages, or API requests
A **Trigger Node** is the starting point of every Agent Flow. It determines *how* a workflow begins and *when* it should run. Every flow begins with exactly **one trigger**, and it must be the **first node** in the flow.
Triggers define not only the entry condition for your workflow (e.g., a call, a message, or an API request), but also the **published behavior** of your Agent—such as the required input, format, and runtime environment.
## Types of Triggers
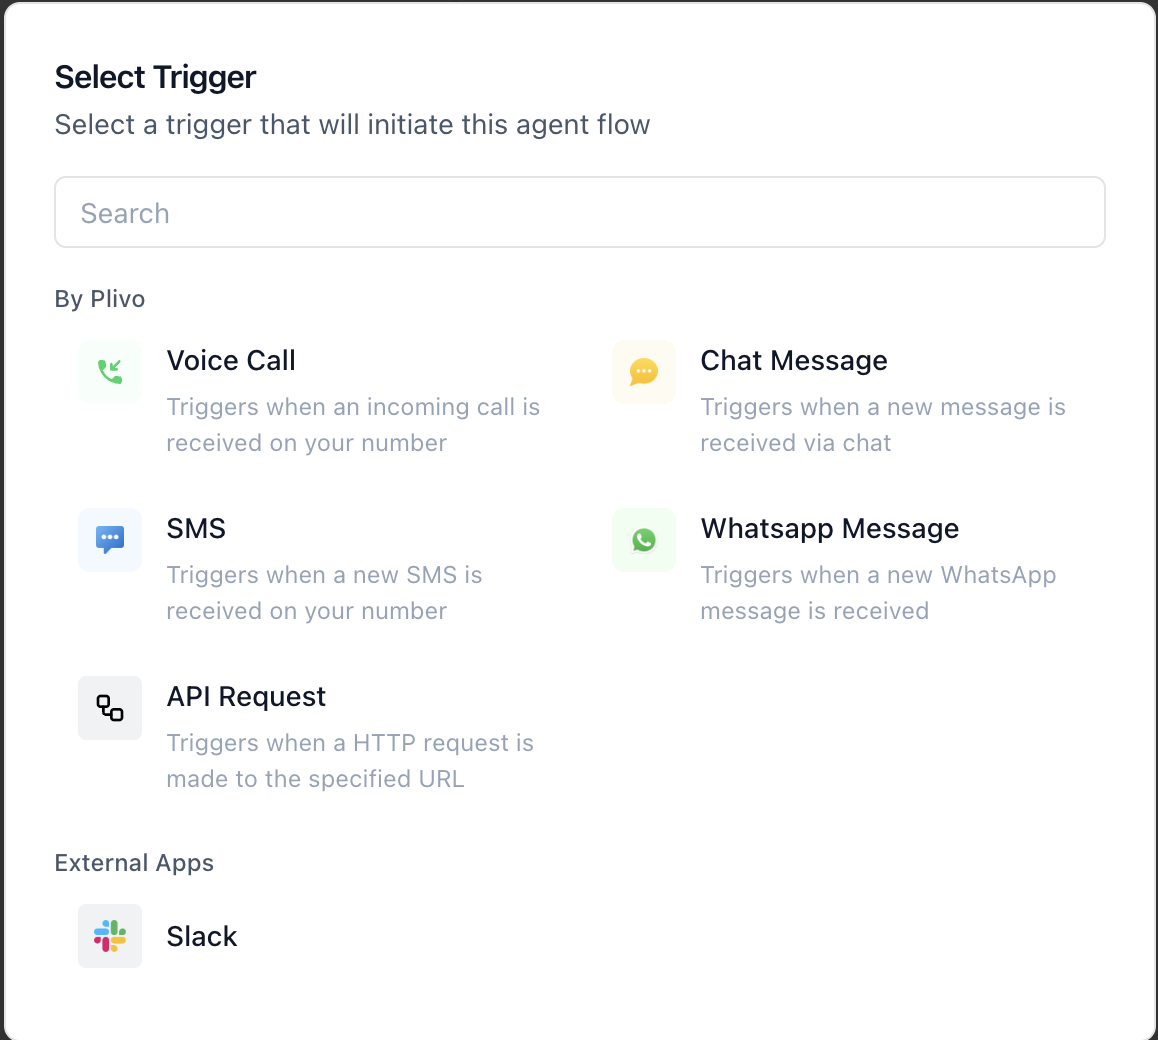 | **Trigger Type** | **Subtypes / Description** |
| :------------------------ | :----------------------------------------------------------------------------------------------------------------------------- |
| **Incoming Conversation** | - When a Call is Received - When a Chat Message is Received - When an SMS is Received - When a WhatsApp Message is Received |
| **API Request** | Triggered externally via an authenticated HTTP call with optional input parameters |
**Note:** The Start trigger placeholder is already present in every new flow. Click **“Select Trigger”** to open the drawer and choose a type.
## Configuring Trigger Types
### Incoming Call
* Choose **"When a Call is Received"** as your trigger.
* You’ll be able to configure a **Hangup Agent**—this is the fallback logic that runs if the user hangs up before the conversation completes.
### Incoming Chat Message
* Choose **"When a Chat Message is Received"**.
* You can configure **Quick Response Questions**—up to 5 preset, clickable suggestions to guide the user.
### Incoming SMS / WhatsApp Message
* These require **no additional configuration** after selection.
* Trigger activates when a new message is received on the selected channel.
Note: **Number Association:** Use the **Numbers** page in Settings to link your flow to a specific phone number.
### API Call Trigger
| **Trigger Type** | **Subtypes / Description** |
| :------------------------ | :----------------------------------------------------------------------------------------------------------------------------- |
| **Incoming Conversation** | - When a Call is Received - When a Chat Message is Received - When an SMS is Received - When a WhatsApp Message is Received |
| **API Request** | Triggered externally via an authenticated HTTP call with optional input parameters |
**Note:** The Start trigger placeholder is already present in every new flow. Click **“Select Trigger”** to open the drawer and choose a type.
## Configuring Trigger Types
### Incoming Call
* Choose **"When a Call is Received"** as your trigger.
* You’ll be able to configure a **Hangup Agent**—this is the fallback logic that runs if the user hangs up before the conversation completes.
### Incoming Chat Message
* Choose **"When a Chat Message is Received"**.
* You can configure **Quick Response Questions**—up to 5 preset, clickable suggestions to guide the user.
### Incoming SMS / WhatsApp Message
* These require **no additional configuration** after selection.
* Trigger activates when a new message is received on the selected channel.
Note: **Number Association:** Use the **Numbers** page in Settings to link your flow to a specific phone number.
### API Call Trigger
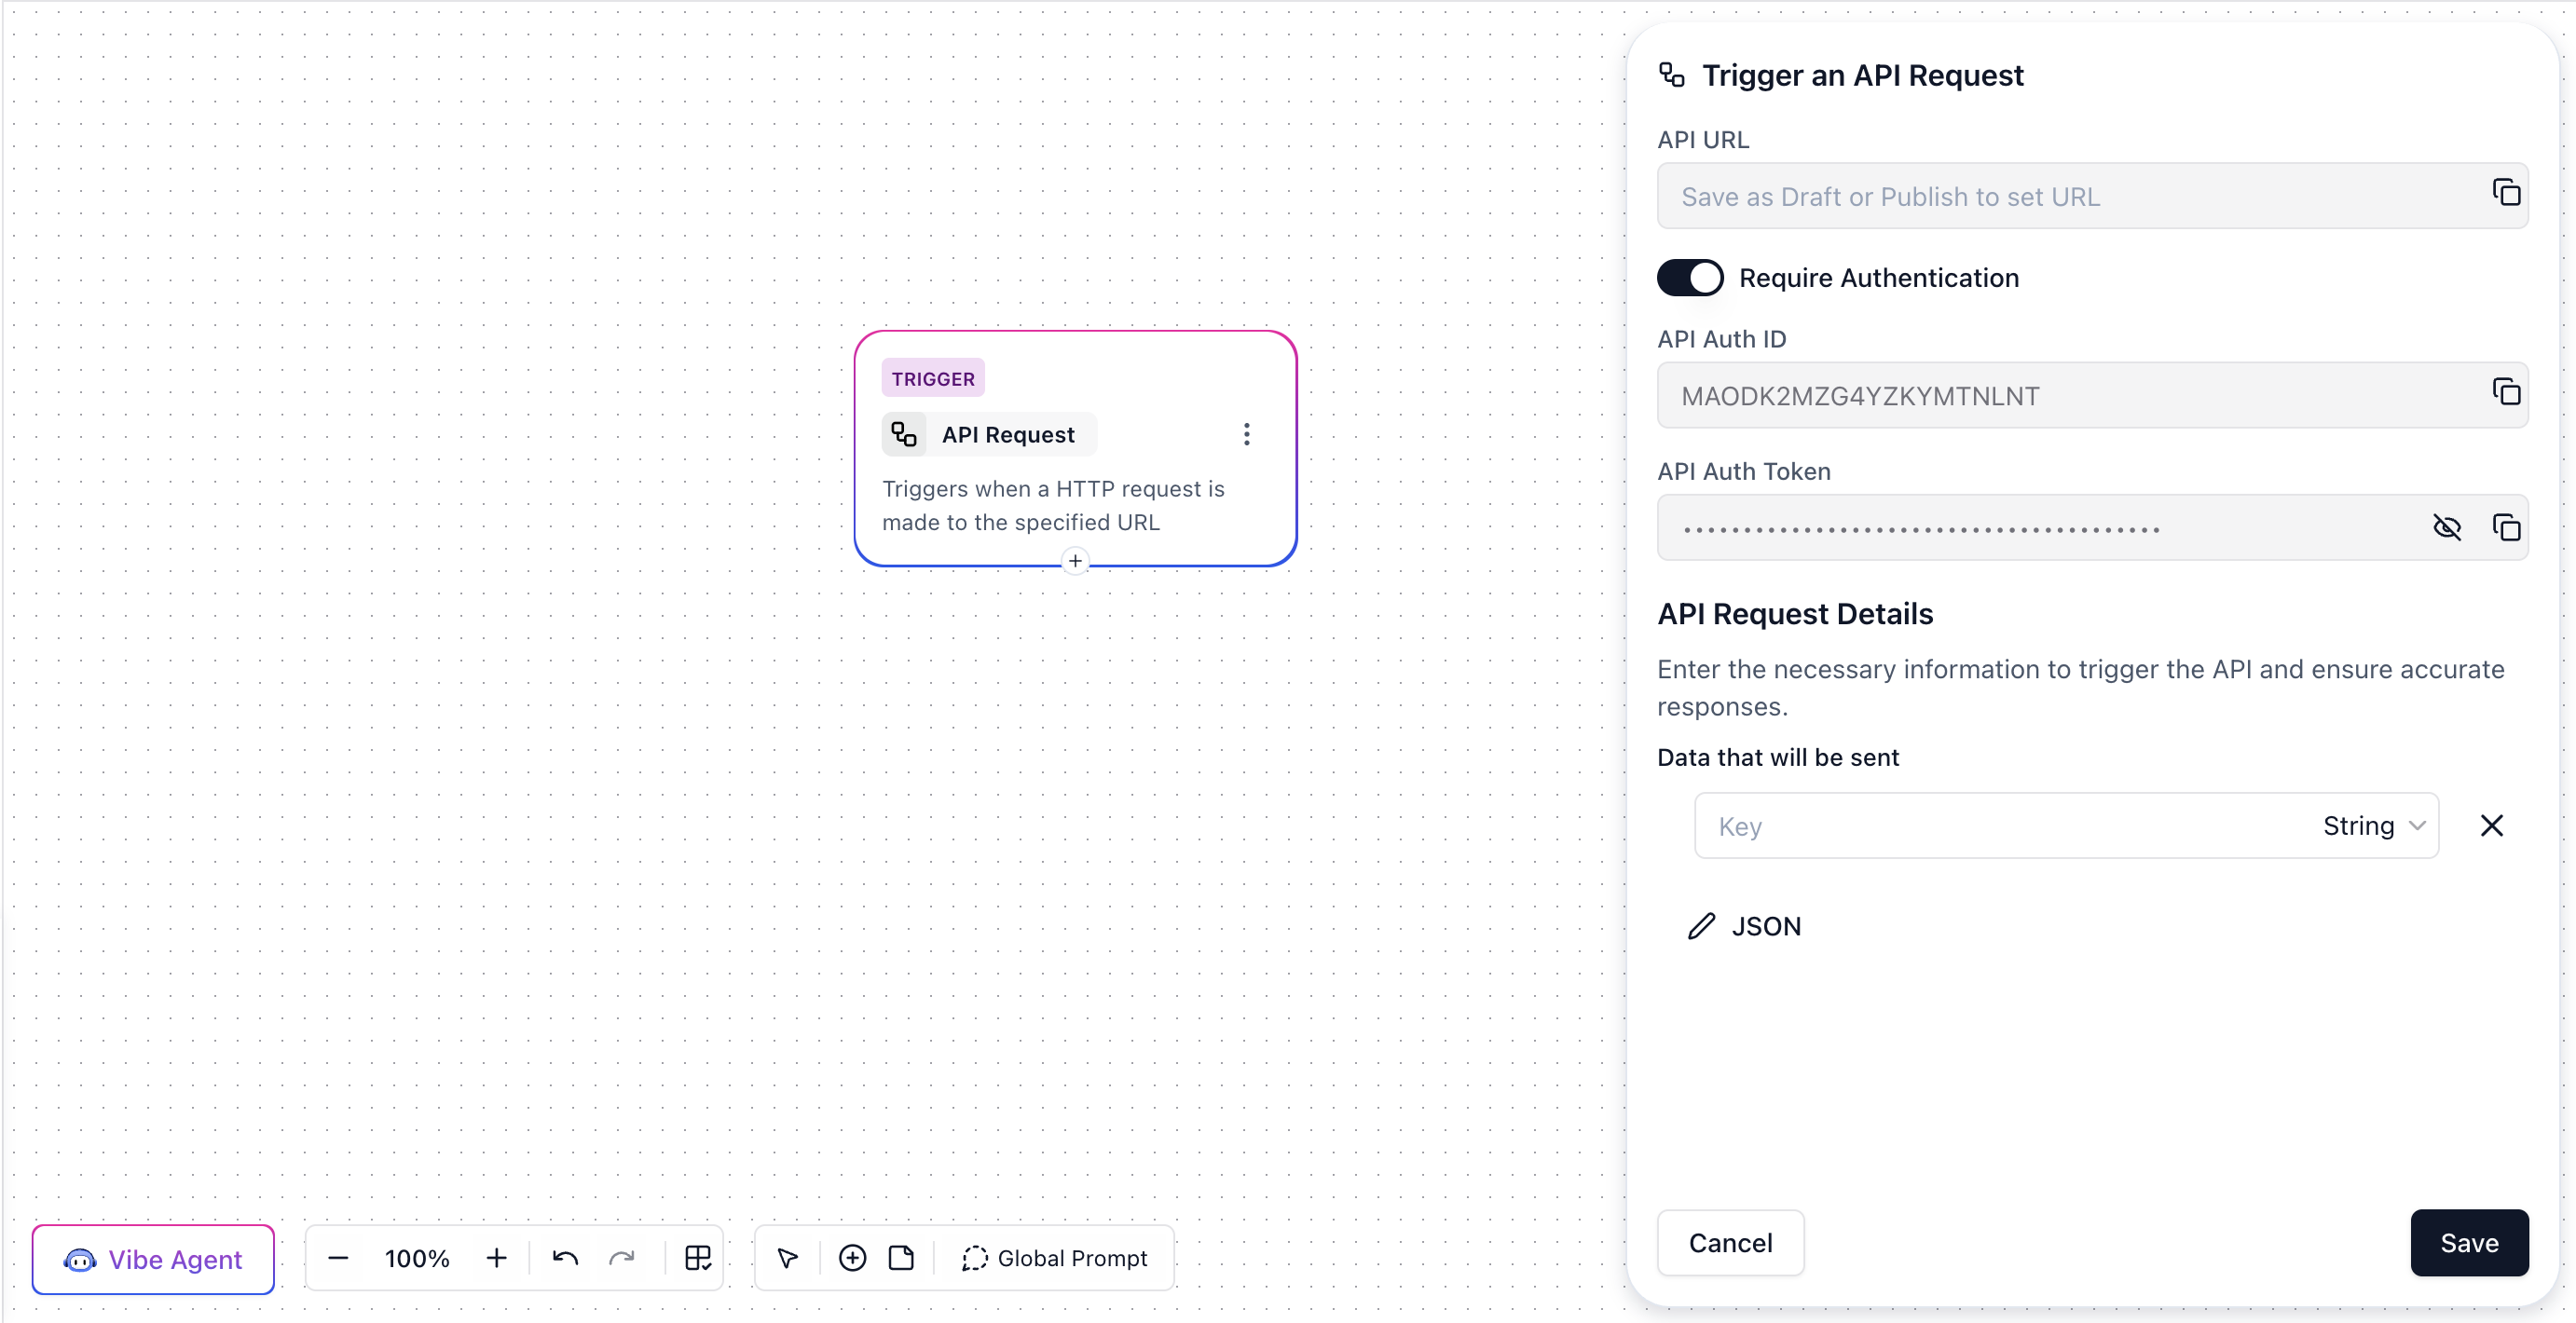 * When selected, you’ll receive:
* A **unique API endpoint URL**
* **Authentication settings** (Basic Auth enabled by default)
* A form to define **input variables**—key names and their expected data types, which can be used later in the flow.
* You can disable authentication (not recommended). We strongly advise **keeping the endpoint behind auth** for security.
## How to Switch a Trigger
You can change the starting point of your flow without rebuilding it:
1. Click the **options icon (⋮)** in the top-right corner of the trigger node.
2. Select **“Change Start Trigger.”**
3. Pick a new trigger type from the available options.
4. Configure your new trigger as needed.
**Note:** Switching triggers removes any configuration set on the previous trigger.
* When selected, you’ll receive:
* A **unique API endpoint URL**
* **Authentication settings** (Basic Auth enabled by default)
* A form to define **input variables**—key names and their expected data types, which can be used later in the flow.
* You can disable authentication (not recommended). We strongly advise **keeping the endpoint behind auth** for security.
## How to Switch a Trigger
You can change the starting point of your flow without rebuilding it:
1. Click the **options icon (⋮)** in the top-right corner of the trigger node.
2. Select **“Change Start Trigger.”**
3. Pick a new trigger type from the available options.
4. Configure your new trigger as needed.
**Note:** Switching triggers removes any configuration set on the previous trigger.